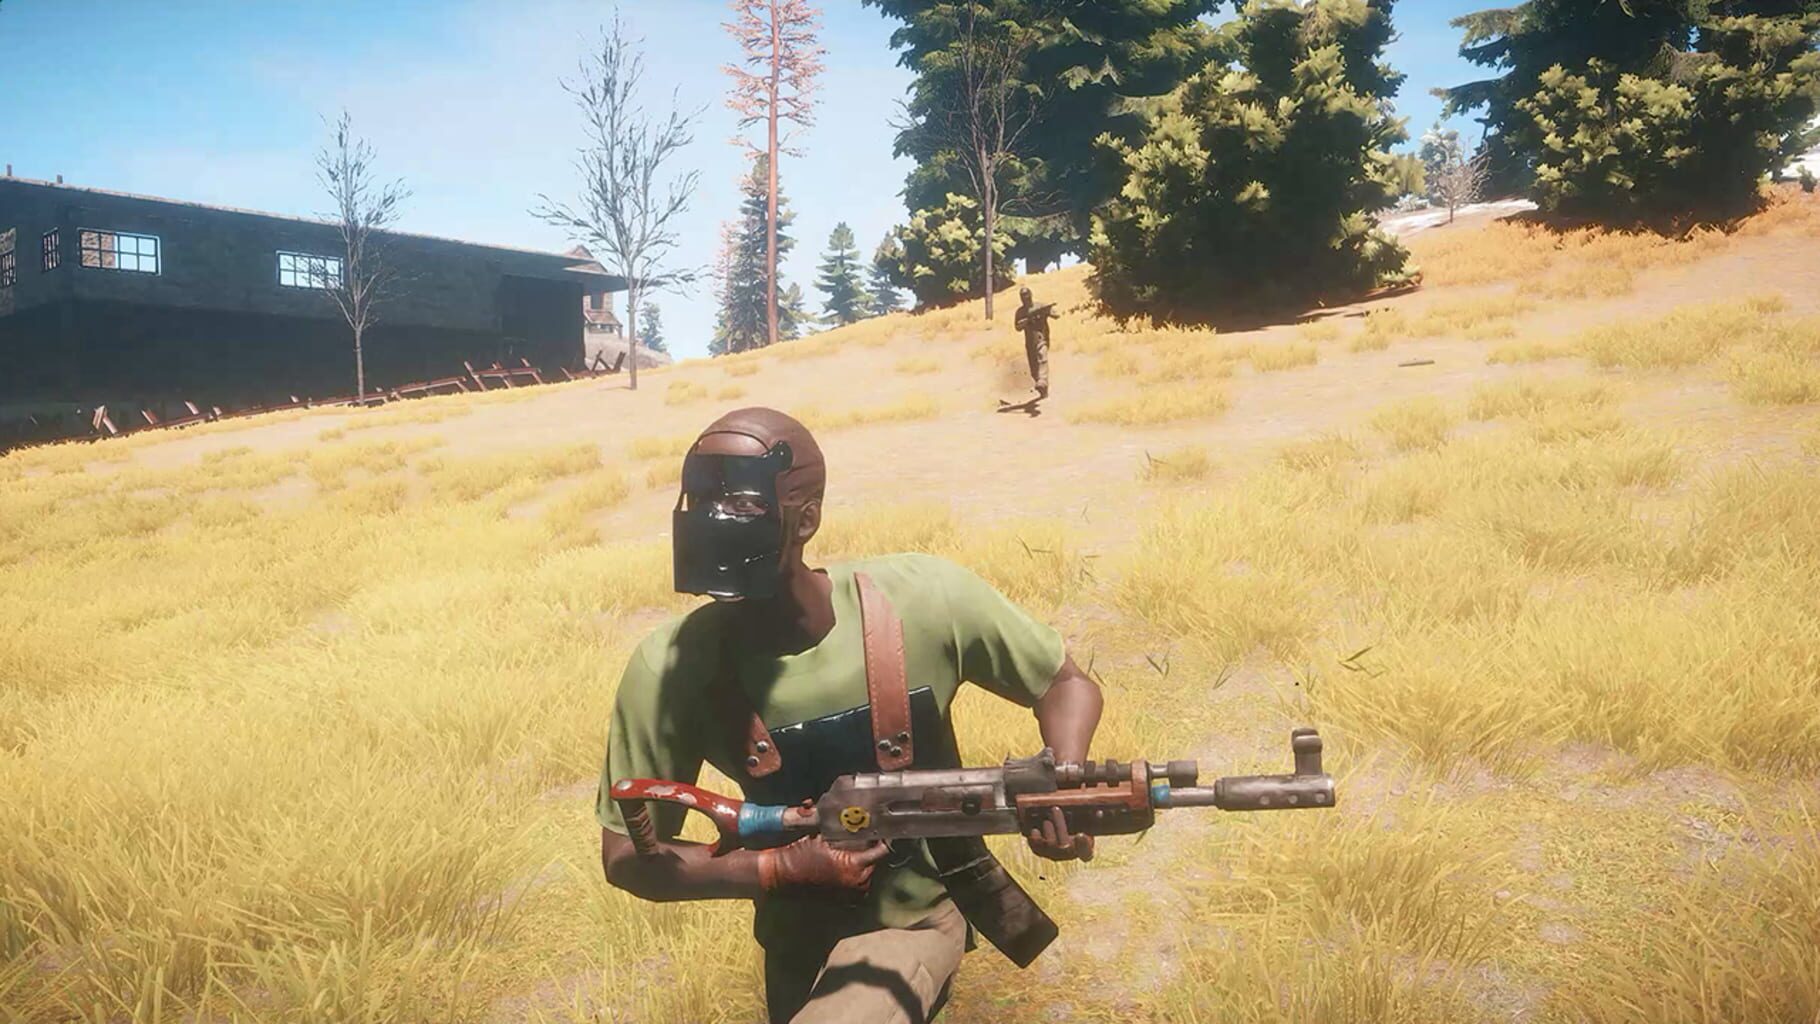
Rust Best PvP Loadouts by Wipe Stage
What to carry for PvP in Rust from wipe day rocks and spears up to full AK kits and C4, plus med, food, and roam versus defense setups.
Rust changes shape as the wipe goes on, and the kit that wins fights on day one gets you flattened by day four. What you carry has to match what everyone else is carrying, because a spear does not trade well against a Thompson. So here is a breakdown of what to run at each stage, what the guns actually do numbers-wise, and how to swap your setup depending on whether you are roaming or holding down your base.
Early Wipe Loadout on a Rock and Spear Budget
Wipe day is its own little game. Nobody has blueprints, nobody has guns, and most fights happen because two naked people wanted the same hemp fiber. Your job early is to get a weapon in hand fast and pick fights you can actually win.
The day-one weapon ladder
Start with a rock, but do not stay there long. Wood is everywhere, so a Wooden Spear (25 body damage) comes first. It is bad, but it beats rock. The real upgrade is the Stone Spear at 35 damage once you have stone and low grade... actually you just need wood, stone, and cloth for that one, and it one-taps most fresh-spawn nuisances in the head.
The Hunting Bow is the first real PvP tool, though. Wooden Arrows hit for 50 damage a body shot, which is nasty when the other guy has 100 HP and no armor. A headshot with a bow on an unarmored target is lethal. Grab a sheet of cloth, craft the bow, and carry maybe 10 to 15 arrows. More if you plan on hunting players near the beach.
The Eoka Pistol is the wildcard. It fires Handmade Shells for about 32 damage, and at point blank range it can delete a fresh spawn before they know what happened. The catch is that you have to strike it to spark, and it misfires a fair chunk of the time. It is unreliable, no question. But for what it costs, which is basically nothing, a loaded Eoka wins a lot of close-range coin flips early on. A Double Barrel Shotgun is the same idea but way better if you can loot one, since handmade shells out of a DB hit for around 180 on a good spread.
The Crossbow sits in a weird spot. It hits for 60, it is quiet, and the bolt drops less than people expect. Solos who want to snipe a boar-and-backpack guy without alerting the whole neighborhood like it. Reload is slow, so pair it with a spear or Eoka as a backup.
What to wear when you have nothing
Clothing matters more than people think, because even basic clothes give a little protection and, just as important, warmth and pockets. Here is the rough early armor ladder:
| Gear | What it is | |------|------------| | Bone armor set | Cheap, from bones and cloth. Some protection, looks scary. | | Hide/leather bits | Better than nothing, easy to craft | | Roadsign Kilt + Roadsign Jacket | The first "real" mid armor, if you find the road signs | | Coffee Can Helmet | Early head protection, looted or crafted cheap |
Do not blow all your cloth on a full bone set the second you spawn. A bow and arrows is worth more than 5 percent damage reduction. Balance it out. A chest piece and helmet cover the spots people actually aim at, so if cloth is tight, armor those two zones first and skip the boots and gloves.
How early fights actually go
Early PvP is ambush PvP. Nobody has the ammo to spray, so fights are short and positioning decides them. Hide behind a tree, let the other player walk past, then shoot them in the back. That is like 80 percent of wipe day kills.
Pick your targets too. A guy with a rock and no pants is not worth an arrow. A guy with a hatchet and a full inventory is. And if you get into a bow duel, remember that crouch-spamming and juking behind cover while you redraw beats standing still and trading shots every time. People panic when you rush with a spear after they miss a bow shot. Use that.
Mid Wipe Loadout With Semi-Auto Rifles
Once your base has a Workbench Level 2 and you have been hitting recyclers, guns show up. The mid-wipe meta is centered on cheap automatics and the Semi-Automatic Rifle, and this is where loadouts start to actually matter.
The mid-tier gun lineup
Numbers here come from the current damage charts, so you can compare apples to apples. Body damage and fire rate:
| Weapon | Body damage | Fire rate (RPM) | Ammo | |--------|------------|-----------------|------| | Semi-Automatic Rifle (SAR) | 40 | 343 | 5.56 | | SKS | 42.5 | 400 | 5.56 | | Thompson | 30 | 462 | Pistol | | Custom SMG | 30 | 600 | Pistol | | MP5A4 | 33 | 600 | Pistol | | Python Revolver | 60 | 300 | Pistol | | M92 Pistol | 45 | semi | Pistol |
The SAR is the workhorse. Forty damage a shot means three body shots kills an unarmored player, and it stays useful at range way past its price point. It is cheap to craft once you have the blueprint, ammo is affordable, and the recoil is honest. For a solo or a small group that cannot fund AKs yet, the SAR is pretty much the answer. One or two SARs plus a stack of 5.56 and you can contest any monument on the map.
The SKS is the SAR's punchier cousin. Slightly more damage per shot at 42.5, faster follow-ups than you'd think at 400 RPM, and it is loot-only, so you see it a lot in the hands of players who just left a military crate. People sleep on it.
On the SMG side, the Thompson is the classic budget sprayer. Thirty damage a bullet sounds weak next to a SAR, but 462 RPM means it melts people inside 20 meters. It eats pistol ammo, which is cheap, so it is a great "always have one" gun for recycler runs and base defense. The Custom SMG trades a bit of handling for a faster fire rate, and the MP5 is the premium option at 600 RPM with 33 damage. If you loot an MP5, run it. Just do not craft MP5s when Thommys exist.
The Python is worth a mention because 60 damage a body shot is bolt-action territory. Six shots, loud as sin, and it fits in a hotbar next to your primary. A lot of players run Python as their "oh no" swap when someone pushes them while they reload.
A realistic mid-wipe kit
Here is what a decent roam loadout looks like a couple days in:
- Primary: SAR with 60+ 5.56 ammo
- Sidearm: Revolver or Python, 20-ish pistol ammo
- Armor: Roadsign Kilt and Jacket, Coffee Can Helmet if you have one
- Meds: 2-3 syringes, a few bandages
- Utility: 1-2 grenades if you can spare them, plus a building plan and hammer for emergencies
That kit costs a fraction of an AK kit and wins most mid-wipe fights anyway, because the person you are shooting at probably has the same gear. The skill floor is in the recoil control. Practice the SAR spray at a shooting range or against a wall of your own base. It kicks up and to the right, so pull down-left as you hold the trigger.
One more mid-wipe tip: carry a bow even after you get guns. Quiet kills still matter. Shooting a guy in the head with an arrow next to his base does not tell his teammates where you are, and a gunshot does.
Late Wipe Loadout With Full Kit and Explosives
By the back half of the wipe, sulfur is flowing, Workbench Level 3 is up, and fights are decided by who brought more 5.56 and who has C4 for the door after the fight. Late-wipe loadouts are expensive, so the goal is efficiency: spend sulfur where it wins raids, and do not walk around in a kit you cannot afford to lose twice.
The AK and friends
The Assault Rifle is still the king. Fifty damage per body shot, 450 RPM, 30-round mag. It has the best mix of per-shot damage, range, and accuracy in the game, and that is why everyone wants one. The recoil pattern is hard, no denying it. It climbs steeply and swings right, and learning it takes real range time. But once it clicks, the AK out-guns everything inside 100 meters.
The LR-300 is the easier alternative. Same ammo, same 30-round mag, 45 damage a shot at 500 RPM. The difference is recoil: the LR kicks way less and is much friendlier to mid-tier aim. The trade-off is higher bullet spread at distance, so it is a monster in close and mid range and a bit sloppy at long range. It is also loot-only rather than craftable by default, and you can buy one at Bandit Camp for around 500 scrap if you have more scrap than patience. Plenty of strong players take the LR for sustained spray fights and save the AK for burst work. That is a fair way to split it.
The Bolt Action Rifle is the third pillar. Eighty damage a body shot means two shots put down anyone without heavy armor, and one headshot ends most conversations. It has no place in a run-and-gun kit, but for a roamer with a spotter, or a player holding a rooftop, the bolt is terrifying. Pair it with an MP5 or shotgun for the inevitable close-range push after you tag someone.
A sensible late-wipe primary setup is AK plus MP5, or LR-300 plus bolt if you are playing a slower, pick-heavy style. Carry 120-plus rifle ammo minimum. Fights at this stage drag out, and running dry mid-push is how full kits change owners.
Armor at the top end
Full metal is the late-wipe default: Metal Facemask, Metal Chestplate, and the leg slot filled out. It tanks rifle rounds hard, and against auto turrets it is the difference between tanking a burst and getting shredded. The downsides are real though. You are loud when you move, and you are slower. A lot of players compromise with the roadsign combo (Coffee Can Helmet, Roadsign Jacket and Kilt) for roaming because it keeps more speed while still eating a couple bullets, then save the full metal kit for raid defense and offline protection.
Match the armor to the threat, in other words. Full metal for holding a base during a raid. Roadsign for monument runs where you might have to run away. Naked with a bow for that one beach gamble we all take sometimes.
Explosives and what they cost
Late-wipe PvP and raiding blur together, so you need to know your boom budget. These are the current structure HP and cheapest raid costs:
| Structure | HP | Cheapest method | Sulfur cost | |-----------|-----|-----------------|-------------| | Stone wall | 500 | 2x C4 | 4,400 | | Sheet metal wall | 1000 | 4x C4 | 8,800 | | Armored wall | 2000 | 8x C4 | 17,600 | | Sheet metal door | 250 | 63x explosive ammo | 1,575 | | Garage door | 600 | 150x explosive ammo | 3,750 | | Armored door | 1000 | 250x explosive ammo | 6,250 | | Tool cupboard | 100 | 10x explosive ammo | 250 |
Read that table again, because it drives every raid decision you will make. Doors are almost always the cheap way in. A sheet metal door costs about a fifth of what the wall next to it costs. Garage doors look tanky but explosive ammo chews through them for 3,750 sulfur, which is why so many groups run straight at garages. Armored walls quadruple the cost compared to sheet metal, which is exactly why defenders wrap their loot rooms in them.
For the loadout itself, a standard raid kit looks like 4-8 C4 or a stack of rockets, an AK or two for the counter-fight, full metal armor, double the meds you think you need, and F1 grenades for soft targets and turrets. Rockets run about 1,400 sulfur each, so a 10-rocket online raid is a serious farm commitment. Plan the raid before you farm for it. Count the doors, pick the entry, then get the boom. Nothing hurts worse than blowing your sulfur on a wall that leads into someone's empty furnace room.
Medical Supplies and Food to Always Carry
Meds win extended fights. Full stop. You can have the aim of a pro and still lose to a guy with average aim who brought four syringes, because he resets his health bar mid-fight and you cannot.
The med kit, ranked
- Medical Syringes are the combat heal. One syringe gives 15 HP on use plus 20 HP over 4 seconds. They cost 15 cloth, 10 metal frags, and 10 low grade fuel to craft at a Workbench Level 2, and research runs 30 scrap. Carry 3-5 for a real roam. Left-click heals you, right-click heals a teammate, which matters more than people expect in team fights.
- Bandages stop bleeding and give a small heal. Cheap, stack them deep. Bleed damage ticks away your HP in any extended scrap, and a bandage mid-cover resets that. Twenty cloth each, so there is no excuse.
- Large Medkits are the big heal craft. They are made from syringes plus extra materials and are your "I just got rocketed off my own roof" button. Keep a couple in the base at minimum.
- Anti-radiation pills are situational but grab them for Launch Site or tunnel runs. Popping pills mid-monument beats drinking from a random puddle later.
A good habit: hotbar one syringe and keep the rest in your main inventory, not your backpack. When you take a bad trade and duck behind cover, you want that heal one keypress away, not buried under a slot swap.
Food and why it decides more fights than you'd think
Health regen in Rust runs off your calories. If you are starving, you do not passively heal, full stop. That means your food bar is secretly your health bar between fights.
Cooked meat is the baseline. Bear and wolf meat cooked on a campfire or BBQ gives solid calories and protein, which is the food group that feeds health regeneration. Corn and mushrooms keep hunger handled in a pinch. Chocolate bars and pickles looted from crates are fine top-ups.
What you actually want, though, is the good stuff. Cooked meals from a mixing table, like the ones combining meat with vegetables, give bigger calorie counts plus bonus effects. And coffee deserves a special shout: it speeds you up, which is a genuine edge when you are pushing a base or running down a wounded player. A lot of PvP players brew coffee before an online raid and honestly it feels like cheating.
Carry maybe 5-10 decent food items on a roam, and keep your base stocked for when you get home at half health. Eat to full before you leave, not after you get hurt. Regen works while you walk, so a full belly on the road means you arrive at the fight already healing the last one.
Swapping Loadouts for Roam Versus Base Defense
The biggest loadout mistake is treating one kit as universal. It isn't. Roaming and defending want opposite things, and swapping between them is free if you set it up right.
The roam kit
Roaming means you are moving, you choose when to fight, and you might have to leave. So the kit wants mobility and sustain:
- Primary: AK or LR-300, 120+ ammo. Bolt if you are playing slow picks with a team.
- Armor: Roadsign combo rather than full metal. You keep move speed, and if you get jumped by three guys, being able to run matters more than tanking two extra bullets.
- Meds: 3-5 syringes, bandages, food.
- Utility: one smoke to break line of sight when a fight goes bad, a building plan to throw up emergency cover, and a sleeping bag if you are going deep into enemy territory.
The rule of thumb for roaming: never carry more than you can afford to drop. Everyone dies to a bolt from a bush eventually. Roam with enough gun to win, not with your whole base on your back. A lot of experienced players roam in "disposable" mid kits, a SAR with roadsign for example, specifically so a bad death does not cost them the wipe.
The defense kit
Base defense flips the priorities. You are not going anywhere, the fight comes to you, and you have armor plates and turrets behind you.
- Primary: AK for the main fight, plus a shotgun (pump or DB) for when they come up the stairs. Shotguns inside a base are filthy.
- Armor: full metal. The speed penalty does not matter when you are standing on your roof, and the damage reduction matters a lot when you're the only thing between the raiders and the loot room.
- Meds: everything you own, basically. Keep a large box of syringes and medkits next to your shooting position.
- Utility: F1 grenades to drop on people crouching at your doors, beancans for cheap chip damage, and pre-placed shotgun traps and turrets to cover your dead angles.
- Explosives: keep some boom inside the base for counter-raiding, but never all of it. If they get your TC and your storage in one push, that's the wipe.
Positioning beats gear here. Fight from behind embrasures and window bars, force them to push a choke, and shoot the guy who has to walk through a door rather than the guy hiding behind a rock outside. Rotate through your base instead of holding the same peek. A defender with an MP5 who keeps moving causes more trouble than a stationary AK player every time.
Setting up the swap
Make the swap fast by keeping labeled boxes by the front door: one for roam kits, one for defense kits, one for meds and food. Before you log off, top up the defense box. Before you leave, build the roam kit from the box rather than from memory. The 60 seconds of prep saves you the classic fumble where the raid shows up and you are still crafting a chestplate with your face in a workbench.
And keep a wipe-day backup kit somewhere hidden. A box with a bow, arrows, a spear, a few bandages, and a sleeping bag stash means one bad death sends you back 20 minutes, not back to the beach. That little insurance kit has saved more wipes than any gun in the game.