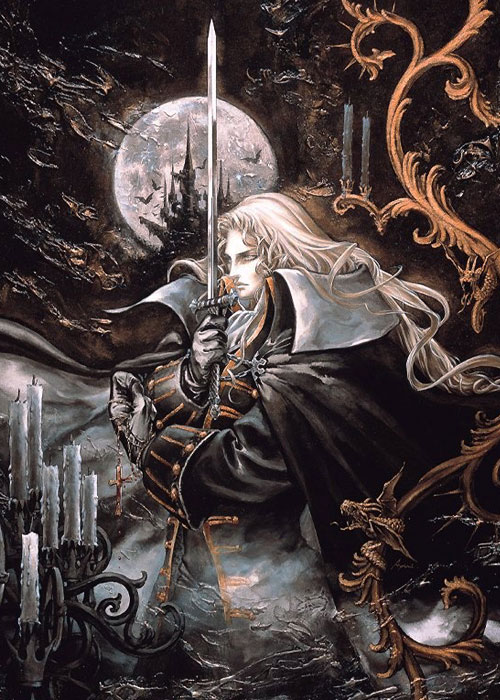
Castlevania: Symphony of the Night Inverted Castle Walkthrough and Access Guide
How to earn the Holy Glasses, free Richter without killing him, and clear the upside-down second castle, including all five Vlad relic bosses.
You beat Richter at the top of the keep, the credits roll, and the game pats you on the head. That's the fake ending. Symphony of the Night's real second half only opens if you rescue Richter instead of finishing him, and pulling that off takes a hidden pair of glasses, two rings, and a suit of armor that eats spikes. Manage it and the whole castle flips upside down - a second map with 948 more rooms, meaner monsters, and the true final boss waiting at the end. Here's the entire road, step by step.
Requirements to Flip the Castle
The flip itself has nothing to do with your level or your map percentage. It's one item plus one rule: wear the Holy Glasses when the Richter fight starts, and break the orb instead of the Belmont. That's genuinely the whole trigger.
The glasses come from Maria, and she's not standing somewhere easy to find. Getting to her is a chain, and every link needs the one before it:
- Form of Mist - Colosseum, handed over after the Minotaur and Werewolf tag-team fight
- Soul of Bat - Long Library, in the back rooms past the Lesser Demon, mist gets you in
- Echo of Bat - Olrox's Quarters, dropped by Olrox himself when you put him down
- Spike Breaker - Catacombs, in a pitch-black room where bat sonar is the only light source
- Silver Ring - Royal Chapel, at the end of a spike-filled corridor that the Spike Breaker smashes through
- Gold Ring - Underground Caverns, taken from the Succubus after her nightmare fight
- Holy Glasses - from Maria, in the Castle Center underneath the Marble Gallery's clock room
What else to grab on the way
A few pickups aren't strict requirements but make the whole back half smoother. The Leap Stone (double jump) sits in the Castle Keep, along with the Power of Mist, which lets mist form last as long as your MP does. The Gravity Boots hide in the Marble Gallery - that's the high jump, done with down, up, plus jump for 4 MP a pop, and it chains in midair once you've spent your double jump. The second castle is basically built assuming you have all of these, and climbing it without the boots gets old fast.
Also worth 500 gold at some point: the Jewel of Open from the Master Librarian. Plenty of blue doors around the castle stay shut without it.
The numbers behind the flip
For context on just how much game was hiding: the first castle counts 942 rooms on the map counter, good for roughly 99% on its own. The Reverse Castle adds another 948 rooms. Together that's 1,890 rooms and a 200.6% maximum without glitches - so if the credits just played at 90-something percent, now you know what you were missing. (The Saturn port adds extra areas and pushes the ceiling to 211.2%.)
One version note
On the PlayStation original, Maria hands the glasses over after a short scene. In the Saturn version and the PSP's Dracula X Chronicles port, she makes you beat her in a fight first. Same location either way.
Reaching the Holy Glasses
The Silver Ring: break the spikes first
The ring sits in the Royal Chapel, in a corridor whose floor and ceiling are both lined with spikes. You can't bat-form over the mess (a door blocks that route) and you can't tank it on HP. The answer is the Spike Breaker, a chest piece with zero other perks - its entire job is shattering spikes on contact. Wear it into that corridor and the spikes crumble as they hit you instead of the other way around, then a short mist through the crumbled gate puts the Silver Ring in your pocket.
The armor itself is deep in the Catacombs, in a room with no light at all. Go in as a bat and use the Echo of Bat's sonar pulse as a flashlight, pinging your way toward the pickup. Don't skip this one - short of glitching through walls, there's no good ending without the Spike Breaker, since it's the only thing that gets you that ring.
The Gold Ring: the purple coffin
Every save point in the game is a coffin, and one of them in the Underground Caverns is colored differently - purple, where all the rest look the same. Rest in that one and the game drags Alucard into a nightmare where the Succubus wears the face of his mother Lisa. The act doesn't last. She drops the disguise soon enough, and then it's a straight fight. Win and the Gold Ring is yours.
Reaching her corner of the Caverns is mostly a bat-form climb up the tall shafts on the right side of the map, so don't bother heading down before you have the Soul of Bat.
Both rings, then the clock
The rings explain themselves, sort of. The Gold Ring's inscription reads "Wear...Clock..." and the Silver Ring's reads "...in...Tower" - squinted at together, "wear in clock tower," which is a mistranslation that sends players marching off to the actual Clock Tower area for nothing. The PSP version fixed the text to "...in...Room." What the rings really want is the big grandfather clock room in the middle of the Marble Gallery.
Walk into that clock room with both rings equipped at once and the floor opens into an elevator ride down to the Castle Center. Maria's waiting down there. On the PS1 she gives you the Holy Glasses after a brief chat - and they're honestly decent gear, INT +6 and DEF +1, the best numbers of any glasses in the game. You're wearing them for the orb, though, not the stats.
Navigating Inverted Room Layouts
First thing to get straight: your gravity never changes. The castle itself is upside down, spun a full 180 degrees, and you walk on its floors like always. Every room is the old room flipped, so the map you memorized still works - you just read it rotated. Shafts you used to drop down are now walls you climb. That Outer Wall elevator you rode a dozen times? Dead, along with its switch, so that shaft becomes a long bat-form flap upward. The telescope in the Outer Wall and the confessional in the Chapel are gone or unusable too.
The area names all change, which is half the disorientation right there:
| First castle | Upside-down version | | --- | --- | | Castle Entrance | Reverse Entrance | | Alchemy Laboratory | Necromancy Laboratory | | Marble Gallery | Black Marble Gallery | | Royal Chapel | Anti-Chapel | | Colosseum | Reverse Colosseum | | Olrox's Quarters | Death Wing's Lair | | Long Library | Forbidden Library | | Outer Wall | Reverse Outer Wall | | Clock Tower | Reverse Clock Tower | | Castle Keep | Reverse Keep | | Underground Caverns | Reverse Caverns | | Abandoned Mine | Cave | | Catacombs | Floating Catacombs |
What works differently up there
- Sealed routes start open. Doors that needed switches or relics in the first castle are just... open. Breakable walls are still around, still hiding loot.
- Warps are a new set. The Reverse Castle has its own warp rooms, and they don't connect to the first castle's network at all. Find a second one before using any - discover only one and the game helpfully warps you to the room you're already standing in.
- Library Cards are one-way. Use one in the Reverse Castle and you land back in the normal Long Library, free to sell junk and restock. There's no ticket for the return trip - you walk back through the portal chamber at the top of the Keep, whose reverse twin sits at the bottom of the Reverse Keep on the new map.
- Everything hits harder. Shaft shows up at level 88, Dracula at level 98, and the optional superboss Galamoth carries 12,000 HP. First-castle mobs were chip damage by the end; these are not.
- The map counter keeps counting. The second map starts at the bottom square of the Reverse Keep and pushes your total past 100%. One gotcha for completionists: the portal room is two map squares stacked vertically, and the game auto-carries you through it on the way in - that upper square stays unexplored until you make a return trip and jump it yourself.
Between bat form, mist, and the Gravity Boots high jump (untouchable on the way up, for what it's worth), you already own every movement tool the game has. Nothing in the second castle is gated behind an ability you lack - it's all gated behind raw combat.
Key Item Locations Revisited
The Reverse Castle's whole endgame is five relics: Dracula's body parts, a nod to Castlevania II: Simon's Quest. Five guardians hold them, and all five are bosses from the original NES Castlevania. Each one materializes its relic right where a Life Vessel would normally sit, so there's no way to miss the drop after the kill.
| Guardian | Where it waits | Relic | | --- | --- | --- | | Darkwing Bat | Reverse Clock Tower | Ring of Vlad | | The Creature | Reverse Outer Wall | Tooth of Vlad | | Death | Cave | Eye of Vlad | | Medusa | Anti-Chapel | Heart of Vlad | | Akmodan II | Death Wing's Lair | Rib of Vlad |
None of them are nightmares. The Darkwing Bat is a level 35 warm-up with 600 HP. Medusa runs level 40 with 1,100 HP, shrugs off strike damage, and flat-out absorbs stone, so leave the petrify toys at home. The other three sit between those poles. And since you already have every mobility relic by the time you flip the castle, the order you hunt them in is basically your call - the clean loop runs Reverse Keep into the Reverse Clock Tower and Reverse Outer Wall, down through the Black Marble Gallery to the Reverse Caverns and the Cave, then back through the Caverns to the Reverse Entrance, Necromancy Laboratory, Anti-Chapel, and Death Wing's Lair.
Each relic also grants a permanent perk on top of being a door key - the Heart of Vlad, for instance, makes you immune to curse.
The door itself
Bring all five to the reverse clock room in the Black Marble Gallery, the twisted twin of the room where Maria used to be. A caged lift rises to the Reverse Castle Center, then drops back down behind you and seals you in - it's a one-way trip, so be ready. Shaft's past that seal: dark priest, level 88, 1,300 HP, immune to poison. Beat him and the room becomes an eye that swallows Alucard whole. Past that is Dracula at level 98, the actual last fight.
Optional loot worth the detour
- Galamoth, Floating Catacombs - level 50 on paper but 12,000 HP and 9,999 EXP in practice, guarding the Gas Cloud relic (poison mist on contact) plus a Life Vessel. Widely considered the hardest fight in the game. Bring your best gear or a shield strategy.
- Beelzebub, Necromancy Laboratory - drops the Ring of Arcana.
- Doppleganger40, Reverse Caverns - drops the Dark Blade.
- Fake Trevor, Grant, and Sypha, Reverse Colosseum - a three-for-one boss room, no unique relic, mostly for bragging rights.
- Force of Echo, Reverse Caverns - a loose pickup that lets bat sonar do a little damage. Mostly a toy.
Order to Reach Richter
The throne room is easy to walk into. The prep is what needs an order, because each step quietly requires the last one. A clean sequence:
- Push through the story to the Colosseum, beat the Minotaur and Werewolf, and take the Form of Mist.
- Mist into the Long Library's back rooms, deal with the Lesser Demon, claim the Soul of Bat.
- Head into Olrox's Quarters, beat Olrox, pick up the Echo of Bat.
- Swing through the Marble Gallery for the Gravity Boots.
- Descend to the Catacombs and sonar your way through the dark room for the Spike Breaker.
- Take it to the Royal Chapel's spike corridor and collect the Silver Ring.
- Bat-climb the Underground Caverns to the purple coffin, beat the Succubus, take the Gold Ring.
- Stand in the Marble Gallery clock room with both rings on, ride the elevator down, get the Holy Glasses from Maria.
- Back through the Royal Chapel, past the Hippogryph's tower, up into the Castle Keep. Grab the Leap Stone while you're there if you never did - the boots' midair chains need the double jump. Hit the save room, put the glasses ON in the menu, then climb to the throne room.
The fight itself
The scene plays, and Richter comes at you with the full Belmont kit - whip, crosses, item crashes, all of it. Your job isn't to out-fight him. With the glasses on, a green orb drifts above his head, and that orb is Shaft's puppet string. Jump and slash at it, back off, repeat. A few clean passes and it pops.
Careful with wide swings and big spells - your attacks can absolutely still connect with Richter, and if his health bar empties, the credits roll and you're back at the title screen, glasses or no glasses. If you die, or clip him once too often, just reload the save and walk back in. Nothing in that room becomes permanent until the orb breaks.
Afterward the ceiling opens up, Shaft shows his face, and Alucard steps through the portal without any input from you. You come out standing on the very first square of the Reverse Keep, at the bottom of a brand-new map - and the counter starts ticking past 100% right there.