Vampire Survivors Beginner Guide: Tips for Your First Runs
Covers picking a first character, gold and chest basics, reroll use, Arcana picks, and kiting tips for new Vampire Survivors players.
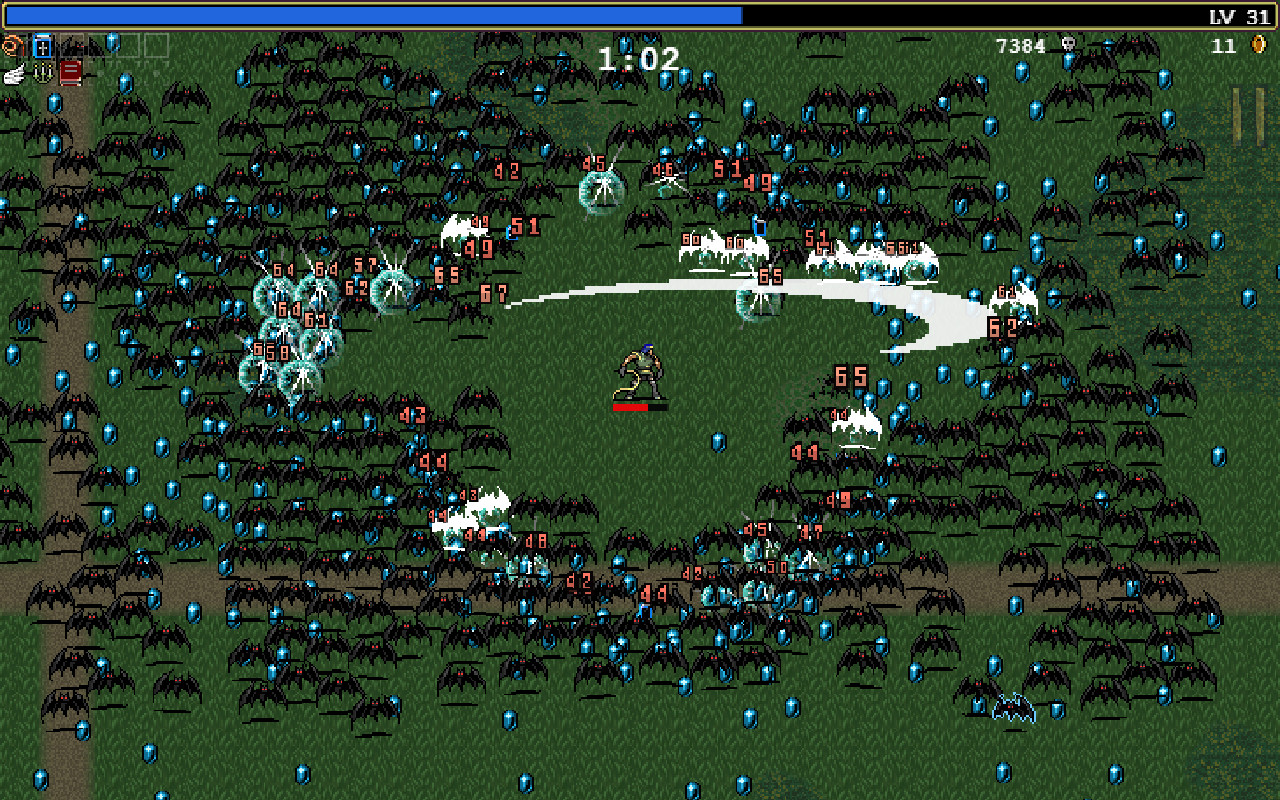
Vampire Survivors looks like a game about shooting bats. It's really a game about walking. Your weapons swing and fire on their own and you never press an attack button. The only thing you control is where you stand. Get decent at that one job and the first stage stops feeling like a meat grinder. The stuff that trips up new players is pretty consistent too: who to pick first, what gold is actually for, how chests and rerolls shake out, which Arcana cards are worth taking, and how to not get cornered by a wall of skeletons.
Choosing Your First Character
You start with one character unlocked and three more a button press away. Antonio Belpaese is free, and the other three Belpaese family members cost gold. Their prices climb as you buy more characters, so the costs below are what a fresh save pays.
| Character | Cost | Starting weapon | Starting bonus | Level bonus | | --- | --- | --- | --- | --- | | Antonio | Free | Whip | +20 Max Health, +1 Armor | +10% Might every 10 levels (max +50% at 50) | | Imelda | 10 | Magic Wand | None | +10% Growth every 5 levels (max +30% at 15) | | Pasqualina | 100 | Runetracer | +10% Projectile Speed | +10% Projectile Speed every 5 levels (max +30% more) | | Gennaro | 500 | Knife | +20 Max Health, +1 Amount | None |
Antonio is a fine teacher
The Whip swings out horizontally and passes through everything it touches. Simple to understand. He also starts with 120 max health and a point of Armor, and Armor quietly knocks one damage off every single hit. That's the most forgiving setup in the game for someone still learning how to dodge.
His damage bonus is the catch. It's +10% Might every 10 levels, and it doesn't even start until level 10. You don't reach the full +50% until level 50. So early runs feel a little thin on damage, then get better the longer you stay alive. That's a decent lesson in itself.
Imelda is the best 10 gold you'll ever spend
Magic Wand fires at the closest enemy on its own. No aiming, no facing the right direction, it just handles things. For a new player that's huge, because you can put all your attention on movement instead of on where your shots are going.
Her Growth bonus stacks fast by comparison: +10% more experience every 5 levels, capped at +30% by level 15. More experience means more level ups, and more level ups means more chances to fix a shaky build mid-run. If you buy one character early, make it her.
The other two can wait
Pasqualina runs the Runetracer, a projectile that ricochets around the screen on its own. Fun weapon, but her bonus is projectile speed, and faster projectiles mostly matter once you have a build that cares about them. Gennaro costs 500 and comes with +1 Amount, which is one extra projectile on every weapon you own. The wiki itself calls him one of the strongest characters early and notes he falls behind in the mid and late game. He's a fun second or third buy. He's not where your first 500 gold should go.
(That 500 is better spent on PowerUps, which comes up next.)
Understanding Gold, Chests, and the Reroll System
Gold is the thing that carries between runs. Weapons and levels vanish when you die. Gold doesn't.
What gold buys
Two things: new characters, and PowerUps. PowerUps are permanent stat boosts that apply to every character you own, bought from the main menu. First-rank costs off the wiki:
| PowerUp | Effect per rank | First rank cost | | --- | --- | --- | | Might | +5% damage | 200 | | Greed | +10% gold gained | 200 | | Max Health | +10% max health | 200 | | Area | +5% attack size | 300 | | Magnet | +25% pickup range | 300 | | Armor | -1 damage taken | 600 | | Cooldown | -2.5% weapon delay | 900 | | Growth | +3% experience | 900 | | Reroll | +2 rerolls | 1,000 | | Amount | +1 projectile on all weapons | 5,000 |
Ranks cost more as you buy them, so it's usually smarter to spread purchases across a few lines rather than maxing one at a time.
Early on, Might and Max Health are cheap and they immediately make runs less scary. Greed at 200 is a steal, since it's +10% gold per rank up to +50%, and more gold pays for everything else on this list. The long-term goal is Amount: one rank only, 5,000 gold, and every weapon you ever use fires one extra shot forever. Save toward it.
How chests work
Chests drop from bosses, not from the braziers you smash. They don't get pulled toward you either, so you have to physically walk into one to crack it open.
Inside is usually an upgrade to one item you already own, plus gold. Luck decides whether you get a better version:
- 1-item chest: 100-200 gold
- 3-item chest: 300-600 gold
- 5-item chest: 500-1,000 gold
Those are base values, and your Greed stat multiplies them. Fun fact for a brand new save: your first six chests ever are set to go 1-1-3-1-1-5 items, so the early game is gentler than it looks.
Chest type matters more than size. Bosses before the 10:00 mark drop bronze chests, which can't evolve weapons. Bosses after 10:00 drop silver chests, which can. Evolution is the big power jump in this game: get a weapon to max level (8 for most of them), hold the passive item it pairs with, then open a silver chest. A maxed Whip plus a Hollow Heart turns into Bloody Tear. A maxed Magic Wand plus an Empty Tome becomes Holy Wand. If a run is going well, plan to have one weapon maxed right around the 10:00 boss so the silver chest has something to work with.
Reroll, Skip, and Banish
All three are PowerUps, all three cap at rank 5 with +2 per rank, so 10 total at max. They do pretty different jobs:
- Reroll (1,000 for rank one) swaps the whole level-up menu for a fresh set. Anything you passed over can't show up in the new set, but it can come back if you reroll again during the same level up.
- Skip (100 for rank one) takes nothing and hands you 20% of the experience you needed for the level you're working on. Use it last. Later levels need way more experience, so that 20% is worth more the longer you hold onto it.
- Banish (100 for rank one) deletes one item from the pool for the rest of the run. This is the real build-shaping tool. Once you know you're running Whip and Magic Wand, banish every other weapon offer and your level ups get clean fast.
Because Skip and Banish cost 100 and Reroll costs 1,000, grab a rank or two of the cheap pair first. Reroll can wait until gold is flowing.
Reading Arcanas and When to Pick Them
You won't see Arcana cards at all at first. They turn on when you find the Randomazzo relic over in Gallo Tower, the second stage, and that first find also unlocks Sarabande of Healing (VI). So on run one in Mad Forest, none of this applies yet. It will soon enough.
How cards work in a run
Pick one at the start, or let the game pick at random. Then special bosses spawn at 11:00 and 21:00 that drop a purple chest holding another card. The menu shows four options, or six once you've unlocked 23 or more cards total, and at that point each chest also throws in one free reroll. Three cards per run is the normal ceiling. Once you're holding three, those bosses drop regular chests instead.
Rerolls behave differently here than on level ups. A card you reroll away is gone from that chest's pool for good. There's no cycling back. So if two of your four options are decent, take one.
You can also switch Arcanas off entirely on the stage select screen. Cards off means the 11:00 and 21:00 bosses don't spawn at all. Good to know if a card is making a stage harder than you wanted.
Cards worth recognizing
| Card | What it does | How it unlocks | | --- | --- | --- | | Sarabande of Healing (VI) | Healing doubled, and healing also damages nearby enemies | Find the Randomazzo | | Awake (IV) | +3 Revivals | Level 50 with Krochi | | Beginning (X) | +1 Amount on listed weapons, +3 on your main weapon | Level 50 with Antonio | | Waltz of Pearls (XI) | Projectiles bounce up to 3 times | Level 50 with Imelda | | Wicked Season (XIII) | Growth, Luck, Greed and Curse double on a cycle | Level 50 with Christine | | Disco of Gold (XV) | Coin bags trigger Gold Fever, and gaining gold heals you | Minute 31 in the Inlaid Library | | Silent Old Sanctuary (XX) | +3 Reroll, Skip and Banish, plus Might and Cooldown per empty weapon slot | Minute 31 in the Dairy Plant | | Mad Groove (VIII) | Every 2 minutes, pulls all stage items and pickups to you | Minute 31 in Mad Forest |
Beginner-friendly picks out of that list: Sarabande of Healing is free and turns any healing into damage, which papers over a lot of mistakes. Waltz of Pearls makes Imelda's Magic Wand hit way more targets, since every missile gets up to three extra chances to connect. Mad Groove is pure quality of life, sweeping the whole map's pickups to your feet every two minutes.
Reading a card before you take it
Plenty of cards only affect specific listed weapons. If the card names weapons you're not carrying, it's doing nothing for you. Check what you're actually running before you commit.
The rest is matching the card to the hole in your build. Dying a lot? Healing or revival cards. Damage fine but gold income weak? Disco of Gold. Running only three weapons and a pile of passives? Silent Old Sanctuary gives +20% Might and -8% Cooldown for each weapon slot you left empty, so a lean build gets paid for being lean.
And if you have no idea, the random option is honestly fine while you're new. Figuring out what the cards do is most of the fun of the first 20 hours anyway.
Positioning and Kiting Basic Enemy Swarms
This is the whole game. You control movement and nothing else, so positioning is the only skill there is to build.
The basic loop
Mad Forest uses what the wiki calls the standard spawn type: enemies appear from all four directions around you, wherever you happen to be standing. Stay put and the ring closes. Pick whichever direction looks thinnest, walk that way, and let your weapons clear the path ahead of you.
Broad loops around the map work better than tight circles. Tight circles walk you back through enemies you already stirred up, and those enemies are still there. Wide arcs keep pushing you into fresh, thin space.
One Mad Forest quirk worth knowing: the stage runs both you and the enemies at 1.1x speed. You're not faster than the horde and not slower either. Matching speed means a clear lane stays clear, and it also means anything on your heels stays on your heels.
Events that catch new players
A few things in Mad Forest show up on a schedule:
- Bat swarms, starting around 2:00. They sweep across the map in a straight line and shove other enemies along with them. Don't stand in the lane. Step aside and let them pass.
- Flower Walls at 5:00 and again at 10:00. A ring of walls spawns around you and closes in, lasting 30 seconds the first time and 60 the second. The move is to spot a gap early and slip out. Panicking in the middle is how people die to a plant.
- 11:00 brings a skeleton wave with a listed minimum of 300 on screen, plus the Arcana boss if you have cards enabled. That's the biggest spike in the first half of the stage. Same answer as always: find the thin side and go.
Bosses and their chests
Bosses walk straight at you and drop a chest when they die. If your damage isn't there yet, you can usually just outrun one and come back later. The chest stays where it dropped.
Since chests don't come to you, you'll be deciding on the spot whether walking into a crowd is worth it. Usually it isn't. If a boss died somewhere nasty, clear the area first and collect after.
Pickups along the way
Braziers are the breakable light sources. Your weapons smash them as you pass, and they drop coins, food, and gems. Mad Forest rolls a 10% chance for a brazier to spawn in a given spot, up to 10 on screen at once, and Luck can push that chance toward 50%. Break them when they're on your path. Don't cross a swarm for one.
There are also one-time stage items lying on the ground, free for the whole run:
- Hollow Heart, about 4 to 5 tilesets north of spawn. This is the Whip evolution piece, so Antonio players want it.
- Pummarola, 5 tilesets south.
- Skull O'Maniac, 6 tilesets northwest.
- Spinach, to the northeast and east.
- Clover, to the southwest and west.
There's a coffin holding a new character, Pugnala Provola, 6 tilesets northeast of spawn, if you feel like a detour.
Last thing on pickups: don't swim into a crowd for experience gems. Gems sit still and wait. Dead players collect nothing. Past level 12 you'll start seeing the Vacuum drop from braziers, and grabbing one pulls every gem on the ground straight to you, which beats risking your neck every single time.
Common Early Mistakes That Get You Killed
Standing still to fight
The horde only grows. All damage in this game comes from being touched. Standing still is a bet that you kill everything before it reaches you, and early on you'll lose that bet.
Leveling six weapons at once
Six weapons at level 4 loses to three weapons at level 8, and it's not close. Max level is what sets up evolutions, and evolutions are where the real damage lives. Pick two or three weapons plus the passives they need, then Banish the other weapon offers so level ups stop pushing them on you. That's exactly what Banish is for.
Chasing pickups into a swarm
Number one actual cause of death for new players. One gem isn't a level. One bronze chest isn't worth 40 health. The pickup will still be there in ten seconds.
Not spending gold between runs
Gold sitting in the menu does nothing. A rank of Might and a rank of Max Health cost 200 each for the first one, and they change how the opening five minutes feel. Buy something after every single run, even if it's small.
Ignoring Greed and Luck
Greed multiplies every coin you pick up, and Luck improves your odds at the 3-item and 5-item chests. Neither one keeps you alive in the next run directly, but both make the run after that easier, and the effect compounds.
Taking every level-up offer
If all four options are bad, taking one anyway still costs you a slot. Skip hands you 20% of the experience you needed for the level you're working on, so skipping a genuinely awful menu usually isn't even a loss. Reroll if you have charges left, banish the junk, skip what's left over.
Trying to win at 30:00
Mad Forest ends at 30 minutes. At the 30:00 mark Death spawns, one-shots whatever it touches, and another one shows up every minute after that. You're not supposed to beat it as a new player, and a few unlocks literally ask you to survive into minute 31, which is a late-game project that needs specific builds. Getting to 29:00 and dying to Death isn't a failed run. That's the stage ending exactly as designed, with a pile of gold waiting in the menu.