Final Fantasy X Beginner's Guide: Tips for Starting Your Journey
A beginner's look at Final Fantasy X: early aeons, battle commands, what to buy first, rookie mistakes, and Sin boss prep.
Final Fantasy X is one of the friendliest entry points in the whole series. You play Tidus, a blitzball star whose home city gets flattened by a giant sea monster called Sin, and he washes up in a tropical world named Spira with no clue how to get back. The story holds your hand through the basics, but a few systems tuck their best stuff into menus you might never open. A little prep goes a long way here, and most of it costs nothing but attention.
Choosing Your First Aeon Path
Small surprise: there's no pick-your-aeon screen. Yuna's first summon is always Valefor, handed over the moment you finish the Cloister of Trials at Besaid Temple (that's the puzzle dungeon under the village church). The "path" part is really about what you do with her, and how many hidden extras you scoop up as the temples keep coming.
Valefor, your starter summon
Valefor's a flyer with no element attached to her attacks, so nothing in the early game resists her. She hits fast and lands almost everything, and she comes knowing Fire, Thunder, Water, and Blizzard on top of her regular talon swipe. Her Sonic Wings move is sneakily good - it shoves the enemy's next turn down the queue, and bosses hate that.
Her Overdrive starts as Energy Ray. When you summon, the aeon fights alone with its own HP and MP, and your party steps back out of harm's way. That makes her a free wall: a boss's big attack hits Valefor instead of dropping your healer. Dismiss her when she's worn down and fight on with your people. Aeons grow as Yuna grows, so feeding her grid nodes pumps up every summon at once.
Grab Energy Blast before you sail
This one's easy to miss and it's free power. After you leave Besaid Village for the first time, on your way to the boat to Kilika, turn right around and go back in. Talk to the woman in the item shop first - she'll mention her dog dug something up. Then find that dog in the weaving tent on the village's northeast side and check on him. Valefor learns Energy Blast, a second Overdrive that hits much harder than Energy Ray.
It's a two-minute detour, so just do it day one. In the HD remaster, putting it off too long gets risky, because a brutal optional boss camps the village later in the story and returning stops being a casual errand.
The rest of the lineup
Aeons arrive temple by temple as the pilgrimage rolls on, and each one covers a different job. Here's the order and what they bring:
| Aeon | Temple | Element | Overdrive | Party trick | |---|---|---|---|---| | Valefor | Besaid | None | Energy Ray / Energy Blast | Sonic Wings delays enemy turns | | Ifrit | Kilika | Fire | Hellfire | Meteor Strike hits like a truck | | Ixion | Djose | Lightning | Thor's Hammer | High defense on both sides, Aerospark wipes enemy buffs like Haste | | Shiva | Macalania | Ice | Diamond Dust | Heavenly Strike plus Blizzara for free | | Bahamut | Bevelle | None | Mega Flare | Full black magic list up to the -ga spells |
Yuna also gets Grand Summon as her own Overdrive eventually, which brings an aeon in with a full Overdrive gauge already charged. Saving that for a boss door is one of the best feelings in the game.
Hidden chests matter later
Every Cloister of Trials hides a bonus chest behind a Destruction Sphere puzzle. Get in the habit of finding them on your first pass through each temple. Collecting all six hidden treasures is what opens the path to Anima, a bonus aeon hiding at Baaj Temple much later (you'll need the airship to get back there). A few can wait for a return trip, but the Besaid and Kilika ones are quick wins while you're already on the spot.
Understanding Basic Battle Commands
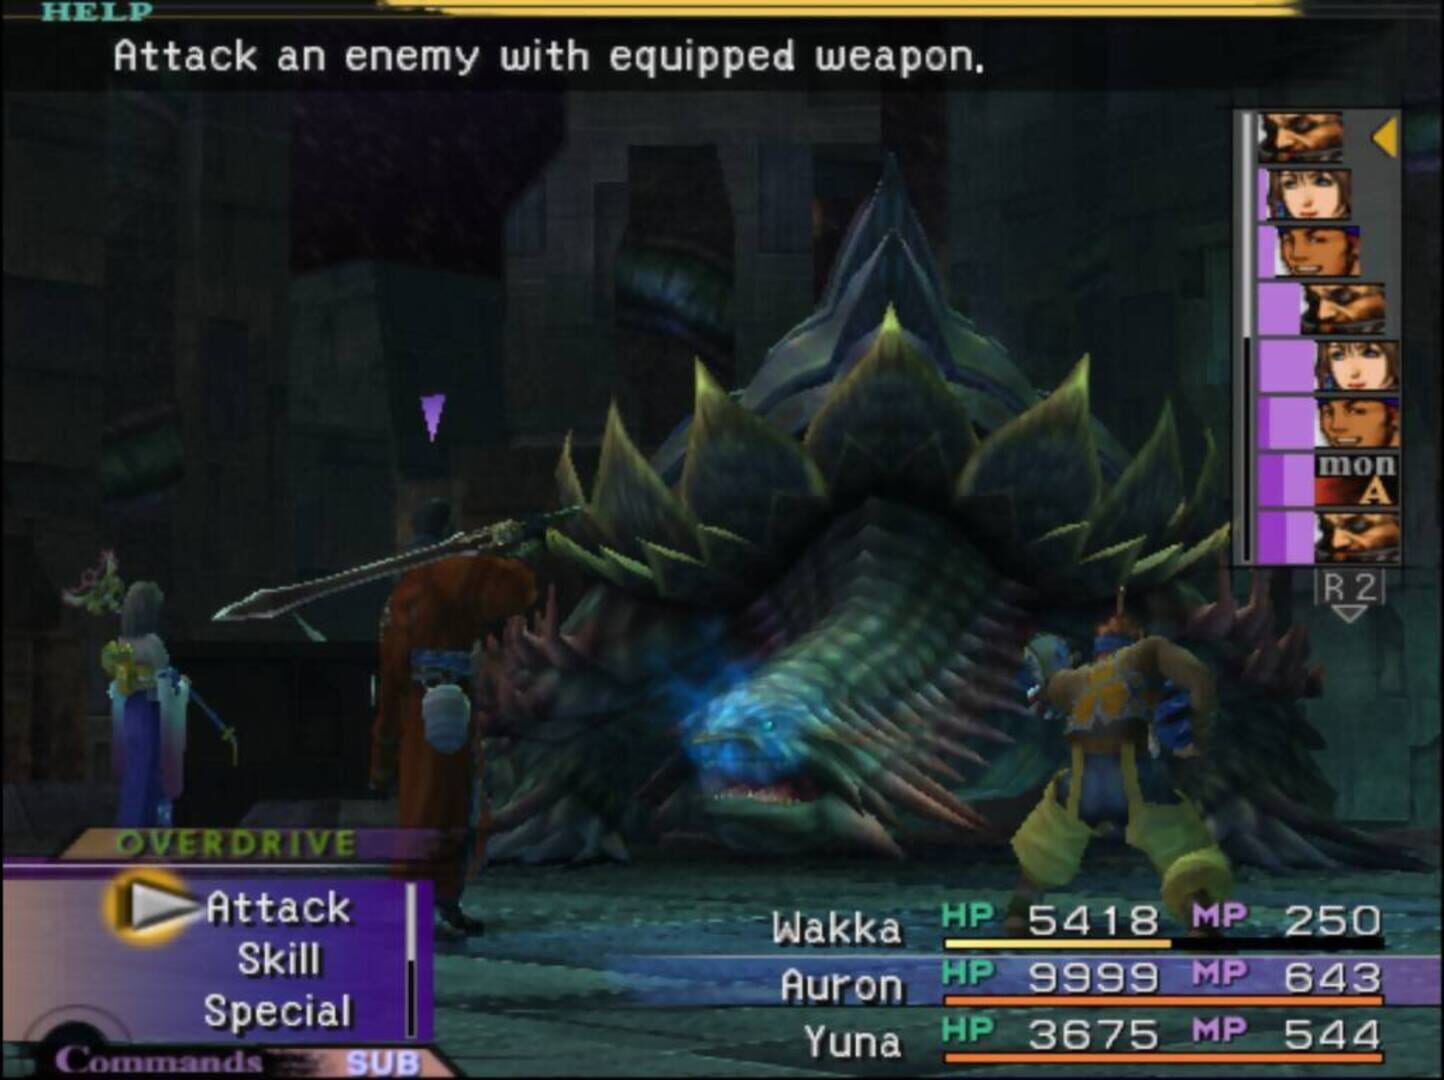
Battles in Final Fantasy X use the CTB system - Conditional Turn-Based Battle. There's no timer and no panic; when it's your call, everything freezes while you think. That turns each fight into a little puzzle instead of a reflex test.
Turns are a currency
The list on the right side of the screen (the Act List) shows the upcoming turn order for both sides. Read it before you pick anything. If you see three enemy icons stacked on top of your healer's portrait, that's your cue to Defend or patch someone up right now instead of swinging.
Agility decides how often someone acts, and the move you choose changes when your next turn comes up. Big slow abilities push you further down the queue, quick ones cycle you back sooner. Delay moves like Sonic Wings, plus Haste and Slow, literally rearrange the list while you watch. Once you notice this, fights open way up.
The command rundown
- Attack - basic physical hit, always quick.
- Skill - character techniques, like Tidus's Cheer, which bumps your attack and defense a notch per use.
- Special - the odder tools, like Kimahri's Lancet, which drains HP and MP from a target.
- Item - your consumables.
- Summon - Yuna only. Calls an aeon in to fight solo.
- Overdrive - lights up when the gauge is full.
- Defend - halves physical damage until your next turn. Better than it sounds.
You can also swap weapons and armor mid-fight on your turn, which matters more than you'd think when an enemy shrugs off physical hits but not magic.
Swap your party, a lot
Seven characters travel with you, but only three fight at a time, and you can trade them around freely during battle. Two big reasons to do it constantly. First, anyone who sits out an entire fight earns zero AP, so habitual benchwarmers fall behind fast. Second, the right tool matters: birds and bugs laugh at swords (the game even demos Tidus whiffing at a Killer Bee), but Wakka's blitzball and Lulu's spells always reach them. Swapping is also a sneaky way to yank a half-dead character out of danger.
Overdrives and trigger commands
By default the Overdrive gauge charges from taking hits. Overdrive Modes change that - Warrior charges it by dealing damage, Healer by healing allies, and the game quietly unlocks modes based on how you actually play each person. Tidus's Swordplay is a timing minigame: stop the cursor inside the white zone for extra damage. His better Overdrives (Slice & Dice, Energy Rain, Blitz Ace) come from using the old ones over and over, so burn them instead of hoarding.
Some boss fights also flash a trigger command onto the menu. It's a free extra option tied to that fight, and it's usually straight-up help. Take it when you see it.
Early Game Item Priorities
Gil is tight for the first few hours, and the Besaid shop is tiny, so the shopping is easy to get right:
| Item | Price | Why you want it | |---|---|---| | Potion | 50 gil | Cheap patch-up between fights | | Phoenix Down | 100 gil | Brings a KO'd character back | | Antidote | 50 gil | Cures poison |
What to actually buy
Phoenix Downs come first. A dead friend contributes nothing, no matter how many Potions you're sitting on, so ten-ish of those is plenty for the opening stretch. Add a handful of Antidotes before sailing - Kilika is poison country, between Lord Ochu in the woods and what Sin leaves at the temple. Potions are the lowest priority, because Yuna is your real healer and once she's a few grid nodes deep, her Cure beats a stack of Potions anyway.
Save your spheres
Fights drop Power, Mana, Speed, and Ability spheres, and those are the fuel for the Sphere Grid - you spend them to activate the stat and ability nodes you move to. They're not vendor trash. Hoard them, because a fat sphere stock is the difference between a party that grows and one that drifts.
Al Bhed Potions are the best cheap heal in the game
Once Rikku's around, keep an eye out for Al Bhed Potions. Used through her Use command, one restores 1,000 HP to every party member at once and cures poison, silence, and petrification on top of that. You can't buy them until the airship much later, but Bikanel enemies drop them and certain machina carry them to steal. Grab a stack when you can - it turns Rikku into a second healer and carries you through a long stretch of the midgame.
Gear works differently here
Weapons and armor in this game carry zero raw stats. They're just containers for auto-abilities, so a plain-looking sword with a useful ability beats a shiny empty one every time. Don't stress the 150 gil gear at Besaid - it's fine. Sell the spare equipment drops you don't need for walking-around money, and check the abilities on anything you find before tossing it.
Avoiding Common Rookie Mistakes
Most early stumbles in this game aren't about skill, they're about skipping stuff the game never forces you to look at.
Forgetting the Sphere Grid exists
This is the big one. There's no traditional leveling in Final Fantasy X - all growth happens on the grid. Battles hand out AP, AP becomes S.lv (sphere levels), and those levels let you move your characters along the board and activate nodes with the spheres you've been collecting. Skip it for a couple dungeons and you're marching a fresh-off-the-boat party into fights built for a grown one. Open the grid after every boss or dungeon and spend what you've banked.
Related: if you're on the HD remaster, the game asks Standard or Expert grid before you even start playing. Pick Standard for a first run. It walks each character down a clean, marked lane that matches their job. Expert starts everyone bunched near the middle with open branches, which is great on a second playthrough and kind of a maze on your first. You can't switch later, so choose with that in mind.
Walking past the free stuff
- Energy Blast - the dog in the weaving tent, remember? Free damage on your first aeon.
- Destruction Sphere chests - all six feed into Anima later. Cheap to grab as you go.
- Jecht Spheres - after the Spherimorph fight in Macalania Woods, memory spheres scatter across Spira, one where you won and nine more after that (another sits just right of Besaid's temple). Watching them teaches Auron new Overdrives as your count climbs. They're small glowing orbs on the ground and ridiculously easy to jog past.
Bad fight habits
- Never glancing at the Act List, then eating three enemy turns in a row.
- Ignoring trigger commands because they look like menu decoration.
- Running one fixed trio and letting everyone else starve for AP.
- Never stealing with Rikku - steals are free items and parts you'd otherwise pay for.
- Hoarding Overdrives "for the boss" across forty regular fights. The gauge refills; use it.
None of these will get you killed on their own. Stack two or three and the midgame starts feeling like a slog for no clear reason.
Preparing for Sin Encounters
Sin's attacks are story beats, so you always know one is coming - the trick is showing up with the right pocket contents. You can't out-level the first few, so prep means items plus knowing each gimmick.
The warm-up: Sinspawn Ammes
The prologue fight in Zanarkand, with just Tidus and Auron. Ammes has 2,400 HP and it's a pure tutorial - the game even teaches Overdrives right here. Its only real move is Demi, which slices off a chunk of your current HP as a percentage. That means it literally cannot finish you off. Use it as free practice for the gauge.
The boat: Sin's fin
On the S.S. Liki to Kilika, Sin rises out of the water next to the ship. The fin has 2,000 HP and it sits out of sword range, so only ranged options connect: Wakka's blitzball, Lulu's black magic, Kimahri's Lancet, or Valefor. Meanwhile it spits Sinscales onto the deck, three at a time, forever. Don't grind on the refill treadmill - leave one scale alive and pour everything into the fin. Tidus stacking Cheer a few times keeps everyone standing and speeds the sweep up. The fin drops a Mana Sphere when it goes down, which is a nice grid snack early on.
Underwater: Sinspawn Echuilles
No breather after the fin - Tidus and Wakka go straight into an underwater brawl, just the two of them. Echuilles has 2,000 HP and its Drain Touch siphons your HP, and after the second Drain Touch it unleashes Blender, which hammers both of you at once. The fight's own Scan hint gives the answer away: blind it and it misses. Wakka's Dark Attack is the tool. With no Yuna here, Phoenix Downs and Potions are your entire medical plan, so have some before the ship leaves Besaid.
Kilika: Sinspawn Geneaux
On the path up to Kilika Temple you'll meet Geneaux, 3,000 HP plus two tentacles with 450 HP each. The tentacles soak up spells aimed at the body, so clear them first or Lulu's magic accomplishes nothing. The shell itself deflects physical attacks, and it's weak to Fire - burn it and it pops open. Skip Water spells entirely, since it absorbs those. Its Venom move poisons people, which is exactly what those 50 gil Antidotes were for. A charged Energy Blast on Valefor ends this one fast.
The big one: Sinspawn Gui
A heads-up for a few hours later: at Operation Mi'ihen on Mushroom Rock Road, Sinspawn Gui shows up with 12,000 HP on its first body. Its arms block physical damage, so this is Auron and Kimahri's moment - their piercing weapons are the answer. When the head starts twitching, hit it fast or it belches Venom all over you. Beat it once and there's a second round with Seymour fighting alongside you. The payout is chunky for that point in the game: 400 AP and 1,000 gil.
A simple checklist
Ten Phoenix Downs, a few Antidotes before Kilika, Valefor's Overdrive gauge topped off before boss doors, and a glance at the Act List before committing to anything slow. That's the whole routine. A 200 gil shopping run at Besaid covers every Sin fight through Kilika - the cheapest insurance you'll ever buy in Spira.