Apex Legends Beginner Guide: Legends, Movement, and Ring Basics
The basics of picking a legend, sliding and tap-strafing, reading the ring, looting early, and pinging your squad in Apex Legends.
Apex Legends throws you into a 60-person fight with basically no hand-holding, and your first dozen matches will feel rough. That's normal. The good news is that getting better mostly comes down to a handful of basics: pick a legend you click with, learn to move, read the ring, grab the right loot fast, and talk to your squad. Nail those and your games get a whole lot less painful.
Choosing Your First Legend
Apex has a big roster, and each legend fits into a class that shapes their job: Assault pushes fights and carries extra ammo, Recon tracks enemies, Support heals and revives, Skirmisher is slippery and mobile, and Controller holds buildings and zones people out. For a first pick, you want someone whose abilities forgive mistakes instead of punishing them.
A few of the legends you start with already unlocked are genuinely the easiest characters in the whole roster to learn, and any of them is a fine place to start.
Bloodhound: the training wheels for game sense
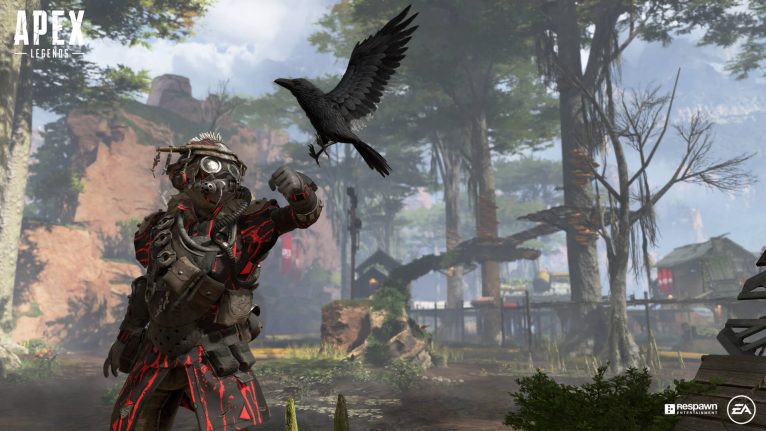
Bloodhound is a Recon legend, and they're probably the single best pick for a brand-new player. Their tactical, Eye of the Allfather, sends out a scan in a 125-degree cone out to 75 meters that lights up enemies, traps, and clues right through walls. Your whole squad sees what you scan, and it even tells you how many enemies it picked up, which is huge when you have no idea where anyone is.
Their passive, Tracker, leaves little markers showing where enemies walked, opened doors, or got into a scrap, and those clues stick around for about 90 seconds. So even when your scan is cooling down (25 seconds), you're still getting info most legends don't, which trains you to pay attention to your surroundings, a skill that carries over to every other character.
Lifeline: the medic who covers your mistakes
Lifeline is a Support legend, and her whole kit is about keeping the squad alive. Her tactical drops the D.O.C. Heal Drone, a little floating bot that heals anyone within 6 meters at 8 health per second for 20 seconds. You pop that thing in a fight, stand near it, and suddenly you're regenerating while you shoot. It's on a 45-second cooldown, so you can use it pretty freely.
What makes Lifeline forgiving for new players is the revive help. Her passive can pick up a downed teammate automatically, hands-free, while she keeps her gun out and fighting, the exact safety net you want when you're still learning positioning. If your squad keeps getting wiped because nobody can clutch a revive, Lifeline fixes that.
Bangalore: the get-out-of-jail-free card
Bangalore is an Assault legend built around not dying when you get caught out. Her Smoke Launcher fires a canister that bursts into a wall of smoke, it has two charges, and the cooldown is 30 seconds. You can smoke yourself to escape, smoke a downed friend to revive them, or smoke a doorway so you can reposition.
Her passive, Double Time, is the real reason beginners love her. When somebody shoots at you while you're sprinting, you get a 30% speed boost for 2 seconds. That reaction basically saves you from mistakes you'd get punished for on anyone else.
Why you should main one legend for a while
The problem with swapping legends every game is you never build muscle memory for any of them. Every legend's abilities have a timing and a feel that only clicks after you've played them for a while. Pick the one that sounds fun, play them for 20 or 30 games, then decide if you want to branch out. Bloodhound, Lifeline, and Bangalore are all unlocked from the start, so there's no cost to trying each of them. Want to branch out later? Octane and Wraith are popular next picks, since their movement and escape tools stay beginner-friendly once you've got the basics down.
Movement Fundamentals: Sliding and Tap-Strafing
Movement is what separates a brand-new player from someone starting to click with the game, and it's the most fun part of Apex once it does. Two techniques matter more than anything else early on: sliding and tap-strafing. Get comfortable with both and you'll be harder to hit, faster across the map, and a lot more annoying to fight.
Sliding: the foundation
To slide, you sprint and then hit crouch. That's the whole move. The catch is a slide is only as fast as the speed you brought into it, so you'll usually slide off the top of a hill or after building up speed. Sliding downhill pushes you past your normal sprint, which is why good players bomb down slopes to rotate across the map fast.
The thing you want to drill is the slide-jump. Slide, then jump near the end of the slide, and you carry that momentum through the air and cover more ground than a plain sprint would. You can also slide to make yourself harder to hit while you heal or peek a corner, since a sliding hitbox is trickier to track than a standing one.
Two caveats: sliding on flat ground slows you down fast, so don't slide everywhere for the sake of it, and you can't slide at all if you weren't already moving.
Tap-strafing: the sharp turn that breaks aim
Tap-strafing is the technique everyone talks about, and here's the honest truth up front: it's a mouse-and-keyboard trick. On a controller you can't do the classic version, and that's fine, there are other movement tools for you. On PC, though, learning it makes a real difference.
What a tap-strafe does is let you snap your direction mid-air way harder than a normal air-strafe. You jump out of a slide, hold a strafe key (A or D), and flick your mouse the same way while tapping forward over and over in quick succession. Most people bind forward to the mouse scroll wheel so they can scroll it rapidly instead of hammering a key. The result is a tight, sharp turn that throws off anyone trying to track you.
Why does that matter? Because a predictable jump is an easy target, and a jump that suddenly curves ninety degrees is not. Tap-strafing turns you from a clay pigeon into something a lot harder to hit, and chaining a couple lets you zigzag through a fight in ways the shooter can't track.
How to actually learn it
Don't try to learn tap-strafing in a real match. Go to the Firing Range. Bind your scroll wheel to move forward, then sprint, slide, jump, and scroll while holding a strafe key and flicking your mouse. Do it over and over until the sharp turn feels automatic, then try chaining two tap-strafes inside a single jump to really change direction on someone. A related move is the wall bounce: jump at a wall, slide along it for a split second, then jump off the other way. It works on controller too, but save it for after the basics feel natural.
Reading the Ring and Rotating Safely
The ring is the circle that shrinks the playable area over the course of a match, and standing outside it burns your health. It ticks once every 1.5 seconds, and the damage climbs every round. Early on the ring barely hurts, but by the late rounds it will flat-out delete you. Knowing the numbers and timing your rotations around them is what keeps you alive to the final circle.
How the damage scales
The ring's damage goes up each round, and it gets steep in the second half of the match.
| Round | Damage per tick | What that feels like | | --- | --- | --- | | 1 | 3 | Barely a scratch, you can live in it | | 2 | 4 | Still fine for a moment | | 3 | 10 | Starting to sting | | 4 | 15 | Melts you without shields | | 5 | 20 | Don't be out there | | 6 | 25 | Game over, fast |
A tick hits every 1.5 seconds, so round 4 at 15 per tick works out to 10 damage a second. That kills a player with no shields in ten seconds flat, before anyone's even shooting at you. The later the round, the less time you can spend on the wrong side of the line.
Watch the timer, not just the ring
Every round has a wait period before the ring starts closing and then a closing time of its own. Round 1 waits about 1:15 and then takes around 4:20 to fully close, which is slow, but later rounds wait less and snap shut faster. Glance at the ring timer constantly. When it says the ring is about to start closing, you should already be moving toward the next safe zone, not looting one more bin.
A controller legend (like Catalyst, Wattson, or Caustic) can walk up to a Ring Console and show the whole squad where the next ring will land before it's announced to everyone else. That's a real advantage if someone on your team plays one, so use it. Knowing the safe zone early means you can grab a building on the good side of the circle instead of getting funneled into a chokepoint with three other squads.
Rotate early, rotate with cover
The single biggest mistake new players make is looting too long and getting caught outside the ring, or rotating across open ground with no cover. Neither ends well. The fix is to start your rotation before the ring closes, pick a path with rocks, buildings, or walls to break line of sight, and move as a squad.
If you do have to cross open ground, do it fast and together. A straggler out in the open is free real estate for any team with a scope. And if the next ring pulls across a wide-open valley, sometimes the smart play is to hold a strong building near the edge and let the ring push other teams toward you instead of racing through a kill zone.
Use the ring against the other teams
The ring isn't just a thing that kills you. It's a weapon if you use it right. Teams caught outside the ring are distracted, low on health, and usually desperate to get back inside. If you're already safe, sit on the edge and punish anyone trying to squeeze through a gate or over a ridge. Gatekeeping like that wins games.
Loot Priority in the Early Game
When you land, everyone's scrambling, and what you grab in the first thirty seconds shapes how the next fight goes. Grab the wrong stuff first and you're a free kill. There's an order to it worth memorizing.
A weapon and ammo come first
You start each match with a Level 1 Shield Core already on, so armor isn't your first worry. A gun is. You land with no real weapon, so the very first thing you want off the ground is anything that shoots. Don't be picky in the opening seconds, because any gun beats fists. Grab what's there, deal with whoever landed on top of you, then swap for something better once the building is clear.
Ammo comes right with it. A gun with no ammo is a fancy paperweight, so grab a stack or two for whatever you picked up.
Your armor and how it grows
Here's the part that trips up new players. Your shield is a Shield Core, and it's built into your legend, so you don't loot a body shield off the ground anymore. It starts at Level 1, which gives 50 shield on top of your 100 base health. You level it up by dealing damage, which earns Evo points: hit 450 Evo and you're at Level 2 (75 shield), and hit 1,700 Evo and you're at Level 3 (100 shield).
The faster you get into a fight and start doing damage, the faster your armor grows. You can also grab Shield Cores out of death boxes, and if you pick one up that's higher level than yours, the extra shield comes in as overcharge that lasts 30 seconds before it drains. To keep your shield topped off during and after fights, you loot Shield Batteries and Shield Cells.
Helmets, knockdown shields, and bags
After a weapon, ammo, and some shield charges, look for a helmet and a knockdown shield. Helmets cut down headshot damage, which adds up way more than people think when someone's beaming you with a sniper. A knockdown shield lets you block shots (and crawl behind cover) once you're downed. A backpack gives you more carry space for ammo and heals, which you'll want once fights run long.
Attachments: extended mags first
Attachments are where new players waste the most time, so here's the order. Extended mags first, then stocks and barrel stabilizers, then optics, with shotgun bolts mattering only if you're running a shotgun. An extended mag is the single biggest upgrade you can slap on a gun, because more rounds in the mag means more shooting before a reload, and reloads are exactly when you get punished.
Don't hoard attachments you can't use. If you grab a purple mag but it's the wrong ammo type for your gun, leave it or ping it for a teammate. Stuffing your backpack with random scopes you'll never equip just slows you down.
Heals and ordnance
For heals you want a mix. Shield Batteries and Cells recharge your shield, and Syringes and Med Kits fix your actual health. Aim for a handful of batteries plus a syringe or two and a med kit. Once you've got that, fill your remaining space with ordnance. Arc stars and frag grenades are slept on by new players. An arc star sticks to a target, slows them, and chunks their shields, which can flip a fight you were losing. Carry at least one if you can.
Don't be a loot goblin
The fastest way to die is to spend ninety seconds perfectly kitting your loadout while your squad fights two buildings over. Once you've got a gun, ammo, some shield charges, and a helmet, stop looting and go help. A decently geared player who shows up to the fight almost always beats a fully kitted player who shows up late. Loot fast, move on, and let the dead teams' death boxes fill in whatever you're missing after the fight.
Communicating with Your Squad
Apex is a team game, and a squad that talks, even a little, beats three randoms running around in silence. You don't need a mic and you don't need to be chatty. The ping system does most of the work for you, and a few good callouts cover the rest.
The ping system is your main tool
The ping button (middle mouse on PC, RB on Xbox, R1 on PlayStation) is the backbone of communication. Tap it on an enemy and your whole squad sees a red marker showing where they are. Tap it on loot and it tells teammates there's something worth grabbing there. It's contextual, too: the ping changes based on what you're looking at, so pinging a door hints someone's nearby and pinging a supply bin marks it as unlooted or empty.
The thing to remember is that pings work even if nobody's on voice chat. A squad that just pings enemies, loot, and rotations can play together surprisingly well. Ping the enemy you see before you shoot, ping a shield battery you don't need for your teammate, and ping where you want to rotate. Those three habits cover most of what a mic would do.
Be specific, not spammy
Spamming the ping button is worse than not pinging at all, because people tune it out. Ping once, and if it really matters, double-ping to emphasize. A single clear enemy ping tells your squad exactly what to look at; six pings in a row just becomes noise.
Pay attention to your teammates' pings too. If someone pings an enemy and you ignore it, you've wasted their callout. If someone pings a battery they need and you grab it anyway, that's how squads start turning on each other. Reading pings matters as much as making them.
Mark your killer when you go down
Here's a tip a lot of new players miss. When you get downed or killed, you have a short window to ping the enemy who did it, so use it. Your squad might be busy and not have seen where the shot came from, and your death ping gives them a target to push or a threat to dodge, a free callout you can make even while bleeding out.
Voice chat: keep it short
If you do use a mic, keep callouts short and useful: "enemy pushing right," "one knocked," "need a battery," "ring's closing, let's push." That kind of stuff helps; a running commentary of every thought in your head does not. Think of voice as the thing you use for what pings can't say, like an enemy being one-shot or you wanting to hold a building instead of pushing.
Call out damage when you can. If you chunked someone for a hundred and they ducked behind cover, tell your squad they're weak so someone can push and finish. A team that shares that info finishes fights fast, and finishing fights fast is what keeps you from getting third-partied.
Play as a squad, not three solo players
The biggest communication failure isn't a missed ping, it's the squad that splits into three separate fights and dies one by one. Stick together, share loot, and commit to the same plays. Three people focusing one target wins trades you'd lose on your own, and that's really all team play comes down to.
A squad that lands together, pings what it sees, and rotates as a group will beat better-aiming players who do none of that. Aim matters, but it matters a lot less than people think when the other team shows up as three and yours shows up as one.