
Dive into our comprehensive guide for Zelda: Phantom Hourglass: Temple of the Ocean King, where every adventurer’s dream transforms into reality! Whether you’re a seasoned Zelda enthusiast or a newcomer eager to conquer this legendary game, our guide is your ultimate companion. Navigate the temple’s labyrinthine corridors with ease, tackle key challenges head-on, and unlock every secret hidden within its walls. Master the art of strategically using items, keep your health and time in check, and unveil the temple’s deepest secrets. Embark on this epic journey and make the Temple of the Ocean King your dominion. Ready to become the hero of your adventure? Let’s get started!
Navigating the Temple
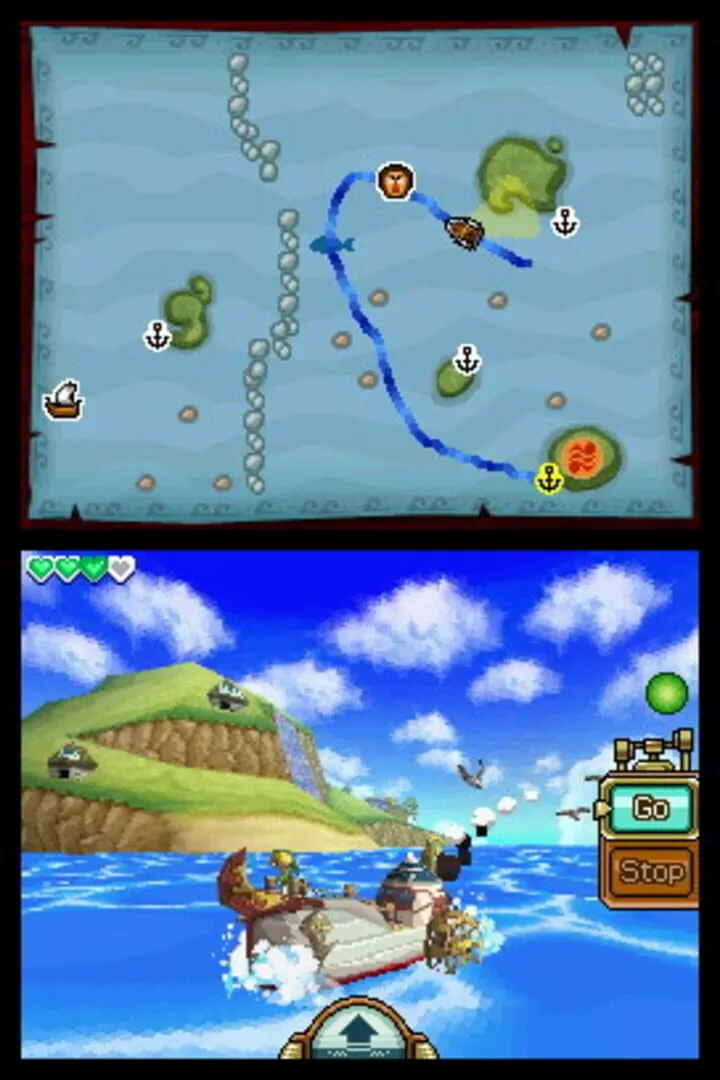
The Temple of the Ocean King is a central part of Zelda: Phantom Hourglass. Returning here multiple times can feel like a bit of a slog. But don’t worry—with some tips and tricks, you can make your trips through this time-drenched temple much easier!
Understanding the Fog
The temple is cursed with a phantom fog that eats away at your life. As you explore the temple, you’ll notice safe zones which are marked by glowing floors. Stay within these zones to avoid losing health to the fog. Plan your moves carefully, so you’re always moving from one safe zone to another.
Collecting Time from Force Gems
You need to make efficient use of the Sands of Hours you collect. These precious grains of sand are stored in the Phantom Hourglass, extending the time that Link can be outside the safe zones without getting hurt. Make sure to keep an eye out for Force Gems—these not only open doors but also add more sand to your hourglass, giving you extra time to complete your tasks.
Phantom Guards
The Phantoms in the temple guard certain areas and can be quite bothersome. They are slow but invincible, so don’t try to fight them head-on. Instead, be stealthy. Hide in safe zones or use pots and corners to avoid being seen. If you do get spotted, run to a safe zone or one of the temple’s many hiding spots until they lose interest.
Using the Boomerang
Early in the game, you’ll get the Boomerang. This nifty tool is useful not only for stunning enemies but also for hitting switches from afar. Smack switches from a distance to make paths accessible or create diversions for Phantoms. Draw the Boomerang’s path on the screen with your stylus for precise control.
Saving Your Progress
One of the biggest tips for making the temple easier is taking advantage of the checkpoints. After completing certain sections, you can activate a blue portal that acts as a warp point, allowing you to skip parts of the temple you’ve already passed. These are life savers, so make sure you activate them every chance you get. This helps in conserving your time and health.
Puzzles and Traps
The Temple is riddled with puzzles and traps. From floor switches to pressure plates, and Bomb Flowers to moving platforms, every floor challenges you in different ways. Pay attention to the clues and the layout of each room. Sometimes a simple pattern can be the key to solving complex puzzle sequences.
Gathering Courage
As you get deeper into the temple, the difficulty increases, but so do the rewards. Equipped with more items and new abilities, you’ll find that earlier floors can be tackled more efficiently. Don’t be afraid to revisit areas with new tools when you’re better prepared.
Planning and Patience
The key to navigating the Temple of the Ocean King is careful planning and patience. Know where your safe zones are, make wise use of your items, and always keep an eye on your remaining time. With practice, you’ll zip through the temple much more quickly and effectively.
So grab your Phantom Hourglass and bravery, it’s time to dive back into the temple. Remember, every second counts!
Happy adventuring!
Key Challenges and Solutions
Navigating the Temple of the Ocean King can be really tricky, especially with the time limit and all those creepy Phantoms lurking around. Don’t worry, though! This guide will help you tackle the most challenging parts of the temple with ease.
Dealing with Phantoms
Phantoms are these big, armored bad guys who patrol certain areas. If they catch you, you’ll lose time and health. Here’s how to handle them:
- Stay Out of Sight: Use stealth to your advantage. Hide behind walls, use safe zones (those glowing areas), and avoid their red line of sight.
- Use Bombs: Later in the game, you’ll have bombs. Throw a bomb to distract a Phantom and sneak past while they’re investigating the noise.
- Phantom Eye: Sometimes, these annoying floating eyeballs called Phantom Eyes show up. If a Phantom Eye spots you, it will call a nearby Phantom. Take these out with arrows or bombs before they see you.
Time Management
The hourglass is running down, and you need to make every second count. Here’s how to stretch your time:
- Collect Sand of Hours: These are the golden triangles in the temple. Each one adds time to your hourglass.
- Speedrun Paths: Instead of fighting, running to the next safe zone quickly can save precious seconds. Memorize the routes for each floor to avoid wasting time exploring.
- Solve Puzzles Efficiently: Some puzzles can eat up your time. Plan your moves before you start the puzzle to solve it quickly. For example, those floor switches usually require moving blocks onto them. Think ahead about the shortest path.
Floor Challenges
Each floor has unique challenges. Here are tips for a couple of them:
- First Floor (1F): On your first visit, take it slow to learn the layout. Use safe zones to hide from Phantoms and grab the map ASAP. When you come back later, you’ll know exactly where to go.
- Second Basement (B2): The floor switches can be confusing. There are multiple steps to open doors. Memorize the switch location and pay attention to the clues scattered around the floor.
- B3 Floor: You’ll face puzzles with moving platforms. Timing is everything here. Watch the platforms for a few seconds before jumping on. It helps to know the pattern.
Treasure and Item Management
You’ll find useful items and treasures that can help you through the temple. Here’s how to make the most of them:
- Boomerang and Bombs: Essential for taking out smaller enemies and triggering switches from afar. Always have a few bombs with you.
- Spirit Gems: These little green and blue gems upgrade your spirits (such as Power Gems for Leaf). Make sure to grab these, as they can give you an edge in combat.
- Phantom Hourglass: Upgrade it whenever you find more sand. This extends your time limit and eases the pressure.
Using the Grappling Hook
The Grappling Hook is a versatile tool that can be a lifesaver:
- Create Tightropes: Use it to connect two poles and create a tightrope. This can help you avoid Phantoms below.
- Trigger Distant Switches: You can also use the Grappling Hook to hit far-off switches or grab treasure chests that are otherwise unreachable.
Final Boss Tips
The Temple of the Ocean King leads to the final boss battle. Here’s a quick tip:
- Stay on the Move: In the final fight, don’t stay in one place for too long. The boss has powerful attacks that target your position. Keep moving and attack when you see an opening.
Following these strategies will make your next trip to the Temple of the Ocean King much smoother. Keep practicing, stay patient, and you’ll conquer the temple in no time!
That’s it for the key challenges in the Temple of the Ocean King. With these tips, you can shave precious seconds off your time and navigate the temple like a pro. Stick to the plan, and you’ll find yourself breezing through even the toughest floors! Keep playing and good luck!
Using Items to Progress in Zelda: Phantom Hourglass
Welcome adventurers! Let’s dive into one of the most crucial parts of Zelda: Phantom Hourglass – using items to make your journey smoother and more epic. Whether you’re dodging traps or solving puzzles, knowing how to use your items can make all the difference.
The Boomerang: Your Trusty Sidekick
How to Use It
Simply draw a path on the touchscreen to guide your boomerang. It can hit switches, cut ropes, and stun enemies.
Where It Helps
- Switches & Levers: Some switches are out of reach. Use the boomerang to activate them.
- Puzzles: Certain puzzles involve hitting multiple targets in a specific order. A well-aimed boomerang saves time.
- Enemies: Stun enemies from a safe distance before moving in for the melee attack.
Bombs: Kaboom Time
How to Use It
Tap the bomb icon and place it where you need. You can also throw bombs by tapping again after placing.
Where It Helps
- Destroying Barriers: Some walls and obstacles can only be cleared with a bomb. Look for cracks!
- Puzzles: Some puzzles require timing. Place a bomb and watch if it opens a new path or activates a switch.
- Enemies: Tough enemies or clusters can be taken down with a well-placed bomb.
The Grappling Hook: Swing and Sling
How to Use It
Tap two points clockwise or counterclockwise to create a rope bridge or use it for a quick swing.
Where It Helps
- Crossing Gaps: Create bridges between two poles to cross otherwise impossible-to-reach areas.
- Obtaining Items: Grapple onto items that are out of reach.
- Puzzles: Use it creatively to activate multiple switches or move items.
The Hammer: Smash and Bash
How to Use It
Tap on the touchscreen to bring the hammer down hard.
Where It Helps
- Crushing Obstacles: Remove wooden barriers or large rocks.
- Switches: Some heavy switches need the hammer’s force to activate.
- Enemies: Flatten smaller enemies with ease!
The Shovel: Dig It Up
How to Use It
Tap where you want to dig and watch new paths and treasures come to light.
Where It Helps
- Hidden Paths: Some paths are hidden underground. Dig to reveal them.
- Treasure: Buried treasures can be found by digging in suspicious spots.
- Secrets: Certain puzzles and hidden areas require a keen eye and a quick shovel.
The Bow and Arrow: Precision and Power
How to Use It
Hold the arrow icon and draw your bow back, then release to fire.
Where It Helps
- Long-Distance Targets: Hit switches or enemies from a distance, especially when precision is needed.
- Enemies: An effective way to take down flying or fast-moving foes.
- Puzzles: Some puzzles need precise hits in a sequence to be solved.
Conclusion
Success in Zelda: Phantom Hourglass largely depends on how well you use your items. Each dungeon and puzzle is crafted to make you think about the right tool for the right job. So keep experimenting, stay curious, and may your adventure be legendary!
Next up: How to conquer the Temple of the Ocean King without losing your marbles (or your health)!
Got stuck using an item? Leave a comment, and our community’s seasoned adventurers will point you in the right direction!
Managing Health and Time in the Temple of the Ocean King
The Temple of the Ocean King in The Legend of Zelda: Phantom Hourglass can be a daunting place. Its unique combination of a ticking clock and progressively tougher enemies means you need to be smart about how you manage both your health and time. Don’t worry, we’ve got you covered with these handy tips.
Keep an Eye on Your Health
Health management in the Temple is crucial. Here’s how you can keep those hearts full:
1. Collect Safe Zones
Some rooms in the Temple of the Ocean King have Safe Zones where the Sand of Hours doesn’t drain from your hourglass. Use these zones strategically to plan your next move and avoid any unnecessary damage.
2. Potions and Fairies
Stock up on potions before you enter the temple. Visit Beedle’s shop ship and spend some Rupees on Red Potions, which can restore your health when needed. Capturing fairies with your boomerang and keeping them in bottles is another great way to have backup health.
3. Watch Out for Traps
There are many traps in the Temple that can chip away at your health. Look out for spikes on the ground, rolling boulders, and other environmental hazards. Move carefully and use your map to plan the safest path.
4. Fight Smart
When you encounter enemies, minimizing damage is key. Use long-range weapons like the boomerang or bow to deal with them from a distance. Also, utilizing the dungeon items effectively, such as the Bombchu or Grappling Hook, can help you avoid taking hits.
Managing Time
Managing your time in the Temple of the Ocean King is equally important.
1. Farm Time Extensions
Certain enemies drop Sands of Hours, which can extend your time in the temple. Look for these foes, defeat them, and grab the time extensions. Every second counts!
2. Use Fast Routes
As you progress and unlock shortcuts in the Temple, use these to save time. Memorize the layout and use the shortcuts to skip parts you’ve already explored.
3. Prioritize Goals
Focus on the main objectives in each visit to the Temple. Whether it’s finding a particular item or reaching a new level, know your goal before you start. This helps prevent aimless wandering, which wastes precious time.
4. Return Strategically
Use the hourglass wisely. If you find your sand running low, it might be better to exit and refill it before taking on deeper parts of the temple. Don’t overextend yourself; leaving and coming back prepared is often better than pushing your luck.
5. Phantom Guards
Phantom Guards are dangerous but can be tricked to buy you time. Use Phantom Eyes to track their movements. If you alert a guard, lead it to a different area and then backtrack to continue your journey.
Final Tips
- Plan Ahead: Before entering, map out your strategy. Decide the key items you need and the routes you’ll take.
- Save Often: Use the DS’s quick-save feature to save your progress regularly. This way, if you encounter trouble or run out of time, you won’t lose much progress.
- Stay Calm: It can get intense, but staying calm will help you think clearly and conserve more time and health.
Master these tips, and you’ll find the Temple of the Ocean King becoming less of an intimidating challenge and more of an exciting adventure. Happy exploring!
Zelda: Phantom Hourglass: Temple of the Ocean King Guide
Unlocking Temple Secrets
Navigating the Temple of the Ocean King in The Legend of Zelda: Phantom Hourglass can be tricky, but with the right tricks and tips, you’ll unlock all its secrets. This guide will help you breeze through the temple, avoiding traps and maximizing your time.
Timing is Everything
The Temple of the Ocean King is on a clock. Every second counts because the Phantom Hourglass only offers a limited amount of protection from the temple’s life-draining curse. Pay attention to the time you have and always look for ways to extend it:
- Collect Sand of Hours: These items add minutes to your Phantom Hourglass. Gather as many as you can to give yourself more time.
- Safe Zones: The glowing floor tiles are safe zones where time doesn’t pass and Phantoms can’t see you. Use these to scout the area, plan your next move, and catch your breath.
Stealth and Strategy
Enemies known as Phantoms patrol the temple. They are invincible and can deal a lot of damage if they catch you. Use stealth and strategy to stay hidden and move past them:
- Stay Silent: Use the stylus to move quietly. Sharp, sudden moves can alert Phantoms, so keep it smooth.
- Distraction Items: Items like the Boomerang or Bombs can distract Phantoms, giving you a chance to slip by unnoticed.
- Look for Patterns: Phantoms follow set patrol routes. Watch their patterns and slip past when there’s an opening. Some floors have safe zones that you can hide in until it’s safe to move.
Switches and Doors
The temple is full of puzzles involving switches and doors. Here’s how to crack them:
- Color-Coded Switches: Often, you’ll need to hit switches in a certain order. Pay attention to the symbols and colors because they often indicate the order.
- Pressure Plates: Some switches require items or even enemies to be placed on them to activate doors or other mechanisms. Experiment with crates, pots, or even luring Phantoms.
- Maps and Clues: Clues are everywhere. Sometimes you’ll find maps with hints for pressing switches or solving puzzles. Read every map and scroll for crucial information.
Special Items
Certain items will help you unlock temple secrets more effectively:
- Bombs: Reveal hidden passageways by blowing up cracked walls.
- Boomerang: Activate distant switches without approaching. Draw a path for the Boomerang with your stylus to hit tricky targets.
- Grappling Hook: Later in the game, this item can be used to swing across gaps or trigger far-off switches.
Secret Areas and Treasures
Don’t just rush through the temple; explore! Secret areas and treasures are scattered all over:
- Hidden Rooms: Walls and floors that look different often conceal hidden rooms. Tap suspicious areas with your sword to uncover secrets.
- Treasure Maps: Some treasure maps lead to hidden treasure chests within the temple. Follow the maps carefully.
- Courage Gems: Collect these to power up the Phantom Hourglass. These gems are often in out-of-the-way places but are worth the detour.
Pro Tips
- Phantom Zones: Later floors introduce Phantom Eyes—floating enemies that can call Phantoms. Take them out first by throwing your Boomerang, or avoid them entirely.
- Shortcut Jumps: Some higher floors allow you to jump back down to lower floors, creating shortcuts for future visits.
- Return Visits: You’ll come back to the temple several times. Each visit, bring new items and powers to reach previously inaccessible areas.
Unlocking the secrets of the Temple of the Ocean King requires patience, stealth, and careful planning. Follow these tips, and you’ll come out with all the treasures and no time wasted. Happy adventuring!