
Welcome to “Xenoblade Chronicles: Journey Through Bionis”—your ultimate guide to mastering life on the titan Bionis. Plunge into the vast, awe-inspiring world of Xenoblade Chronicles armed with expert strategies and insights. Our comprehensive guide covers everything from “Understanding Basic Controls” to help you get started, to “Navigating the Game World” for seamless exploration. Discover the secrets of “Key Locations and Their Challenges,” learn essential tips for “Managing Health and Resources,” and become proficient in “Strategies for Enemy Encounters.” Dive in and transform your journey through Bionis into an unforgettable adventure!
Understanding Basic Controls
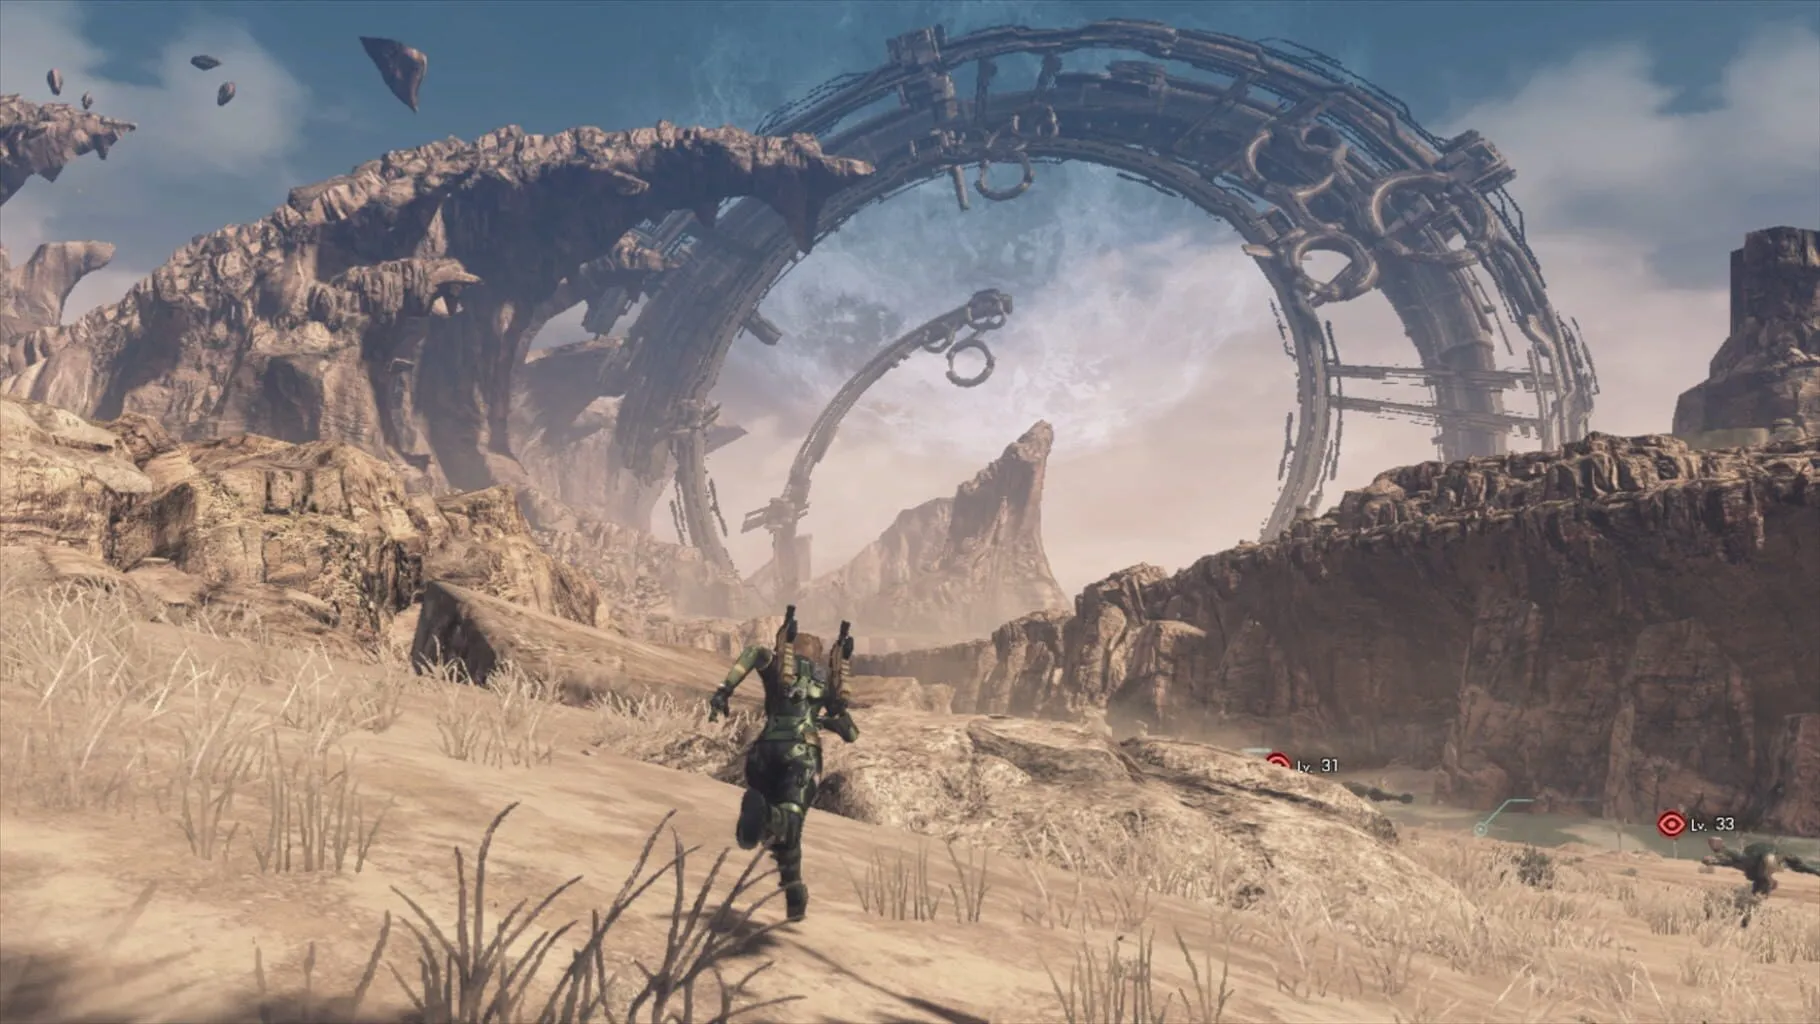
Navigating through the sprawling landscapes of Xenoblade Chronicles can be daunting at first, but once you get the hang of the controls, it becomes second nature. Here’s a breakdown to get you started, whether you’re combating fierce creatures or just exploring the stunning world of Bionis.
Movement and Camera
Left Analog Stick: Moves your character around. Simple enough, push the stick in the direction you want to go.
Right Analog Stick: Controls the camera. This is vital for getting a good view of your surroundings, especially in busy combat scenarios. Tilt it up to look up, down to look down, and so on.
L Button + Right Analog Stick: Adjusts the camera’s height and angle. Perfect for those epic landscape shots or spotting enemies from afar.
Basic Actions
A Button: The universal action button. Use it to talk to NPCs, pick up items, and interact with objects in the world.
B Button: Jump. Because sometimes you just gotta leap that gap or dodge an incoming attack.
X Button: Opens the menu. Here you can access your inventory, equipment, and much more.
Y Button: View map. Toggle this to get a better sense of where you are and where you need to go.
Combat Controls
Combat is where things get really exciting. Here’s how to manage your party and unleash powerful attacks:
ZR Button: Locks onto a target. Essential for focusing your attacks on the right enemy, especially in a crowded battle.
A Button (during combat): Use Arts. After selecting an enemy and locking on, you’ll want to unleash your character’s special abilities (referred to as Arts). Select the Art you want with the D-pad, then press A to use it.
ZL Button: Sets up Party Commands. This lets you direct your team to focus on different tasks, like healing or attacking a specific enemy.
D-Pad (Left/Right): Scroll through your Arts. Use this to select the Art you want to use next.
ZR + D-Pad (Up): Switch targets. If things aren’t going as planned with your current enemy, switch to another target seamlessly.
B Button (during combat): Encourages an ally. If an ally’s morale drops, or they need a little boost, press B when prompted.
Special Controls
ZR + Y Button: Access the Talent Art. Each character has a unique Talent Art, a powerful ability that can turn the tide of battle. Use it wisely!
ZR + X Button: Chain Attacks. When your Party Gauge is full, initiate a Chain Attack to deal significant damage by linking your party’s Arts together.
ZR + B Button: Initiate a Vision Break. This lets you prepare for and counter powerful enemy attacks that you foresee.
Other Handy Shortcuts
Minus Button: Quick save. Be sure to do this regularly to safeguard your progress, especially before big fights or venturing into dangerous areas.
Plus Button: Pause. Need a quick breather? Use the Plus Button to pause the game at any moment.
R Button: Reset camera. If your camera gets wonky, just hit R to snap it back to your character.
Remember, practice makes perfect. Spend some time getting used to these controls in a safe area before diving headfirst into tougher battles. Once you’ve got these basics down, you’ll find yourself slicing through enemies and saving the world of Bionis with flair. Happy adventuring, heroes!
Xenoblade Chronicles: Journey Through Bionis
Navigating the Game World
In Xenoblade Chronicles, exploring the vast and immersive world of Bionis is one of the most rewarding experiences. Whether you’re scaling the heights of the Bionis’ Leg or plunging into the deep forests of Makna, here’s how to navigate this sprawling landscape like a pro.
Using the Mini-Map and Full Map
Your mini-map, located in the top-right corner of the screen, is your best friend. It displays crucial information such as key landmarks, quest markers, and enemy locations. It’s essential to glance at it frequently to stay on track.
For a more detailed view, you’ll want to pull up the full map. To do this, press the X button to open the menu, then select Map. The full map lets you zoom in and out, and it also has handy icons marking towns, landmarks, and quest objectives. Be sure to check it out whenever you enter a new area.
Fast Travel to Save Time
Bionis is huge, and running from point A to point B can eat up a lot of your time. Luckily, Xenoblade Chronicles has a super convenient fast travel system. You can teleport to any landmark or location you’ve already discovered.
To fast travel, open your map and select the location you want to teleport to. Press A to confirm, and voilà — you’ll be whisked away in seconds. Make sure to discover as many landmarks as possible so you can hop around the map with ease.
Knowing Your Landmarks
Landmarks are more than just pretty vistas. They serve as crucial points for fast travel and checkpoints for quests. As you venture through Bionis, always be on the lookout for these icons on your mini-map:
- 🏙️ City Icon: Towns and larger settlements.
- 🏔️ Mountain Icon: Notable geographical features or high points.
- 🔄 Circular Arrows: Fast travel points scattered around more obscure locations.
Whenever you see these, make sure to approach them until you get a notification that it’s been added to your map.
Sidequests and Secondary Objectives
One of the great joys in Xenoblade Chronicles is stumbling across sidequests and secondary objectives. These are marked on your map with blue exclamation points. They can range from simple fetch quests to complex, multi-part stories.
Completing sidequests not only helps you level up but also immerses you deeper into the world and its lore. Make a habit of checking your map and mini-map for these markers and pick up quests whenever you’re in a new area.
Environmental Hazards and Unique Monsters
Bionis is not without its dangers. Different regions have unique environmental hazards, like poisonous swamps or high-level enemy territory. Pay close attention to the following tips to stay safe:
- Environmental Indicators: Poisonous areas have a distinct, sickly green color. Avoid lingering in them unless you have immune items or skills.
- Unique Monsters: High-level unique monsters roam various zones and have unique names over their health bars. They are often much stronger than regular enemies, so it’s best to avoid them until you’re leveled up and prepared for a tough fight.
Navigating Vertical Spaces
Bionis has impressive verticality. Some quests and locations might be above or below your current altitude. Look out for markers and paths that lead up or down. Rope ladders, climbable vines, and secret passages are your friends in these areas. Always be on the lookout for ways to change elevations.
Conclusion
Navigating the world of Bionis in Xenoblade Chronicles is all about making the most of your maps, fast travel, and keeping an eye out for landmarks and hazards. By following these tips, you’ll traverse this captivating world with ease, uncovering its secrets and enjoying its rich lore. Happy exploring!
Key Locations and Their Challenges in Xenoblade Chronicles
Colony 9
Overview
Colony 9 is your starting point in Xenoblade Chronicles. It’s a peaceful settlement at the foot of the Mechonis, providing a perfect introduction to the game’s mechanics and story.
Challenges
- Basic Combat: Initially, you’re up against low-level monsters like Wood Bunnits. This is your chance to get a feel for the combat system.
- Side Quests: Early-game fetch and kill quests will help level up your party and introduce you to the NPCs.
- Turkin Headquarters: Your first mini-dungeon, which plays a crucial role in teaching party mechanics and strategy.
Tephra Cave
Overview
After leaving Colony 9, you’ll find yourself navigating the Tephra Cave. This dark, winding labyrinth introduces you to more complex layouts and stronger enemies.
Challenges
- Spawning Brogs: These mid-level enemies can be a handful. Watch out for their poison attacks.
- Jelly Frontier: The cave is filled with Gel-like creatures that can slow you down with their sticky attacks.
- Subterranean Xord, the Boss Fight: The cave culminates in a tough boss battle that tests your command of the game’s mechanics. Be sure to equip your party with anti-Daze gems!
Bionis’ Leg
Overview
Moving on from the cave, Bionis’ Leg is a vast, open area filled with new opportunities and dangers. It’s a massive area with a stunning view of the sword held by the Mechonis.
Challenges
- Aggro Management: Large monsters roam the fields, including Territorial Rotbart, a super boss that can wipe your party if you’re not careful.
- High Entia Tomb: This area within Bionis’ Leg serves as a mini-dungeon with puzzles and tougher enemies.
- Colony 6 Reconstruction: Start rebuilding Colony 6 by collecting resources and completing quests. It’s a long-term commitment that pays off.
Satorl Marsh
Overview
Satorl Marsh is a breathtaking area, especially at night when the swamp glows. Don’t let its beauty deceive you; the Marsh is filled with tricky enemies and thick fog.
Challenges
- Environmental Hazards: Fog and swamp water deal constant damage. Stay on the paths to avoid unnecessary HP loss.
- Nocturnal Predators: Be wary of night-time creatures. They’re stronger and more aggressive than their daytime counterparts.
- Sleeping Dragon: There’s a quest where you’ll have to sneak past a sleeping dragon, which requires careful timing and strategy.
Eryth Sea
Overview
The floating islands of Eryth Sea feel like a dream, but don’t let your guard down. The high-level makna creatures here mean business.
Challenges
- Aerial Combat: Levels here increase encounters with flying monsters. Airtime can make targeting more difficult, so practice!
- Hidden Pathways: Navigation is tricky with invisible paths that you can only see with specific items.
- Fighting to Move Forward: Some paths are blocked by powerful monsters that require clearing to progress.
Valak Mountain
Overview
Known as the frozen domain, Valak Mountain is a chilling high-altitude region that tests your endurance and preparedness.
Challenges
- Freezing Temperatures: This affects HP regeneration. Make sure to have healing items and skills ready.
- Avalanche Beyond: Certain paths have avalanches that periodically fall, inflicting heavy damage or blocking the way.
- Frost Nebula Boss: A tough, ice-based boss that requires thermal protection. Equip your party with heat-based attacks and armor.
Fallen Arm
Overview
One of the most mysterious locations, the Fallen Arm is a lower-level area of Mechonis. It’s a mechanical wonderland filled with Advanced Mechon.
Challenges
- Mechanized Enemies: You’ll face tougher, more advanced Mechon that require specific tactics to defeat.
- Repair Point Locations: Scattered repair stations offer vital upgrades and repairs for your party.
- Mechonis Field Entrance: The gateway to the next story arc, guarded by powerful foes.
Conclusion
Each area in Xenoblade Chronicles presents its own unique set of challenges and requires strategic planning to navigate and conquer. From the rolling hills of Bionis’ Leg to the icy cliffs of Valak Mountain, your journey is filled with dynamic environments and foes. Prepare yourself, adapt your strategies, and enjoy the adventure that awaits!
Dive into each location with this guide in hand, and you’ll be well-equipped to handle the trials that come your way!
Managing Health and Resources in Xenoblade Chronicles
Exploring the massive world of Xenoblade Chronicles can be a bit overwhelming, especially when it comes to managing your health and resources. But don’t worry, we’ve got you covered! Here’s everything you need to know about staying healthy and well-equipped as you journey through Bionis.
Health: Keeping Your Party Alive
HP and Healing Arts
Every character in your party has a health bar filled with HP (Hit Points). When your HP hits zero, your character gets incapacitated. To avoid this, keep an eye on everyone’s health during battles.
- Healing Arts: Some party members, like Sharla, specialize in Healing Arts, which are abilities that restore HP.
- Use Potions: Make good use of healing potions. You can buy these from most shops or find them in treasure chests scattered across the world.
- Reviving Allies: If a character falls in battle, you can revive them with another party member’s help. This costs a bit of your Party Gauge, which you’ll find is super valuable in tough fights.
The Party Gauge: Your Best Friend
The Party Gauge is displayed as a blue bar at the top-left of the screen and is split into three segments.
- Revive Allies: Use one section to bring a fallen ally back into action.
- Chain Attacks: When filled, unleash powerful Chain Attacks, which can turn the tide of battle in your favor. Chain Attacks also provide amazing damage when executed just right with timed button presses.
Keep the Party Gauge topped off by landing critical hits and successfully dodging attacks.
Managing Resources: Collect and Conserve
Ether Crystals and Cylinders
Ether Crystals are essential for crafting gems, which you can slot into your equipment to boost stats.
- Collecting Crystals: Find these crystals in caves, from defeated enemies, or mining points.
- Crafting: To create gems, visit an Ether Furnace like the one in Colony 9. You can combine Ether Cylinders here to make the perfect gem to enhance your weapons and armor.
Inventory Management
Your inventory will get cluttered fast if you’re not careful. Here’s how to avoid a mess:
- Sell Unwanted Items: Regular trips to the shops to offload junk items can net you extra cash and keep your inventory clean.
- Quest Items: Some items may seem useless but are actually part of quests. Double-check before selling!
- Gear Up: Equip your party with the best weapons, armor, and gems. New gear often drops from enemies or can be purchased.
Affinity: Bonding With Your Party
Building Relationships
Affinity is the bond between your party members and can significantly impact your performance in battle.
- Heart-to-Hearts: Special conversations known as Heart-to-Hearts can be found all over Bionis. Completing these will boost Affinity between characters.
- Liking Each Other: Members with high Affinity will work better together in combat, unlocking new skills and improving teamwork during Chain Attacks.
- Side Quests: Completing side quests also boosts Affinity, so be sure to help out those NPCs you encounter.
Saving and Planning Ahead
Always remember to save your game frequently. The world of Bionis is full of surprises, and sometimes, things won’t go as planned.
- Frequent Saves: Save before big battles or when entering new regions.
- Multiple Slots: Use multiple save slots to avoid backtracking too much if things go south.
Tips to Consider
- Watch the Environment: Weather and time of day can affect enemy behavior and quests. Plan accordingly.
- Use Landmarks: Fast travel between landmarks makes resource management easier and saves time.
- Experiment with Strategies: Don’t be afraid to switch up your party lineup and strategies until you find what works best.
By keeping a close watch on your health, smartly managing your resources, and building strong bonds between your party members, you’ll be well-prepared to tackle the challenges that Xenoblade Chronicles throws your way. Happy adventuring!
Strategies for Enemy Encounters
Navigating the sprawling world of Xenoblade Chronicles means running into a ton of different enemies. Here are some solid strategies to help you tackle these foes and keep your adventures on track.
Understanding Enemy Types
Before diving into fights, it’s crucial to know what you’re up against:
- Normal Enemies: These are your everyday foes. They usually won’t give you much trouble unless you’re under-leveled.
- Elite Enemies: Marked with a golden icon, they’re stronger than normal enemies and often have better loot.
- Unique Monsters: These mini-bosses can be tough. They have specific names and drop rare items.
- Bosses: Major fights in the story. Each boss has unique mechanics and is significantly more challenging.
Team Composition
A well-balanced team can make all the difference:
- Tanks: Characters like Reyn can soak up damage. Keep him geared and leveled.
- Healers: Sharla is your go-to for healing. Make sure her Arts are up-to-date.
- DPS (Damage Per Second): Shulk and Dunban are great for dealing damage. Positioning and skill rotation are key here.
Battle Tactics
Pre-Battle Preparation
- Check Levels: Always make sure you’re not wildly under-leveled for the area you’re in. A few levels can make a big difference.
- Equip the Right Gear: Use gear that boosts your primary stats and adds useful effects like increased HP or attack power.
During Battle
- Positioning: Position characters based on their roles. For example, Shulk does more damage when attacking from the side or back.
- Use Chain Attacks: Build up your party gauge by landing critical hits and utilizing high affinity boosts. Chain attacks can turn the tide.
- Art Management: Use your Arts (special abilities) wisely. Don’t spam them. Cooldowns are crucial, and using the right Art at the right time can be a game changer.
- Aggro Management: Keep an eye on aggro. Tanks should keep enemies focused on them, freeing up your DPS to do their job without getting hit.
Environmental Awareness
Sometimes the environment plays a big role in battle:
- Lures and Hazards: Look out for things like poisonous gas or lava pits, which can either harm you or be used to your advantage.
- Escape Routes: Know when to fight and when to run. If you’re about to get overwhelmed, fleeing might just save your life.
- Time of Day: Some enemies are stronger or behave differently depending on whether it’s day or night.
Strategies for Specific Enemy Types
Mechon
- Use Enchant: Shulk’s Enchant ability is critical for dealing damage to Mechon.
- Break and Topple: Use Shulk’s “Break” Arts to set up Reyn’s “Topple” Arts to incapacitate Mechon for a short time.
Aerial Enemies
- Use Ranged Attacks: Characters like Sharla can hit airborne enemies more easily. Focus on ranged Arts to bring them down.
Multiple Enemies
- Focus Fire: Concentrate on taking out one enemy at a time to reduce their numbers quickly.
- Area-of-Effect (AoE) Abilities: Use AoE abilities to damage multiple enemies at once, making fights with groups more manageable.
Final Tips
- Grind Smart: If you’re struggling, spend some time leveling up and collecting better gear.
- Affinity Boosts: Increase party affinity by completing side quests and maintaining good relationships among party members. This boosts morale and battle effectiveness.
- Know When to Use Party Gauge: The party gauge can revive fallen comrades or execute powerful chain attacks. Use it wisely depending on the situation.
Tackle every enemy encounter with these strategies, and you’ll be well on your way to mastering the world of Xenoblade Chronicles. Good luck out there, and may your journey through Bionis be legendary!