
Embark on an epic journey with our comprehensive ‘Uncharted 2: Among Thieves Walkthrough’! Whether you’re a first-time explorer or a seasoned adventurer, our guide will lead you through every twist and turn of Nathan Drake’s thrilling quest. Dive into ‘Starting Your Adventure’ to set up your game right, discover ‘Key Locations and Challenges’ that will test your skills, master ‘Using Abilities and Weapons Effectively’, conquer formidable foes with ‘Strategies for Boss Battles’, and unearth hidden secrets by ‘Unlocking All Treasures’. Ready to uncover the secrets of the ancient world and outsmart your enemies? Let’s get started!
Starting Your Adventure
Welcome to the adrenaline-pumping world of Uncharted 2: Among Thieves! Get ready to dive into a thrilling adventure with Nathan Drake. Here’s how you get started on your journey.
Prologue: A Rock and a Hard Place
You start in a pretty rough spot—seriously, Nathan Drake is hanging off the edge of a cliff! This gripping prologue sets the tone for the game’s action-packed narrative. Here’s what you need to do:
- Stay Calm and Climb On: Follow the on-screen prompts to climb up the dangling train car. It’s a bit nerve-wracking, but take your time to get familiar with the controls. Moving the joystick and pressing the jump button will help Nathan navigate this treacherous beginning.
- Watch Your Step: The train car is unstable, so some sections might fall apart. Keep an eye out for any visual cues and move quickly to avoid falling.
Learning The Basics
Once you’re off the cliff edge, the game will gently guide you through its mechanics. Let’s walk through some key elements:
Movement and Exploration
- Stick to the Joystick: Use the left analog stick to move Nathan around. The right stick controls the camera. Get comfortable with both for smooth exploration.
- Jump and Climb: Press the ‘X’ button to jump and climb. You’ll need to use this often as you scale obstacles and navigate tricky terrains.
- Interacting with Objects: The triangle button allows you to interact with objects. This could be anything from picking up treasures to moving items out of your way.
Combat Basics
Early on, you’ll learn how to handle combat. Here’s a quick rundown:
- Aiming and Shooting: Hold L1 to aim and press R1 to fire your weapon. Use L2 for precision aiming if needed.
- Take Cover: Press Circle to take cover behind objects. This is crucial for avoiding enemy fire.
- Melee Attacks: Press Square for melee attacks when up close to an enemy. Combos can be performed by tapping Square repeatedly.
The Opening Scenes
As you progress, you’ll watch some compelling cutscenes that set up the backstory. Pay attention to these—they provide valuable context and help you get immersed in Drake’s world.
- Flashback Sequences: Right after the cliffhanger intro, the game takes you back to explain how Nathan got there. These scenes are helpful for understanding the plot and characters.
- Meeting Old Friends: You’ll meet familiar faces like Sully and new ones like Chloe. Take note of their interactions as they offer hints about the story and gameplay.
Getting Equipped
Before diving deeper into the game, ensure you know how to manage your inventory and gear:
- Weapons: Throughout the game, you’ll come across various weapons. Swap out weaker weapons for more powerful ones as you find them.
- Health: Keep an eye on Nathan’s health. If you take too much damage, find cover and wait for your health to recover slowly. There aren’t any health packs, so be cautious!
Quick Tips for Starting Strong
- Explore Thoroughly: Look around every corner for hidden treasures. They not only boost your score but also give you more backstory.
- Stay Agile: Uncharted 2’s environments are interactive. Climb, jump, and swing your way around to avoid enemies and find alternative routes.
- Make Use of Stealth: Sometimes, it’s better to take down enemies quietly. Use stealth attacks to keep things tidy and manageable.
And there you have it! You’re now ready to start your adventure in Uncharted 2: Among Thieves. Keep an eye out for the stunning visuals and heart-pounding moments that make this game an absolute blast. Happy exploring, and good luck on your quest with Nathan Drake!
Key Locations and Challenges
Uncharted 2: Among Thieves is packed with stunning places and thrilling challenges that will keep you on the edge of your seat. Let’s dive into some of the most exciting spots you’ll explore and the obstacles you’ll face in the game.
The Train Sequence
Arguably one of the most iconic sequences in the game, the train level is an adrenaline rush from start to finish. Nathan Drake finds himself leaping from car to car, battling enemies, and dodging obstacles in this heart-pounding sequence. Here’s what to look out for:
Challenges
- Enemies with RPGs and Gatling Guns: Keep moving to avoid being an easy target. Use cover effectively and take out the RPG enemies first since they can hit you from afar.
- Shifting Cars: Cars will sometimes shift and present new paths or obstacles. Stay alert and be ready to jump or climb to avoid falling off.
- Helicopter Boss: Near the end, a helicopter will attack. Use the mounted turret found in one of the cars to deal significant damage to it, but stay mobile as the train’s movement can knock you off balance.
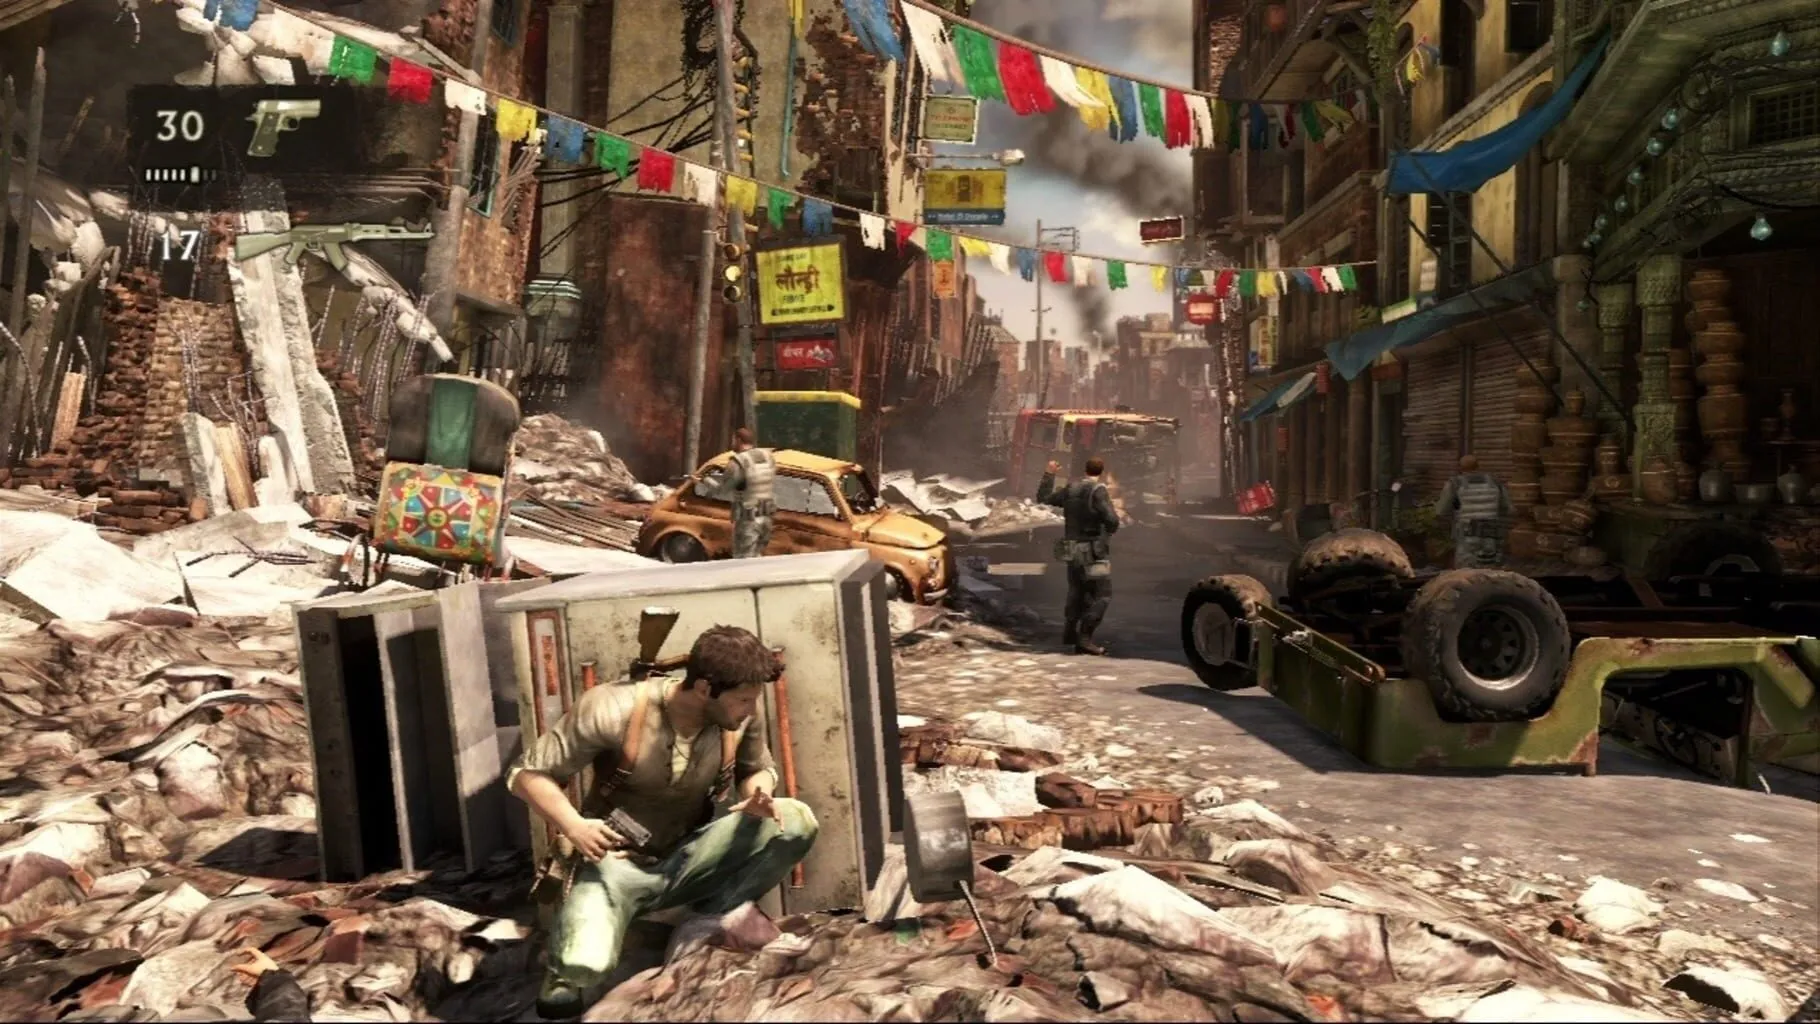
War-Torn Nepal
Nepal’s war-torn cityscape is both a beautiful and dangerous playground. As you navigate destroyed buildings and streets, keep an eye out for surprises.
Challenges
- Snipers: These sharpshooters will pin you down if you’re not careful. Make them your priority and take them out quickly—preferably with a sniper rifle or by sneaking up to their perch and taking them down in close combat.
- Puzzle Areas: The game integrates environmental puzzles that require you to move objects or interpret ancient symbols. Take your time to study the area; often, the solution involves thinking vertically as well.
- Ambushes: Streets and buildings can turn into trap zones. Always ensure you have plenty of cover and conserve your ammo by going for headshots and using environmental hazards to your advantage.
Tibetan Snowfields
The icy landscapes of Tibet are both breathtaking and treacherous. Here, you’ll face environmental hazards and deadly foes.
Challenges
- Avalanches: Certain parts of this level will trigger avalanches. Stay behind cover or move swiftly to avoid being buried under the snow.
- Yeti Encounters: Mythical yetis (which are actually armored enemies in disguise) appear in this area and are incredibly tough. Focus on shooting weak points, or better yet, use stealth to bypass them.
- Climbing Challenges: The icy cliffs and precarious ledges require careful navigation. Make sure you time your jumps, and always look for handholds.
Shambhala
The mystical city of Shambhala is the final gauntlet. It’s visually stunning and filled with the toughest enemies.
Challenges
- Guardians: Hulking blue guardians are immune to conventional attacks. Use resin sap explosives to damage them. Lure them into traps and use incendiary weapons when you can.
- Resin Sap Explosives: These glow in a distinctive blue and can be shot to create massive explosions. Look for opportunities to lure multiple enemies into these traps.
- Final Boss (Lazarevic): The climactic battle with Lazarevic is intense. Use the environment to your advantage, particularly the explosive sap pockets. Keep moving, as staying still makes you an easy target.
Strategies for Tough Challenges
- Use Cover Effectively: Throughout the game, mastery of cover mechanics can make a significant difference. Always move from cover to cover and peek out only for shots.
- Conserve Ammo: Ammo can be scarce, so make every bullet count. Prioritize headshots and switch to melee when possible to save bullets.
- Environmental Awareness: Each area has unique environmental hazards and opportunities, from exploding sap in Shambhala to shifting train cars. Use these factors to your advantage whenever possible.
By keeping these key locations and challenges in mind, you’ll be better prepared to tackle the many adventures awaiting you in Uncharted 2: Among Thieves. Good luck!
Using Abilities and Weapons Effectively
So you’re jumping into the action-packed world of Uncharted 2: Among Thieves, and you want to make sure Nathan Drake is the ultimate adventurer. Knowing how to use your abilities and weapons effectively is key to surviving and thriving. Let’s break it down.
Abilities - Think Like an Adventurer
Climbing and Traversal:
- Use the Environment: The game’s environments are designed with traversal paths in mind—look for ledges, ropes, and ladders. If you see a yellow or white area, it usually means you can climb it.
- Speed Over Style: When enemies are around, move quickly and avoid hanging around in one spot for too long. Use cover spots and try to stay above your foes.
Stealth:
- Silent Takedowns: When possible, approach enemies from behind for a quiet takedown. This saves ammo and avoids alerting others.
- Stick to Shadows: Use the environment to your advantage by staying in dark or hidden areas. Pay attention to enemy patrol patterns and move when their backs are turned.
Using Cover:
- Stay Low and Move Fast: Duck behind cover during shootouts and pop up only to fire. Moving between cover spots reduces the chance of being hit.
- Use Blind-Fire: If an enemy is too close, blind-fire your weapon from behind cover. It’s less accurate but keeps you safe.
Weapons - Packing the Right Heat
Handguns:
- Versatile in Close Combat: Handguns are great for quick shots when enemies get too close. They’re often your fallback weapon.
- Headshots Count: Aim for the head to conserve ammo and take down foes faster.
Rifles and SMGs:
- Balanced Firepower: Rifles are useful for mid-range combat and are generally more accurate. SMGs provide rapid fire but can expend ammo quickly.
- Burst Firing: Aim in short bursts to maintain accuracy and manage ammo.
Shotguns:
- Devastating Up Close: Shotguns are extremely powerful at close range. Use them when you need to clear a tight space quickly.
- Hit and Run: After firing, move quickly to a new position to avoid returning fire while reloading.
Sniper Rifles:
- Long-Range Precision: Ideal for picking off distant enemies before they can close in on you.
- Find a Good Vantage Point: Use higher ground or secluded spots to snipe without being easily detected.
Grenades - A Toss for Every Occasion
Frag Grenades:
- Clear Out Groups: Use them to deal with clusters of enemies behind cover.
- Cook the Grenade: Hold the throw button for a few seconds before tossing to reduce the time enemies have to react.
Flashbangs:
- Disorient and Conquer: Use flashbangs to blind enemies, giving you a window to rush in or reposition.
Tips for Ammo Management
Collect from Fallen Enemies:
- Always check bodies for extra ammo and weapons. It’s like a treasure hunt after a skirmish.
Conserve Bullets:
- Only shoot when you have a clear shot. Randomly spraying bullets will leave you dry in critical moments.
Swap Weapons Strategically:
- Switch out weaker or low-ammo weapons for better-equipped options you find along the way. Adapt to the situation.
Mastering Your Skills
Combining these abilities and weapon strategies will make Nathan Drake the unstoppable force he’s supposed to be. Remember: stay nimble, think smart, and use your resources wisely. Practice makes perfect, so keep improving as you delve deeper into Uncharted 2: Among Thieves. Keep these tips in mind, and you’ll outsmart and outgun your foes with ease. Happy adventuring!
Strategies for Boss Battles
In Uncharted 2: Among Thieves, boss battles are some of the most heart-pounding moments. Here are some tips and tricks to help you take down these formidable foes.
Guardians in the Temple of the North
The Guardians are some of the trickiest enemies. They have crazy speed and can throw projectiles that explode on impact. Here’s how to beat them:
- Keep Moving: Staying in one place is a big no-no. The Guardians’ projectiles can deal huge damage, so keep running and jumping to avoid getting hit.
- Shoot the Blue Orbs: Focus your fire on the glowing blue orbs on the Guardians’ bodies. These are their weak spots and will cause more damage than shooting them elsewhere.
- Use the Environment: Use cover to your advantage. Duck behind broken pillars or walls to temporarily avoid damage and get a breather.
- Equip the Right Weapons: Shotguns are your best friend here. They deal massive damage up close, which is essential when the Guardians rush you.
Tank in the Trainyard
This heavily armored brute with a minigun can be super intimidating, but don’t worry, you got this.
- Keep Your Distance: The tank’s minigun is deadly in close range. Stay back and use your surroundings to stay out of its line of fire.
- Aim for the Weak Spots: Just like with the Guardians, look for weak spots. Specifically, aim for the machine guns on the sides and the back.
- Use Grenades Wisely: Conserve your grenades for when you have a clear shot at the weak spots. Blindly throwing them won’t do much.
- Patience is Key: This fight is more about endurance. Keep chipping away at its health while avoiding its directed attacks.
Dagger-Wielding Brute in the Bunker
This mid-game boss is fast, strong, and has a killer knife. Here’s what to do:
- Stick and Move: This guy loves close combat. Keep your distance, shoot him when you can, and move before he can counter.
- Use Explosives: Grenades and propane tanks are effective. Use them when he’s grouped with other enemies to maximize damage.
- Aim for the Head: Headshots do the most damage here. Save your most powerful guns for this fight to maximize damage.
Lazarevic in the Shambhala Garden
The final boss, Zoran Lazarevic, is a beast thanks to his healing ability from the Tree of Life sap. But you can outsmart him:
- Move Constantly: Lazarevic is not only strong but also throws powerful grenades and charges at you. Keep moving to avoid taking heavy damage.
- Shoot the Blue Resin: He’ll often be near the blue resin that explodes when shot. Use this to your advantage. Shoot the resin to cause massive damage.
- Hit and Run: Don’t try to face him head-on for long. Deal your damage and get out of there before he can retaliate.
- Use Grenades: Save them for when he’s standing near the blue resin or when you need to deal critical damage in a pinch.
Boss battles in Uncharted 2: Among Thieves can be tough, but following these strategies can make them manageable. Keep a cool head, stay on the move, and use your surroundings, and you’ll come out on top!
Unlocking All Treasures
Unlocking all the treasures in Uncharted 2: Among Thieves is a quest that adds hours of exploration and fun to your gaming experience. Here’s a nifty guide to help you hunt down all 101 treasures hidden throughout the game’s chapters. Let’s dive right in.
Treasure Hunting Basics
First off, know that treasures in Uncharted 2 shine when nearby, which makes them a bit easier to spot. Keep an eye on corners, crevices, and sometimes even above you. Using your flashlight in darker areas can also help reveal hidden glints of treasure.
Chapter Breakdown
Chapter 1: A Rock and a Hard Place
- Golden Phurba Dagger: Right at the start when you are hanging from the train, before climbing up, look to your left. There, nestled in the snow, lies your first shiny prize.
- Jeweled Golden Brooch: After Nate climbs past the first train car, look for a small gap in the rocks. The brooch will be lying there.
Chapter 2: Breaking and Entering
Treasures start appearing more frequently here.
- Ceremonial Dagger: After defeating the first set of guards, you’ve got to climb up some boxes. Look to the right, beneath the stairs.
- Silver Spanish Coin: Past the laser traps and before heading up the ladder, search the bottom area near some boxes.
Chapter 3: Borneo
- Silver Fish Charm: As soon as you take control of Nate, turn around and check the stream you just crossed.
- Jade Necklace: After the showdown with the enemies in the ruins, look for a small alcove to your right before you proceed.
Chapter 4: The Dig
- Gold Frog: Early on, Nate will comment on how it looks like a dig site. From this point, keep an eye out for a structure with a wooden ladder; the Gold Frog will be found on a ledge above it.
- Gold Locking Knife: When Sully aims his flashlight at the clue, search the darkened area to the left for this treasure.
Tips to Maximize Your Treasure Hunt
Replay Chapters: Sometimes you’ll miss a treasure or two. Don’t sweat it. You can always replay chapters. Use chapter select to pinpoint exactly where you’re missing items.
Listen Carefully: Occasionally, you might hear audio cues like a bell or chime when you know a treasure is nearby. Make sure your game volume is up to help catch these hints.
Use a trusty guide: If you’re a completionist who can’t stand to miss a single collectible, there are plenty of in-depth guides and maps online that detail every single treasure location.
Chapter-Specific Treasures
Since it’s impossible to cover all treasures in one go, here are some bonus chapter-specific hints:
- Chapter 6 (Desperate Times): Look in unlikely places like underneath bridges and on top of statues.
- Chapter 11 (Keep Moving): Pay special attention to abandoned buildings and high ledges.
By the time you reach the game’s conclusion, if you’ve just kept your eyes peeled and consistently explored every nook and cranny, you should be close to having all the treasures. Happy treasure hunting, and may your journey through Uncharted 2 be filled with gold and glory!