
Welcome to our ‘Phasmophobia: Getting Started Guide’! If you’re ready to embark on a spine-chilling journey into the world of ghost hunting, this guide is your perfect starting point. Dive into the basics of Phasmophobia, where we’ll cover everything you need to know to get your ghost-busting career off to a thrilling start. From mastering the basic controls and navigating the main menu to embarking on your first investigation and picking up essential tips for new players, we’ve got you covered. Prepare yourself for an exhilarating adventure, and let’s get started!
Getting Started - The Basics
So, you’ve decided to dive into the spook-filled world of Phasmophobia. Welcome, brave ghost hunter! Before you run headfirst into a haunted house, there are a few basics you should know to make your experience more enjoyable (and less deadly).
Setting Up Your Game
Download and Install: First things first, you need Phasmophobia on your system. You can find it on Steam. Click that download button and install the game. Easy peasy.
Adjust Settings: Once the game is installed, spend a few minutes tweaking your settings. Go to the options menu and adjust the audio and graphics to fit your preferences. Make sure your mic is working because communication is key in this game.
Select Your Character: Click on the “Change” button to pick your ghost-hunting avatar. This doesn’t affect gameplay, but it’s always nice to look your best when facing ghosts!
Create or Join a Lobby: You can either create your own lobby or join an existing one. Creating allows you to choose the map and difficulty, while joining throws you into someone else’s creepy adventure.
Understanding the Objectives
In Phasmophobia, your main goal is to identify the ghost haunting the location. Here’s what you typically have to do:
- Find Evidence: Use various tools to gather evidence. Three pieces of evidence will tell you what type of ghost you’re dealing with.
- Complete Secondary Objectives: These tasks can range from capturing pictures of ghost activities to witnessing a ghost event.
- Survive: Easier said than done. Ghosts can (and will) hunt you, which can quickly turn deadly.
Your Toolkit
Before you head out, you need to familiarize yourself with the tools of the trade. Here are some basics:
- EMF Reader: This beeps and lights up when paranormal activity is nearby. An EMF Level 5 reading is one piece of evidence.
- Spirit Box: Speak to the ghost. If you get a response, that’s another piece of evidence.
- Ghost Writing Book: Place this down and see if the ghost decides to leave a little message.
- UV Flashlight: Shines a light on hidden fingerprints and handprints—the third type of evidence.
- Camera: Capture pictures of ghost activities to earn extra cash and complete photo-related objectives.
The Map and Environment
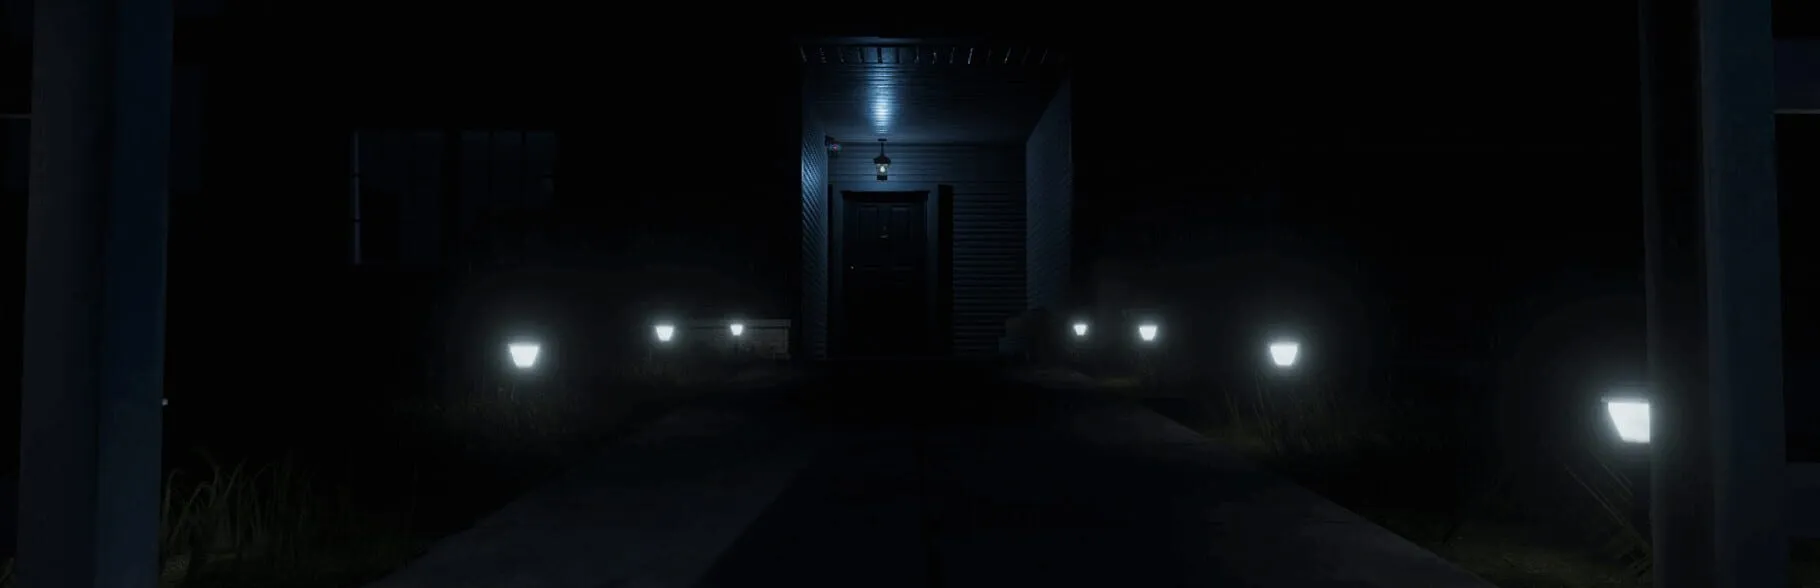
Each map offers a unique, haunted environment ranging from cozy houses to massive asylums. Here’s what you need to know:
- Haunted Locations: Get ready to explore spooky houses, creepy schools, eerie asylums, and more. Each location has its own quirks.
- Hiding Spots: Knowing where to hide when a ghost starts hunting can save your life. Look for closets, lockers, and rooms to duck into.
- Breaker Box: Each location has a breaker box that controls the power. Ghosts have a habit of flipping it off, so make sure to turn it back on to keep the lights working.
Communicating with Your Team
Playing with friends is a huge part of what makes Phasmophobia fun (and a bit less terrifying). Here are some tips:
- Use Your Mic: Communicate clearly with your teammates. Let them know what you find and when you’re getting spooked.
- Stay Together… Or Not: Sticking together can be safe, but splitting up can cover more ground. Decide which strategy works best for your team.
- Watch Your Sanity: The lower your sanity, the more active the ghost. Use sanity pills to keep your wits about you and avoid frequent hunts.
Final Tips
- Stay Cool: Panic can be your worst enemy. Ghosts can sense your fear, so try to stay calm and collected.
- Practice Makes Perfect: Don’t get discouraged if you get KO’d by a ghost early on. Learn from each hunt and you’ll get better.
- Have Fun: It’s a game about hunting ghosts with friends—enjoy the experience, scares, and laughs.
Now you’re ready to jump into your first job. Good luck, and happy hunting!
Understanding Basic Controls
Navigating the haunted venues in Phasmophobia can be tricky, especially when ghosts are lurking around every corner. Getting a grip on the basic controls will make your ghost-hunting experience smoother and help you stay one step ahead of any spectral entities.
Keyboard Controls
Here are the essential keyboard controls you’ll need to master:
- W, A, S, D: These keys will be your primary mode of movement. Use W to move forward, A to go left, S to move backward, and D to go right.
- Shift: Press and hold Shift while moving to sprint. Keep in mind, your character has limited stamina, so use it wisely.
- C: Crouch with this key. Crouching can sometimes help you hide from ghosts or to pick up items closer to the ground.
- E & F: Use the E key to interact with or pick up objects. The F key is particularly useful for placing items like cameras or motion sensors.
- G: To drop an item, press G. This is handy when your inventory is full or you want to strategically place an item on the floor.
- V & B: Use the V key to speak in local chat and B to use the global walkie-talkie. Communication with your teammates is key in Phasmophobia.
Mouse Controls
Your mouse is crucial for looking around and interacting:
- Mouse Movement: Move your mouse around to look in different directions or to aim your flashlight.
- Left Click: Use this button to interact with objects, like opening doors or turning on/off your flashlight.
- Right Click: This typically activates your held item’s secondary function, like switching the night vision on your camera.
Inventory Management
Managing your inventory is an important part of gameplay:
- Scroll Wheel: Use the scroll wheel to cycle through your equipment. This is handy when you need to quickly switch from a flashlight to a camera.
- Q: Quick-swap to the last item you had equipped by pressing Q.
Using The Journal
Your journal is a key tool for identifying ghosts and keeping track of evidence:
- J: Press J to open your journal. In it, you can log various pieces of evidence, check off completed tasks, and ultimately decide which type of ghost you’re dealing with.
Lighting and Cameras
Flashlights and cameras are essential in the dark:
- T: If you’re holding another item, press T to toggle your flashlight. Note, this only works if you have a flashlight in your inventory.
- Right Click (with a Camera): This allows you to take photos or toggle night vision on the video camera.
Conclusion
Mastering these basic controls in Phasmophobia not only helps you to better navigate the eerie environments but also ensures that you can quickly react when ghosts start getting hostile. Quick access to your tools and effective communication with your team can make the difference between a successful haunting investigation and an untimely demise. Happy Ghost Hunting!
Navigating the Main Menu
Welcome, ghost hunters! Before you dive into the spooky thrill that is Phasmophobia, you’ll need to navigate through the Main Menu. Whether you’re playing solo or with friends, understanding the main menu is key to getting started. This guide will help you fly through the options so you can start hunting those pesky ghosts as soon as possible.
Main Menu Layout
When you first launch Phasmophobia, you’ll find yourself in a cozy, slightly eerie room that serves as your main menu. Here’s a breakdown of the Main Menu options:
1. Play
This is the big one. Clicking “Play” takes you to the game’s main setup screen, where you can choose to start a single-player or multiplayer session. From here, you can create a lobby, join a lobby, or play solo.
2. Training
If you’re new and feeling a bit anxious, this is where you should start. Training mode offers a guided tutorial to help you get familiar with the game’s mechanics, tools, and goals without the pressure of an active haunting.
3. Item Store
Ready to gear up? The Item Store lets you buy all kinds of essential ghost-hunting equipment, from EMF readers to Spirit Boxes. You’ll earn money by completing missions, so keep coming back to stock up and upgrade your gear.
4. Equipment List
Here, you can review what items you currently own. This is super helpful for planning out what you’ll take on your next mission. Make sure you know your inventory well!
5. Options
Clicking on “Options” lets you tweak the game settings. From here, you can adjust audio levels, graphics settings, and keybindings. Make sure everything’s set up just the way you like it before heading out on your spooky adventures.
6. VR Settings
If you’re in for the extra scare and are using Virtual Reality, this is where you can adjust VR-specific settings. Trust us, it’s both terrifying and amazing.
7. A Journal on the Table
This isn’t technically a menu option but is crucial. This handy booklet serves as your in-game guide. It helps you track evidence, make notes, and correctly identify the type of ghost haunting the location. You can access it in-game by pressing “J.”
Setting Up a Game
Once you click on “Play,” you’ll be whisked away to an interface that lets you set up your game. Here’s what you’ll see:
1. Create Lobby
Want to play with friends? Creating a lobby lets you generate a private or public game. You can invite friends or wait for other players to join. Choose your server region and difficulty level to get started.
2. Join Lobby
Looking to hop into an existing game? Browse through available public lobbies or enter a lobby code your friend gave you. Look for a game that fits your preferred difficulty and jump right in.
3. Single Player
Not in the mood for multiplayer? Solo mode lets you tackle the haunting all on your own. It’s just you, your gear, and the ghosts. Good luck!
Buying and Managing Equipment
After setting up a lobby or choosing your game mode, you’ll get the chance to prepare your gear. Here, you can buy equipment from the Item Store or add items you already own to your loadout.
Add Equipment
You’ll see an “Add” button next to each piece of equipment. Add what you think you’ll need based on your mission’s objectives. Remember, the right gear can make a huge difference.
Buy Equipment
Run out of EMF readers? Need another crucifix? Head to the “Buy” tab to purchase new gear. Spend your hard-earned cash wisely—you’ll need each item sooner or later.
Ready Up
Once you’ve filled your equipment list and everyone in your lobby is ready, hit the “Ready Up” button to kick off your ghost hunt. Don’t forget to double-check your gear before confirming!
Final Tips
- Check the maps. Some maps are smaller and easier to navigate, while others are sprawling haunted houses or even high schools. Choose wisely.
- Plan with your team. Communication is key, so figure out who’s handling which tools and tasks before you begin.
- Stay calm. The dark, ghostly atmosphere can be intense, but sticking together and staying organized makes a big difference.
Navigating the main menu might seem overwhelming at first, but once you get a feel for it, you’ll be setting up hunts like a pro. Happy ghost-hunting, and may your EMF readers always hit level 5!
Starting Your First Investigation
Starting your first investigation in Phasmophobia can be thrilling and a bit nerve-wracking. Don’t worry, though! We’ve got you covered with this simple guide to get you prepped and ready. Here’s everything you need to know to jump into your first hunt and (hopefully) come out unscathed.
1. Gear Up in the Lobby
Before you even step foot in a haunted location, you’ll need to prepare in the lobby. Here, you can choose your equipment and loadout alongside your ghost-hunting buddies. Here’s a quick run-down of essential starter items:
- Strong Flashlight: Your best friend in dark and creepy places.
- EMF Reader: Helps detect ghost activity by showing spikes in electromagnetic fields.
- Spirit Box: Lets you communicate with the ghost using voice commands.
- Video Camera: Essential for spotting ghost orbs—set it up in different rooms for best results.
- Ghost Writing Book: Leave it out for any ghostly messages.
Tip: If you’re just starting out, don’t worry about getting all the fancy gear. Start simple and add more equipment as you earn money from your investigations.
2. Choose Your Location
Once you’ve geared up, you’ll need to choose a location for your investigation. Options range from small houses to larger and more complex locations like schools and asylums. For your first time, it’s best to start with a smaller map like Tanglewood Street House or Ridgeview Road House. These locations are more manageable and less intimidating.
3. Briefing Time
After selecting your location, you’ll get a mission briefing. This includes important details like the ghost’s name, whether the ghost responds to everyone, or if it requires you to be alone for interactions. Pay close attention to these clues—they’ll help you figure out your strategy.
Here’s some key info to look for in the briefing:
- The ghost’s name (saying it can provoke activity).
- Whether the ghost responds to all players or only when alone.
- Any optional objectives that can net you extra cash.
Always remember: The ghost’s name is a double-edged sword. While it can spike activity, overusing it might make things turn deadly quicker.
4. Divide and Conquer
With your team, assign roles. Each player should carry a different piece of equipment to maximize efficiency. Here’s a suggested starter setup:
- Player 1: EMF Reader and Flashlight
- Player 2: Spirit Box and Flashlight
- Player 3: Video Camera and Flashlight
- Player 4: Ghost Writing Book and Flashlight
If you’re playing solo or with fewer players, mix and match the gear accordingly.
5. Find the Ghost Room
Once inside, your first goal is to locate the ghost room. This is where the bulk of paranormal activity will occur. Use your EMF Reader, Thermometer (if you have one), or look for freezing temperatures or other signs of ghostly presence like flickering lights and opening doors.
Tip: Always keep your flashlight on and try to stay together until you identify the ghost room. Splitting up too early can make you vulnerable.
6. Gather Evidence
After finding the ghost room, it’s time to gather evidence. Place the Video Camera, put the Ghost Writing Book down, and keep asking questions using the Spirit Box. Keep your EMF Reader handy to detect changes.
Here are the main types of evidence you’re looking for:
- EMF Level 5
- Spirit Box Responses
- Ghost Writing
- Fingerprints (Use a UV Light)
- Ghost Orbs (Check your camera feed)
- Freezing Temperatures (Visible breath or below-zero readings)
Pro tip: The journal will help you keep track of collected evidence. Deduce the type of ghost by filling in the evidence you gather.
7. Stay Safe and Sanity Check
While you’re in the house, keep an eye on your sanity levels—there’s a display for this in the truck. The lower your sanity, the more aggressive the ghost becomes. Take turns going back to the truck to check cameras and sanity levels. If necessary, use sanity pills to keep your levels up.
Important: If the ghost starts hunting, your flashlight will flicker. Find a hiding spot, turn off your flashlight, and stay quiet.
8. Make an Educated Guess and Get Out
Once you’ve collected enough evidence, make an educated guess about the ghost type in your journal. When you’re confident in your identification, pack up and get out. Close the truck’s door to end the investigation.
Congratulations! You’ve completed your first ghost hunt. Head back to the lobby to see if you correctly identified the ghost and collect your earnings. Use what you’ve learned to improve and buy new equipment for your next spooky adventure. Jobs well done—and good luck on your next hunt!
Tips for New Players
So you’ve just started playing Phasmophobia and find yourself shaking in your ghost-hunting boots. It’s okay! While the game might seem overwhelming at first, with the right strategies, you can become a pro ghost hunter in no time. Here are some tips to help you get started:
1. Start Small, Stay Alive
When you’re new, stick to the smaller maps like Tanglewood Street or Edgefield Street House. These are less daunting and easier to manage. You don’t want to be wandering aimlessly in a large location when a ghost hunt begins. Smaller maps also mean quicker escapes if things go south.
2. Understand Your Gear
Familiarize yourself with the starter equipment. Here’s a quick rundown:
- EMF Reader: This handy device lights up when it’s close to ghost activity. An EMF Level 5 can be a clue to the type of ghost you’re dealing with.
- Spirit Box: Talk to the ghost through this. If it responds, note down ‘Spirit Box’ as evidence. Make sure to ask questions like “Are you here?” or “How old are you?”
- UV Light: Use this to look for fingerprints or footprints, often found on doors, windows, and light switches.
- Video Camera: Set it up in rooms you suspect are haunted and look for ghost orbs in the truck.
- Ghost Writing Book: Place this in the suspected ghost room and check back later for any spooky messages.
3. Stick Together, But Not Too Close
Teamwork is key, but if you’re all huddled together, you might miss ghost events or clues. Spread out within the house but maintain communication. Use the walkie-talkie (press B) for long distances and your regular voice chat (press V) for when you’re close together.
4. Keep Your Cool During Hunts
When the lights start flickering and your flashlight goes wild, it’s hunt time. Here’s what to do:
- Turn Off Electronics: Switch off your flashlight and don’t talk. The ghost can hear you and will be drawn to sound.
- Hide and Stay Still: Find a room, go inside, and shut the door behind you. Crouch down, and stay quiet until the hunt is over. You’ll know it’s safe when the lights stop flickering.
5. Use Your Evidence Journal
Open your journal (press J) and keep track of the evidence you find. There are over a dozen ghost types, and by jotting down what you find, you’ll be able to narrow it down quickly.
6. Don’t Waste Your Sanity Pills
Your sanity meter (visible in the truck) is super important. The lower it gets, the more likely you’ll be hunted. Use Sanity Pills wisely—don’t pop them too early. A good strategy is to wait until you or your team are around 40-50% sanity.
7. Manage the Doors
Doors are your friends and enemies. Always ensure doors are open when you explore and close them behind you if a hunt begins. This way, you can easily run into a room and shut the door in a pinch.
8. Communication Is Key
Always keep your voice chat clear and concise. Let your team know where you are and if you find any evidence. During hunts, avoid unnecessary chatter to keep everyone focused.
9. Watch the Clock
The game gives you a grace period at the start, visible in the top left corner of the truck computer. Use this time to set up equipment, find the ghost room, and gather initial clues. Once the timer hits zero, the ghost can become aggressive, so have a plan ready.
10. Practice Makes Perfect
Don’t be disheartened by early failures. Each game is a learning experience. Pay attention to how the ghosts behave and what you did right or wrong. Over time, you’ll get a feel for the subtle cues that indicate ghost activity and how best to counter it.
By starting small, understanding your gear, and communicating effectively with your team, you’ll get the hang of ghost hunting in no time. Now get out there and show those phantoms who’s boss!