
Embark on an unforgettable journey with our comprehensive Link’s Awakening: Dungeon Guide! Dive into the enchanted world of The Legend of Zelda: Link’s Awakening as we unravel the secrets of each treacherous dungeon. From Navigating Each Dungeon with masterful precision to Solving Puzzles and Challenges that will test your wits, our guide is packed with essential tips. Discover how to harness your hero’s skills in Using Abilities to Progress, maintain your vitality with strategic Managing Health and Resources, and reap the benefits by Unlocking Dungeon Rewards. Get ready to conquer Koholint Island and become the ultimate hero in Link’s Awakening!
Navigating Each Dungeon
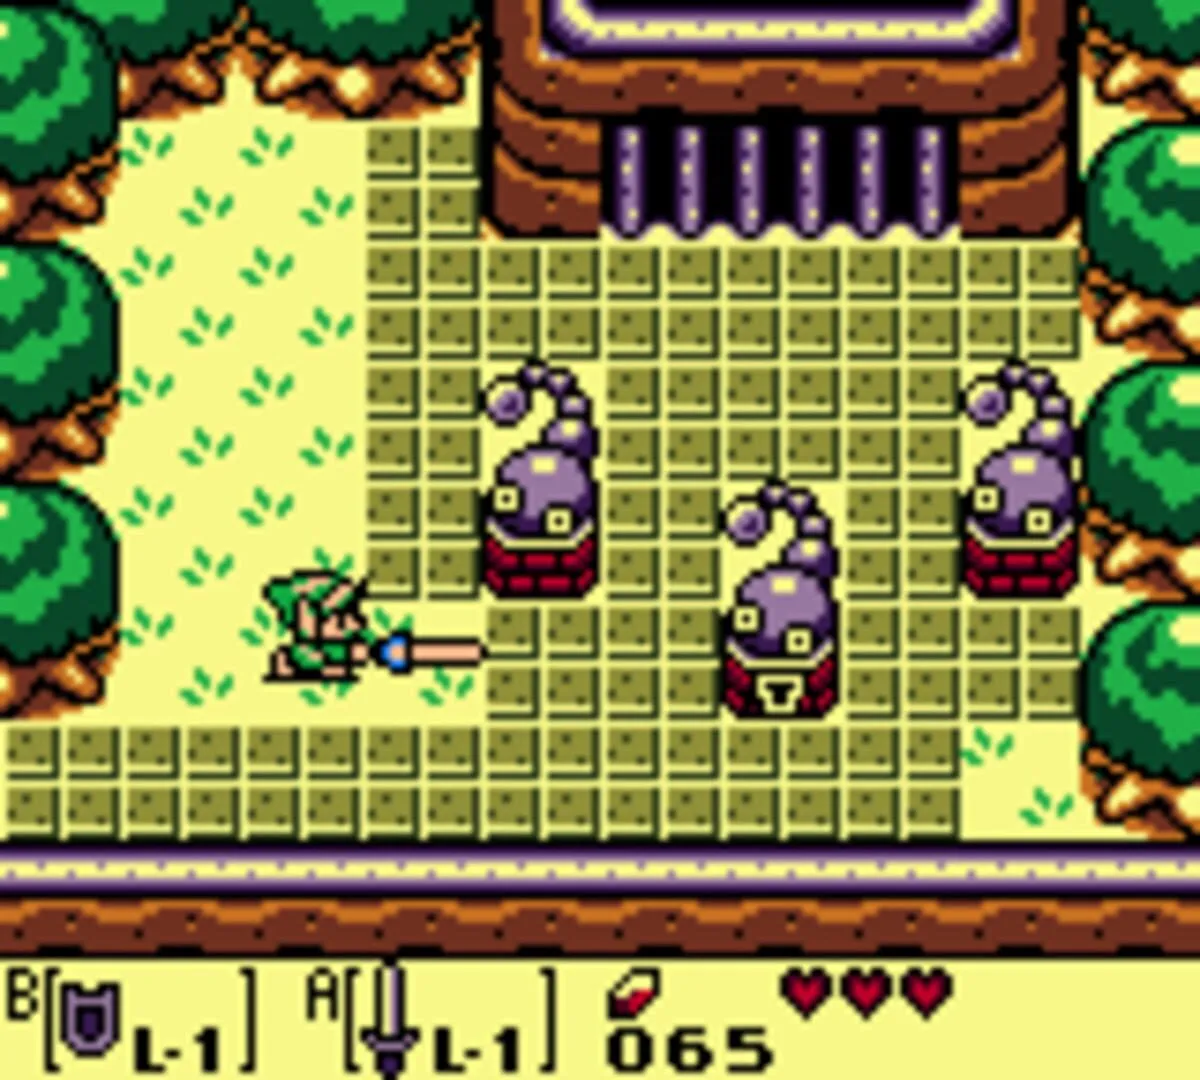
In “The Legend of Zelda: Link’s Awakening,” you’ll find eight unique dungeons scattered across Koholint Island. Each dungeon challenges your puzzle-solving skills and combat prowess, but fear not! We’ve got you covered with tips and tricks to get through these labyrinths.
Tail Cave
Location: South of Mabe Village
Key Item: Roc’s Feather
Tail Cave sets the stage with straightforward puzzles and basic enemies. Your primary goal is to obtain Roc’s Feather, which lets you jump.
- Opening the Cave: Use a key to open the entrance.
- Navigating Puzzles: Push blocks and defeat enemies to unlock doors.
- Mini-Boss: Rolling Bones - Simply dodge the spiked bar and attack.
- Nightmare Boss: Moldorm - Hit its tail segment a few times.
Pro Tip: Make sure to collect all Small Keys to avoid backtracking.
Bottle Grotto
Location: Goponga Swamp
Key Item: Power Bracelet
Things get trickier in this second dungeon, located in the swamp. You’ll need the Power Bracelet to lift heavy objects.
- Dark Rooms: Keep your Magic Powder handy to light torches.
- Using the Bracelet: Lift and throw the pots to access new areas.
- Mini-Boss: Hinox - Keep your distance and attack when it charges.
- Nightmare Boss: Genie - Break his bottle, then attack when he’s vulnerable.
Pro Tip: Conserve your Magic Powder; you’ll need it!
Key Cavern
Location: Near Ukuku Prairie
Key Item: Pegasus Boots
Here, speed is vital. The Pegasus Boots let you dash, breaking through obstacles.
- Collect Keys: Explore thoroughly; almost every room has a hidden key.
- Wall Cracks: Pegasus Boots let you break through cracked walls.
- Mini-Boss: Dodongo Snakes - Feed bombs to defeat them.
- Nightmare Boss: Slime Eye - Use Pegasus Boots to split it in two.
Pro Tip: Always check walls for cracks with the Boots before moving on.
Angler’s Tunnel
Location: Tal Tal Heights
Key Item: Flippers
Welcome to underwater challenges. The Flippers are essential for swimming.
- Water Puzzles: Swimming lets you access otherwise unreachable areas.
- Collect All Small Keys: Essential for unlocking the main path.
- Mini-Boss: Cue Ball - Move around and strike its unarmored backside.
- Nightmare Boss: Angler Fish - Use Z-targeting to aim for its weak spot.
Pro Tip: Keep an eye out for subtle clues in the wall carvings.
Catfish’s Maw
Location: Off the coast by Martha’s Bay
Key Item: Hookshot
Here, the Hookshot will be your new best friend.
- Searching for Hooks: Use the Hookshot on obvious points to traverse gaps.
- Puzzles Galore: Hookshot activates various mechanisms; be methodical.
- Mini-Boss: Master Stalfos - He appears multiple times. Use the Hookshot and sword.
- Nightmare Boss: Slime Eel - Use Hookshot to pull it out of its hiding place.
Pro Tip: Keep a watchful eye on rooms with multiple exits for shortcuts.
Face Shrine
Location: Southern Koholint Island
Key Item: L-2 Power Bracelet
Here’s where things get heavy. The upgraded Power Bracelet is crucial.
- Puzzle Complexity Increases: Lift and throw heavy statues to solve puzzles.
- Be Observant: Study the layout; hidden switches abound.
- Mini-Boss: Smasher - Throw his ball back at him.
- Nightmare Boss: Facade - Avoid falling tiles and attack his face.
Pro Tip: Use your map frequently to avoid getting lost.
Eagle’s Tower
Location: Tal Tal Mountain Range
Key Item: Mirror Shield
With verticality and intricate puzzles, this dungeon tests your skills.
- Balancing Puzzles: Knock down pillars with a heavy ball to lower levels.
- Multi-floor Challenges: Use the map to navigate several floors effectively.
- Mini-Boss: Grim Creeper - Defeat his minions quickly.
- Nightmare Boss: Evil Eagle - Block with the Mirror Shield and counter-attack.
Pro Tip: Account for the vertical layout to orient yourself properly.
Turtle Rock
Location: West of Tal Tal Mountain Range
Key Item: Magic Rod
Fire power is essential here.
- Revisiting Areas: You’ll often need to backtrack with new abilities.
- Magic Rod Solves Many Problems: Use it on practically everything.
- Mini-Boss: Blaino - Dodge his punches and counter.
- Nightmare Boss: Hot Head - Use the Magic Rod to disable him.
Pro Tip: Be thorough in clearing each room to collect all items.
Navigating the dungeons in Link’s Awakening can be challenging, but with the right strategies and thorough exploration, you’ll emerge victorious. Don’t forget to save frequently and always be on the lookout for hidden secrets! Happy adventuring, heroes!
Solving Puzzles and Challenges
In The Legend of Zelda: Link’s Awakening, you’ll find a variety of puzzles and challenges that will test your problem-solving skills. Here’s a guide to help you navigate those tricky spots and keep your adventure moving smoothly.
The Basics of Puzzle-Solving
Understanding the essentials can save you a ton of time:
1. Pay Attention to the Environment: The dungeons in Link’s Awakening are packed with clues. Look for patterns, unusual objects, or anything that stands out. If something seems out of place, it probably holds a secret.
2. Equip Proper Items: Some puzzles require specific tools. Equip your sword, bombs, boots, or any other items you’ve gathered. Try different combinations if you’re stuck.
3. Trial and Error: Don’t be afraid to experiment. Sometimes the solution isn’t straightforward, and you may need to test several approaches before getting it right.
Key Techniques
Push and Pull: Many puzzles involve moving blocks. You can usually push these in the direction you’re facing by walking into them. Sometimes, pulling might be required, but always think ahead about where you’re moving blocks so you don’t box yourself in.
Switches and Traps: Look out for floor switches. These can open doors, move walls, or trigger other mechanisms. Be mindful of traps; hitting or standing on a certain switch might also release enemies or drop you into a pit.
Tile and Floor Puzzles: You’ll encounter rooms with tiles or special floors that need to be activated. Step on them in the right sequence, or move blocks to match a pattern. Pay attention to any hints provided by statues or inscriptions in those rooms.
Unique Dungeon Solutions
Key Cavern: This dungeon has a lot of locked doors and hidden keys. Use your bombs to find hidden walls and always backtrack to explore areas you might have missed on the first pass.
Angler’s Tunnel: Water levels are your biggest challenge here. Use the flippers to swim and dive, and look for switches that drain or fill areas with water. It’s important to navigate both the dry and wet paths.
Face Shrine: Pay attention to the large face tiles on the floor. You’ll need to bomb walls and pay close attention to the directions given by owl statues. The map is key to finding your way here.
Boss Tactics
Each dungeon ends with a boss that’s both a puzzle and a combat challenge. Observe the boss’s patterns and look for its weak points. Some bosses can only be damaged at certain times or in specific ways, so be patient and watch carefully.
1. Tail Cave Boss - Moldorm: Circle around and strike its tail. Avoid the head and the edges of the platform to prevent falling off.
2. Bottle Grotto Boss - Genie: Destroy his bottle with your sword after picking it up and throwing it against the wall. Then strike the Genie when he’s vulnerable.
3. Angler’s Tunnel Boss - Angler Fish: Use your sword to attack its glowing bulb. Swim carefully to avoid getting hit by smaller enemies.
Tips for Success
- Save Often: Many challenges can mean a quick death if you make a mistake. Save your game frequently so you don’t lose progress.
- Use Your Map and Compass: The map reveals unexplored areas, while the compass shows where hidden keys and the boss are located.
- Look for Visual Cues: Cracked walls, suspicious floors, and unlit torches often indicate places to bomb, lift, or light up.
Remember, solving puzzles in Link’s Awakening is all about exploration, experimentation, and observation. Take your time, enjoy the process, and you’ll master even the toughest challenges. Happy adventuring!
Using Abilities to Progress
Link’s Awakening is packed with unique abilities and items that you’ll need to solve puzzles, defeat bosses, and explore new areas. Let’s break down some of the key abilities you’ll unlock and how to use them to progress through the game.
The Power Bracelet
What It Does:
The Power Bracelet allows Link to lift heavy objects like rocks and pots, which he can’t do at the beginning of the game.
Where to Find It:
You’ll find the Power Bracelet in Bottle Grotto, the second dungeon.
How to Use It:
- Lifting Objects: Approach an object like a rock or pot, press and hold the button assigned to the bracelet, and voila, you can now pick it up and throw it!
- Unlocking New Paths: Many blocked paths become accessible once you can lift heavy objects. For example, lifting rocks can clear the way to new areas on the overworld map.
Roc’s Feather
What It Does:
Roc’s Feather lets Link jump across small gaps and dodge enemy attacks by hopping over them.
Where to Find It:
You’ll find Roc’s Feather in the Tail Cave, the first dungeon of the game.
How to Use It:
- Jumping Over Pits: Some areas have gaps that you can’t cross by walking. Equip Roc’s Feather to link’s action button and press it to jump over these pits.
- Dodging Attacks: You can use the feather to leap over projectiles or enemies to avoid damage during combat.
- Advanced Moves: Combine Roc’s Feather with other items, like the Pegasus Boots, to perform long jumps and reach otherwise inaccessible platforms.
Pegasus Boots
What It Does:
The Pegasus Boots grant Link the ability to dash across the screen, break through obstacles, and perform powerful attacks.
Where to Find It:
You’ll get the Pegasus Boots in Key Cavern, the third dungeon.
How to Use It:
- Dashing: Press and hold the assigned button to start a dash. You’ll move much faster and be able to smash through certain barriers.
- Combo Moves: Combine the Pegasus Boots with Roc’s Feather to cover more distance in your jumps.
- Battle Tactics: Use the dash to deliver a high-speed attack to enemies, breaking their defenses, and closing distance quickly.
The Hookshot
What It Does:
The Hookshot lets you grapple across large gaps, pull distant items towards you, and stun enemies.
Where to Find It:
You’ll find the Hookshot in Catfish’s Maw, the fifth dungeon.
How to Use It:
- Crossing Gaps: Equip the Hookshot and aim it at wooden poles or specific target points to pull yourself across large gaps.
- Retrieving Items: Use the Hookshot to grab items out of reach, like floating hearts or rupees.
- Disabling Enemies: Fire the Hookshot at enemies to stun them, making them easy targets for your sword.
Magic Powder
What It Does:
Magic Powder has various uses, like lighting torches, transforming enemies, and solving puzzles.
Where to Find It:
You can get Magic Powder from the Witch’s Hut early in the game.
How to Use It:
- Lighting Torches: Sprinkle it on unlit torches to light them up. This is often necessary to solve puzzles in dungeons.
- Transforming Enemies: Use Magic Powder on certain enemies to transform them into something less dangerous.
- Unlocking Secrets: Sprinkle it on strange objects or suspicious spots to reveal secrets.
Mirror Shield
What It Does:
The Mirror Shield can reflect projectiles and block powerful energy attacks.
Where to Find It:
You’ll obtain the Mirror Shield in Turtle Rock, the eighth dungeon.
How to Use It:
- Reflection: Equip the shield and face towards enemy projectiles or environmental traps to reflect them back, often needed to clear certain puzzles.
- Defense: Use it to protect yourself from strong attacks that the normal shield can’t handle.
Bombs
What It Does:
Bombs can blow up weak walls, damage enemies, and activate certain switches.
Where to Find It:
Initially obtained from shops, but you’ll find them in various dungeons as well.
How to Use It:
- Blowing Up Walls: Place a bomb in front of cracked walls to expose hidden rooms.
- Combat: Use bombs to deal heavy damage to tough enemies or bosses.
- Puzzle Solving: Sometimes, you’ll need to use bombs to trigger faraway switches or clear paths.
Armed with these abilities, you’ll be ready to tackle bigger challenges and uncover deeper secrets within Link’s Awakening. Keep experimenting with combinations of your items to discover unique interactions and carve your own path through Koholint Island!
Managing Health and Resources
In The Legend of Zelda: Link’s Awakening, keeping Link alive and well is key to your success. Here’s how to ensure you’re always ready for whatever challenges Koholint Island throws your way.
Keeping Link in Tip-Top Shape
Hearts and Heart Pieces
Your health in the game is displayed as hearts. Lose them, and it’s game over. Here’s how to keep that from happening:
- Pick Up Hearts: Hearts can be found by cutting grass, breaking pots, and defeating enemies. Always keep an eye out, especially when you’re running low on health.
- Collect Heart Pieces: Scattered throughout Koholint Island, you’ll find Heart Pieces. Four of these will increase your maximum health by one heart. Explore thoroughly to find them!
- Complete Dungeons: Each dungeon rewards you with a full Heart Container, which permanently increases your health by one heart. So, tackling dungeons not only advances the story but also boosts your health.
Fairies
Fairies are your health-savers:
- Capturing Fairies: Use the Bug-Catching Net to capture fairies and keep them in bottles. If you don’t have a net, fairies will still heal you but won’t be stored.
- Fairy Fountains: These are scattered around the island and will fully restore your health. Make a mental note of their locations for a quick health restore point.
Resource Management
Rupees
Rupees are your currency and essential for buying items:
- Collecting Rupees: They’re in the grass, pots, chests, and dropped by enemies. Different colors have different values – green (1), blue (5), red (20), purple (50), and silver (100).
- Saving Up: Some items and upgrades are costly. Keep an inventory of your rupees and spend wisely.
Arrows and Bombs
As you progress, you’ll need to manage arrows and bombs:
- Find and Buy: Like rupees, arrows, and bombs can be found or bought. Keep your stock full, especially before heading into dungeons.
- Efficiency: Use them strategically. Don’t waste a bomb on enemies when a sword will do, and aim arrows carefully.
Magical Items and Power-ups
Magic Powder
Magic Powder is used to light torches, activate certain items, and defeat specific enemies:
- Collect Wisely: You can carry up to 40 piles of Magic Powder. Refill at Mad Batter locations or buy from shops.
Inventory Management
Keep track of your items and their uses:
- Hotkeys: Use hotkeys efficiently for quick access during battles.
- Prioritize: Equip items based on your needs at the moment. Swap out rarely used items for essentials during dungeons or boss fights.
Special Tips
Fairy Bottles and Potions
- Stock Up: Always carry at least one Fairy Bottle filled with a fairy or a healing potion. This can turn the tide in tough battles.
Explore Thoroughly
- Hidden Rewards: Hidden in corners of the world are additional rupee stashes, heart pieces, and other resources. Completing side quests often yields valuable items.
Timing of Usage
- Save Potions: Don’t use potions unless absolutely necessary; rely on found hearts and fairy fountains first.
Conclusion
Managing health and resources in Link’s Awakening is crucial for making progress and overcoming challenges. Keep collecting those rupees, utilize your items wisely, and always be prepared for the unexpected corners of Koholint Island. Stay healthy, keep your pockets full, and adventure on!
Unlocking Dungeon Rewards
Dungeons in The Legend of Zelda: Link’s Awakening are packed with puzzles, enemies, and, best of all, rewards. This guide will help you navigate each dungeon and ensure you unlock every treasure and special item they hold. Let’s break it down dungeon by dungeon.
Tail Cave
Compass, Stone Beak, and Map
- Compass: As you explore, keep an eye out for a room with a chest in plain sight. No tricks here—just open it to find the Compass.
- Stone Beak: Another room contains this item. Push the blocks to reveal the chest.
- Map: Head to the room with multiple spikes and defeat all enemies. The map’s hidden in the chest that appears.
Roc’s Feather
- How to Get: Progress through the dungeon until you find a room with a chest guarded by a couple of hard-hitting moldorms. Defeat them, and the Roc’s Feather is yours.
- Usage: This item is a game-changer! Equip it to jump over holes and small enemies. Essential for your journey ahead.
Bottle Grotto
Compass, Stone Beak, and Map
- Compass: Found in a chest after defeating the mini-boss. You can’t miss it.
- Stone Beak: Defeat a room full of Shrouded Stalfos to reveal the chest containing the Stone Beak.
- Map: Found early in the dungeon. Look for a solo chest in an out-of-the-way room.
Power Bracelet
- How to Get: After solving the puzzles involving lighting torches with Magic Powder, you’ll unlock a path leading to the Power Bracelet.
- Usage: Lift heavy objects like pots, boulders, even some enemies. This bracelet is key to solving many future puzzles.
Key Cavern
Compass, Stone Beak, and Map
- Compass: Easy find in the upper-right area of the dungeon. Look for a lone chest and grab it.
- Stone Beak: Taken from a chest after dealing with some pesky Dodongo Snakes.
- Map: Found just past the area where you need to use your first Small Key.
Pegasus Boots
- How to Get: Pass through a series of rooms that require precise bomb placement to open the way forward. The Pegasus Boots await in a chest.
- Usage: Equip them to dash at high speeds. Combine them with the Roc’s Feather for long jumps.
Angler’s Tunnel
Compass, Stone Beak, and Map
- Compass: Found early in the dungeon, just after the waterlogged areas. Search for a chest in the northeast.
- Stone Beak: Earned by solving the block-pushing puzzles in the east rooms.
- Map: Acquired after defeating several underwater enemies east of the entrance.
Flippers
- How to Get: As you make your way deeper, the paths will split. Take the right fork to find the room with the Flippers.
- Usage: Swim in deeper waters and dive to find hidden pathways and treasures.
Catfish’s Maw
Compass, Stone Beak, and Map
- Compass: Located in the northwest section. Defeat all the enemies there.
- Stone Beak: After facing off with the mini-boss Master Stalfos for the first time, follow the new path to find the Stone Beak.
- Map: Found in a chest near the middle of the dungeon after solving several bone puzzles.
Hookshot
- How to Get: Face Master Stalfos multiple times. Each victory moves you closer to the chest containing the Hookshot.
- Usage: Traverse wide gaps, pull distant objects, and stun enemies.
Face Shrine
Compass, Stone Beak, and Map
- Compass: Early on, after defeating a series of Wizzrobes.
- Stone Beak: Found by solving a room’s puzzle featuring moving statues.
- Map: Located shortly after finding the Compass, in a room with multiple Shrouded Stalfos.
L-2 Power Bracelet
- How to Get: Navigate through an array of tough puzzles and enemies. The L-2 Power Bracelet will be in a large, ominous chest.
- Usage: Lift even heavier objects than before, enabling you to move forward in the game.
Eagle’s Tower
Compass, Stone Beak, and Map
- Compass: Located in the southeast corner after solving a series of mirrored puzzles.
- Stone Beak: Earn it by solving a block-pushing puzzle in a room full of Anti-Kirby enemies.
- Map: Found in a chest on the second floor, hidden behind a mini-boss.
Mirror Shield
- How to Get: Progress through the tower, defeating mini-bosses and solving puzzles to access the treasure chest containing the Mirror Shield.
- Usage: Reflect powerful beams and protect against stronger attacks. Crucial for upcoming challenges.
Turtle Rock
Compass, Stone Beak, and Map
- Compass: Located in the first few rooms, in a chest guarded by Dodongo Snakes.
- Stone Beak: Earn this by defeating a series of fire-based enemies near the dungeon’s center.
- Map: Found midway through the dungeon, in a chest revealed by bombable walls.
Magic Rod
- How to Get: Dodge fire traps and solve intricate puzzles to reach the chest containing the Magic Rod.
- Usage: Shoot fireballs to defeat enemies and melt ice blocks. A powerful weapon as you near the game’s climax.
Unlocking the rewards in these dungeons isn’t just about collecting items; it’s about preparing Link for the challenges that lie ahead. Equip wisely, explore thoroughly, and enjoy every treasure you unearth. Happy adventuring!