
Welcome to our comprehensive ‘Kingdom Hearts 3D: Dream Drop Distance Walkthrough’ guide! Dive into an epic adventure with Sora and Riku as they embark on the challenging Mark of Mastery exam. This ultimate guide is designed to elevate your gameplay experience, providing essential tips and strategies to conquer every aspect of the game. Get started by mastering the Basic Controls, traverse through the vibrant and intricate Different Worlds, uncover and navigate Key Locations and Their Challenges, and maximize your potential with insightful advice on Using Abilities and Spirits Effectively. Finally, prepare yourself for the ultimate test with our detailed Strategies for Boss Battles. Whether you’re a newcomer or a Kingdom Hearts veteran, this guide is your perfect companion for success in Dream Drop Distance. Let’s begin this magical journey together!
Kingdom Hearts 3D: Dream Drop Distance Walkthrough
Understanding Basic Controls
So, you’re diving headfirst into the dreamy worlds of Kingdom Hearts 3D: Dream Drop Distance! Mastering the basic controls is essential before you can battle Heartless and uncover the mysteries of Sora and Riku’s adventures. Let’s break down what you need to know to get started.
Movement and Camera
- Circle Pad: The Circle Pad on your Nintendo 3DS is your go-to for moving your character around. Push it in any direction to move Sora or Riku through the game environments.
- L and R Buttons: These buttons control the camera. Use them to rotate the view, helping you see around corners or get a better look at your surroundings.
Navigating Menus
- D-Pad: Navigate through menus with the Directional Pad. It’s straightforward—just press up, down, left, or right to highlight options.
- A Button: Confirm your selections in menus, talk to NPCs (non-playable characters), and interact with items in the game world.
- B Button: Use this button to cancel selections or go back to a previous menu. Also, it’s your action button to jump when you’re in the field.
Combat Basics
- X Button: Your key to regular attacks! Hit it repeatedly to perform combos.
- Y Button: The Y Button is used for Flowmotion attacks and other special moves, like sliding into enemies or bouncing off walls for an epic strike.
- D-Pad (Up/Down): Quickly switch between different commands during battle, like using magic spells or items. You can set these commands in your deck before heading into the fray.
Reality Shift and Flowmotion
- Reality Shift: When prompted, tap the touch screen to activate Reality Shift. Each world has unique Reality Shift abilities, so experiment to see what works best.
- Flowmotion: Engage Flowmotion by pressing Y in specific contexts—like when you’re near a wall, pole, or large enemy. Flowmotion lets you zip around the battlefield in exciting ways, adding a dynamic edge to combat.
Dream Eaters
- Touch Screen: Interact with your Dream Eaters, your loyal companions, right on the touch screen. You can pet, feed, and train them to make them stronger allies in battle.
Dual Play System
Remember, you’ll be switching between Sora and Riku. When the Drop Gauge empties, you’ll Drop (or switch) from one character to the other. Keep an eye on this gauge; planning your moves ahead of a Drop can save you a lot of hassle.
- Start Button: Open up the menu to check your status, equipment, and abilities. Adjust everything to suit your play style and preferences.
Putting It All Together
It might seem like a lot at first, but practice makes perfect. Spend some time getting comfy with these controls in the early areas, and pretty soon, you’ll be gliding through combat like a Keyblade Master. Keep experimenting with different moves and strategies, and don’t forget to bond with your Dream Eaters—they’re more than just cute pets, they’re key to your success!
Ready to dive deeper? Adventure—and danger!—awaits in Kingdom Hearts 3D. Get out there and show the Heartless and Nightmares who’s boss!
Navigating Different Worlds
One of the coolest things about Kingdom Hearts 3D: Dream Drop Distance is exploring the variety of vibrant worlds. Each world has its unique challenges, characters, and secrets. This guide will help you get the most out of your travels.
Dropping Between Sora and Riku
Throughout the game, you’ll control both Sora and Riku. Instead of picking one at the start, you’ll switch between them using a system called “Drop.” Here’s the lowdown:
Managing the Drop Gauge
- The Drop Gauge is a timer that counts down during gameplay. When it empties, you’ll automatically switch to the other character.
- It’s essential to keep an eye on it, especially during boss fights or tricky sections.
- Use Drop-Me-Nots to refill the gauge if you need more time.
Strategic Drops
- Sometimes, it’s useful to switch characters intentionally. For example, if one character needs a specific upgrade or treasure in their world, drop to them, grab what you need, then return.
- Remember, each character’s progress is independent. If Sora finishes a challenge, Riku might still need to complete it.
Exploring The Seven Worlds
Here’s a breakdown of the seven worlds you’ll explore, with tips for each:
Traverse Town
- Your starting point. It’s split across two visits, with different NPCs and Dream Eaters each time.
- Don’t miss the additional shops and side quests that unlock after the first visit.
La Cité des Cloches (Hunchback of Notre Dame)
- Pay attention to the verticality here; scaling walls and jumping across rooftops leads to hidden treasures.
- Watch out for strong Dream Eaters in the bell tower; coming prepared is key.
Prankster’s Paradise (Pinnochio)
- This world has vibrant, carnival-like sections with lots of mini-games.
- Focus on controlling the camera in the faster sections to avoid missing paths or treasures.
The Grid (Tron: Legacy)
- A more technical world with lots of neon and straight lines.
- The Light Cycle mini-game can be tricky. Practice to get familiar with the controls.
The Country of the Musketeers (Mickey, Donald, and Goofy)
- Don’t let the whimsical charm fool you, some battles here are intense.
- Look for hidden paths behind props in the performance hall.
Symphony of Sorcery (Fantasia)
- The musical cues here can help guide you to next objectives.
- The magic-based enemies require specific Dream Eaters for easier fights.
The World That Never Was
- This final world is designed for higher-level play.
- Be ready for challenging bosses. Familiarize yourself with their patterns and stock up on potions and ethers.
Using Flowmotion Efficiently
Flowmotion is a new mechanic that makes navigating worlds more dynamic:
Running Up Walls
- Activate Flowmotion by dashing into a wall. This technique gets you to high places quickly.
- Some walls have hidden pathways or treasures, so experiment with different walls.
Grinding on Rails
- Look for rail-like objects and grind on them for speed boosts.
- This can also help in dodging enemies or reaching far-off platforms.
Combat Advantages
- Use Flowmotion in battles to deal massive damage. Pinballing between walls can knock out multiple foes.
- Keep the momentum going to stay out of harm’s way and land powerful attacks.
Maximizing Map Usage
Each world has a detailed map. Use it to avoid getting lost:
Marking Locations
- Checkpoints and save spots are marked. Plan your route to hit these regularly.
- Highlight important areas like shops and boss arenas.
Backtracking:
- Some areas can’t be accessed until later. Revisit past worlds when you unlock new abilities to uncover hidden treasures.
By mastering the Drop system, exploring each world’s unique traits, and using Flowmotion to your advantage, you’ll navigate Kingdom Hearts 3D’s diverse realms like a pro. Don’t forget to enjoy the journey, meet new characters, and uncover all the hidden secrets each world has to offer!
Key Locations and Their Challenges in Kingdom Hearts 3D: Dream Drop Distance
Navigating through the whimsical and challenging worlds in Kingdom Hearts 3D: Dream Drop Distance can be a magical yet tricky journey. Here, we’ll break down some of the key locations you’ll explore, along with the particular challenges you’ll face in each. Buckle up, Keyblade wielders!
Traverse Town
Traverse Town is one of the first worlds you’ll encounter. It serves as a hub to learn the basics of gameplay.
Key Challenges:
- Tutorial Missions: Before diving into heavier battles, you’ll tackle tutorial missions. Pay close attention—these are essential for understanding new mechanics like Flowmotion and Reality Shift.
- First Boss Battle - Hockomonkey: Face off against Hockomonkey, who will test your basic combat skills. Use dodges and stay on your toes to win this fight.
La Cité des Cloches
In La Cité des Cloches, inspired by The Hunchback of Notre Dame, the stakes get higher.
Key Challenges:
- Flowmotion Puzzles: Navigating the city’s heights and tight spaces will push your Flowmotion skills. Make sure you utilize wall jumps and rail slides effectively.
- Wargoyle: This boss requires you to be nimble. Watch his attack patterns closely and strike when you see an opening. Using aerial attacks can be especially helpful here.
The Grid
Next, move into The Grid, a world pulled from Tron: Legacy. It’s futuristic and filled with digital dangers.
Key Challenges:
- Data Battles: Expect to face enemies with unique, techy moves. Learn their patterns and be prepared with the right commands.
- Rinzler: A fierce opponent with powerful attacks. Use Reality Shift to hack into the environment and turn the tide in your favor.
Prankster’s Paradise
Prankster’s Paradise, based on Pinocchio, is a colorful and slightly chaotic world.
Key Challenges:
- Unpredictable Enemies: You’ll face weird and wacky foes. Stay light on your feet and use varied attacks to keep up.
- Char Clawbster Boss: This fiery crustacean won’t go down easy. Focus on dodging its fire attacks and striking when it’s vulnerable.
Country of the Musketeers
In Country of the Musketeers, inspired by Mickey, Donald, Goofy: The Three Musketeers, you’ll experience classic swashbuckling action.
Key Challenges:
- Guard Missions: You’ll have sections where you need to defend areas or characters. Be vigilant and protect your allies at all costs.
- Pete’s Recurring Battles: Be prepared to fight Pete multiple times. Each encounter will require you to adapt and use different strategies.
Symphony of Sorcery
Finally, Symphony of Sorcery based on Fantasia, offers a dream-like atmosphere filled with musical magic.
Key Challenges:
- Rhythm-Based Battles: Pay attention to the musical cues here. Timing your attacks to the rhythm can give you an edge in combat.
- Chernabog: This formidable foe requires you to master both offensive and defensive tactics. Use all your skills and stay alert to defeat him.
Tips to Overcome Challenges
- Explore Thoroughly: Key locations hide useful items and secrets. Take the time to explore and gather resources.
- Upgrade Your Skills: Keep an eye on abilities and spirits to enhance your strength and capabilities.
- Learn Enemy Patterns: Every boss and mini-boss has a pattern. Learning these can greatly increase your chances of success.
Final Thoughts
Mastering the challenges in each location of Kingdom Hearts 3D: Dream Drop Distance will make your adventure more enjoyable and rewarding. Remember, persistence is key—keep practicing and you’ll conquer every world the game throws at you. Happy keyblading!
Kingdom Hearts 3D: Dream Drop Distance Walkthrough
Using Abilities and Spirits Effectively
So, you’ve dived into the dream worlds of Kingdom Hearts 3D and started collecting some cool abilities and adorable Spirits. But now you’re scratching your head, wondering how to make the best use of them. Don’t worry—we’ve got you covered. Let’s dig into how you can use both to their full potential.
Mastering Abilities
Abilities in KH3D come in various forms like passive boosts, offensive spells, or supportive powers. Understanding how to balance these will make your journey much smoother.
Passive Abilities: These are your behind-the-scenes champions. They can increase your HP, enhance defense, or boost resistance to certain attacks. Equip abilities like Second Chance or Once More to survive devastating hits.
Attack Commands
These are your frontline tools. Use them to dish out damage or exploit enemy weaknesses. For example, Balloonra is a fantastic attack command that targets multiple enemies—perfect for crowd control. Don’t forget to mix in some elemental spells like Blizzaga or Thundaga to hit enemies with their weaknesses.
Support Abilities
These are the spells and commands that keep you in the fight longer. Abilities like Cura or Renewal Block can turn the tide in tough battles, replenishing your health or nullifying damage. Don’t neglect abilities that boost your movement, like Glide or Air Slide—staying mobile is key to avoiding damage.
Rolling with Spirits
Alright, onto the Spirits—your cute and cuddly partners in crime. These guys aren’t just for show; they have a significant impact on your gameplay.
Training Your Spirits
Bonding and training your Spirits can unlock new abilities and commands for Sora and Riku. Use the Link Boards to unlock helpful new tricks. Pay attention to what each Spirit offers you. Some are great for unlocking powerful attack commands, while others boost your stats or grant helpful abilities.
Choosing the Right Spirits
Your choice of Spirits should complement your playstyle. Here’s a quick rundown:
Offensive Spirits: These Spirits excel in attack power. Spirited companions like Sudo Neku or Drak Quack are great if you’re all about offense.
Defensive Spirits: If you need more survivability, look for Spirits like Jestabocky or Meow Wow that offer defensive boosts and healing abilities.
Specialist Spirits: Some Spirits, like Lord Kyroo, provide unique buffs or statuses. These are handy in specific situations or boss fights.
Spirit Linking and Dual Links
Spirit Link: During battles, you can use the Link command to temporarily merge powers with your Spirits. Each Spirit has its unique link abilities, so experiment with different combinations.
Dual Links: When both Spirits’ Link Gauges are full, you can perform a Dual Link. This unleashes a powerful combo move that can turn the tide in battle. Pair up your Spirits strategically to get the best Dual Links— some combinations offer extra damage while others provide healing and buffs.
Final Tips for Maximum Efficiency
Balance Your Loadout: Make sure you have a variety of abilities equipped. You’ll want a mix of offense, defense, and support for different situations.
Keep Spirits Happy: Regularly pet, feed, and play with your Spirits. Not only does this make them more effective in battle, but it also helps unlock their full potential on the Link Board.
Experiment: Don’t be afraid to switch things up. Different worlds and bosses might require different strategies. Sometimes, that Fire Spirit might do better than the Ice one!
That’s it! Now you’re ready to maximize your abilities and get the most out of your Spirits in Kingdom Hearts 3D. Go forth and show those Nightmares who’s boss!
The next section will cover Navigating Dream Eater Battles. Don’t miss it!
Kingdom Hearts 3D: Dream Drop Distance Walkthrough
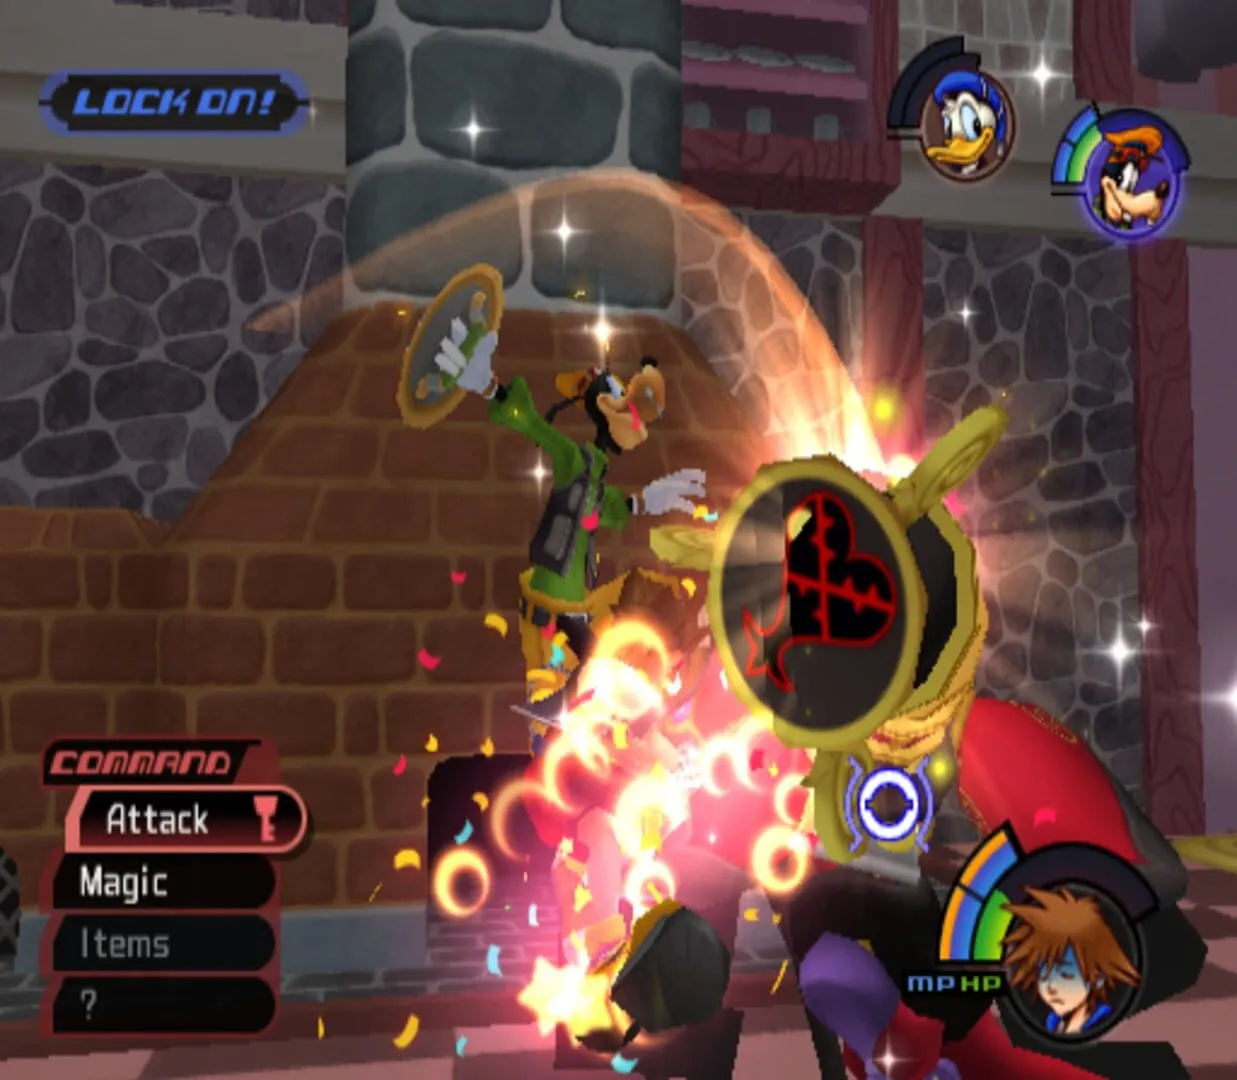
Strategies for Boss Battles
Boss battles in Kingdom Hearts 3D: Dream Drop Distance can be super challenging but also really rewarding once you figure out how to tackle them. Here are some strategies to help you conquer the toughest foes in the game.
General Tips
- Level Up: Make sure you’re at an appropriate level for the bosses. If you’re getting wiped out too quickly, head back and grind a bit.
- Dream Eaters: Don’t underestimate your Spirit Dream Eaters. They can heal you, deal extra damage, and provide vital buffs. Keep at least one Dream Eater that can heal in your party.
- Stock Up: Before any big fight, stock up on potions, Ether, and other healing items. Customize your deck to include plenty of Curaga spells.
- Know Your Commands: Equip commands that work best against the boss you’re facing. Commands like Balloon and Balloonra are often very powerful in boss fights.
Specific Boss Strategies
Julius (Post-Game Secret Boss)
- Location: Traverse Town.
- Attack Strategy: Julius has a lot of health and his punches can wipe you out if you’re not careful.
- When he charges up for powerful hits, dodge roll or use Flowmotion to get out of the way.
- Keep your distance and use ranged attacks. A good mix of Balloon and ranged magic can whittle down his health.
- Save your strongest attacks, like reality shifts or powerful combos, for when he’s stunned or slowed down.
- Staying Alive: Bring lots of Curaga spells and keep your healing items handy. Julius won’t give you much time to breathe, so you need to heal fast and often.
Spellican (Symphony of Sorcery)
- Location: Symphony of Sorcery.
- Attack Strategy: Spellican likes to spam powerful magic attacks.
- Pay attention to the spells he casts. Dodge or block fire and ice spells, and maneuver behind him when he casts harder to dodge attacks like thunder.
- Close the distance quickly when he stops to cast spells. Use Flowmotion to chain attacks and stay mobile.
- Commands like Balloonra and Triple Plasma can do serious damage.
- Staying Alive: Dodge rolls and Glide are your best friends. Keep moving to avoid getting pinned by his spells. Heal quickly if you get hit, as Spellican’s attacks can stack up fast.
Chernabog (Prankster’s Paradise)
- Location: Prankster’s Paradise.
- Attack Strategy: Chernabog attacks primarily using fire and lava-based moves.
- Stay airborne as much as possible to avoid his ground-based lava attacks.
- Target his head for the most damage. Use aerial combos and powerful magic attacks like Firaga and Thundaga.
- Watch for his sweeping fire breath and fly behind him when he’s charging it.
- Staying Alive: Keep an eye on your health and use Curaga frequently. Fly in circles to dodge incoming attacks and never stay in one place too long.
Wargoyle (La Cité des Cloches)
- Location: La Cité des Cloches.
- Attack Strategy: Wargoyle is big and doesn’t move too quickly, but his attacks have a wide reach.
- Attack his legs and tail first to limit his movements.
- When he takes to the air, lock on and attack with ranged magic.
- Flowmotion attacks are great to deal continuous damage while staying mobile.
- Staying Alive: Heal often and keep moving to avoid his ground slams and wing attacks. Use Dodge Roll to stay one step ahead, especially when he tries to swipe at you.
Rinzler (The Grid)
- Location: The Grid.
- Attack Strategy: Rinzler is fast and his attacks can be hard to avoid.
- Always keep moving and use block frequently.
- Strike after he finishes an attack sequence. Commands like Strike Raid and impactful magic like Balloonra are super effective.
- Watch his pattern and strike when you see an opening.
- Staying Alive: Your Dream Eaters can be really helpful here for healing and distracting Rinzler. Keep Curaga in your command deck and use it whenever you drop below half health.
Remember to always save before a big boss fight so you can retry without losing your progress. Use these strategies, stay persistent, and you’ll be taking down bosses like a pro!