
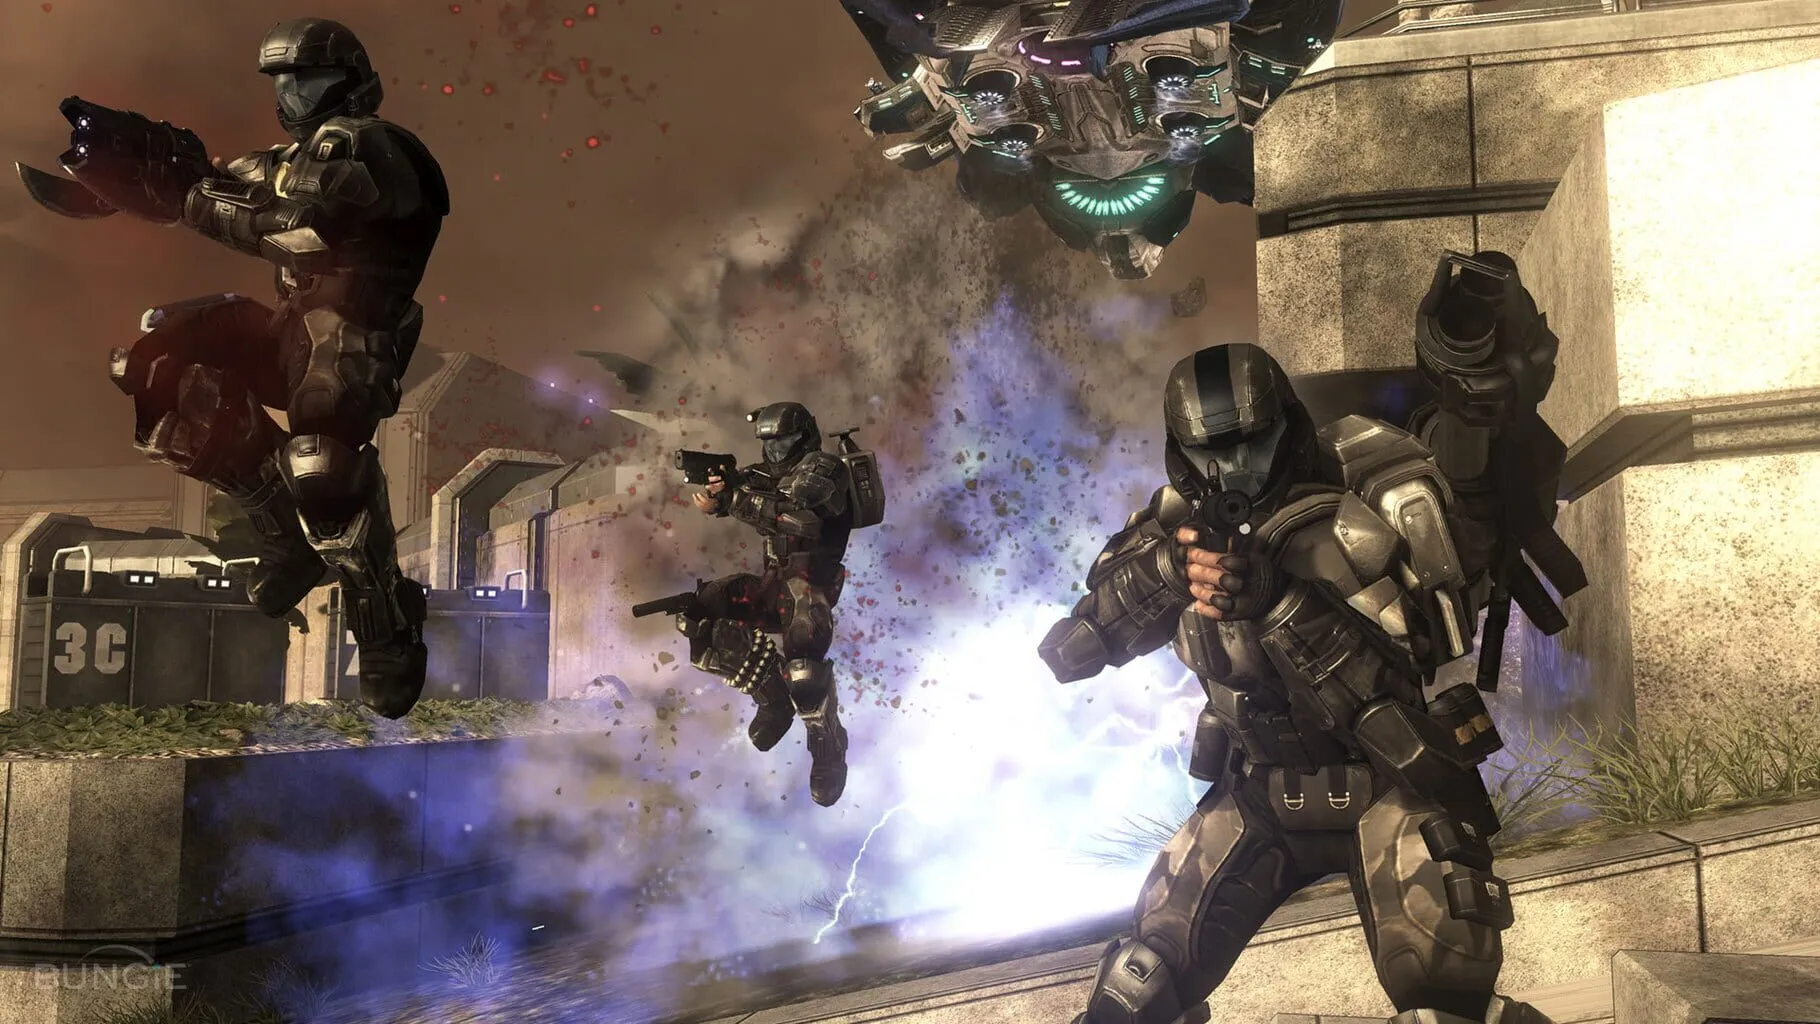
Welcome to our comprehensive “Halo 3: Weapons and Equipment Guide,” your ultimate resource for mastering the armory in one of the most iconic first-person shooters of all time. Whether you’re a seasoned Spartan or a new recruit, this guide is designed to elevate your gameplay. Dive into crucial insights on Choosing the Right Weapons for every scenario, learn the secrets of Using Weapons Effectively, and discover strategies for Managing Ammo and Reloading to stay battle-ready. Explore the powerful impact of Using Grenades and Melee Attacks, and unlock pro-level Tips for Effective Combat to dominate the battlefield. Read on, and prepare to become a legend in Halo 3!
Choosing the Right Weapons
In Halo 3, picking the right weapons can make the difference between dominating the battlefield and constant respawns. Here are some tips to help you choose wisely and stack your arsenal for any situation.
Know the Basics
There are a few main types of weapons in Halo 3:
- Human Weapons: These are practical and reliable, with plenty of ammo scattered around.
- Covenant Weapons: These are alien weapons; they’re more exotic but can be very powerful and effective against shields.
- Brute Weapons: These are mostly Covenant weapons modded by the Brutes, often packing a punch but with lower precision.
Primary Weapons
Your primary weapon is usually what you’ll be using for most of the battle. Here are some solid choices:
Battle Rifle (BR): Versatile and effective at mid-range. Perfect for those who like to keep a bit of distance but still stay in the action. The scope helps with headshots.
Assault Rifle (AR): Great for close quarters. Lots of ammo and a solid rate of fire. It may not be super precise, but it’s perfect for mowing down grunts and giving you a good start.
Covenant Carbine: Think of this as the alien answer to the BR. Easy to find and packs a punch, especially effective against shielded enemies.
Secondary Weapons
Secondary weapons are usually your backup for when things get hairy or you need something specific:
Plasma Pistol: Not much on its own, but when you charge it up, it fires an EMP shot that can knock out shields or vehicles. Pair it with a BR for a deadly combo known as the “noob combo.”
Needler: Fires homing needles that explode. It’s oddly satisfying and very effective against unshielded enemies.
Spikers and Maulers: These Brute weapons are perfect up close. Spikers for sustained fire, Maulers for a powerful shot that can take down enemies quickly.
Power Weapons
These weapons are picked up on the map and can turn the tide of battle:
Rocket Launcher: Ideal against vehicles and groups of enemies. Use it sparingly, as ammo is limited.
Sniper Rifle: Excellent at long-range takedowns. If you’ve got a good aim, it’s a game-changer. Always stay aware of your surroundings when using it.
Energy Sword: Ultimate for close quarters. If you can get up close without taking too much fire, the Energy Sword is a one-hit kill on most foes.
Gravity Hammer: Similar to the Energy Sword in its one-hit kill potential, but with a massive knockback effect. Great for crowd control or defending a tight spot.
Dual-Wielding
Some weapons can be dual-wielded for extra firepower. Mix and match for the best combos:
- SMGs: Dual-wielding these can shred through enemies quickly.
- Plasma Rifles/Pistols: Pairing these with an SMG can effectively combine their shield-stripping and health-draining abilities.
Situational Awareness
Always be aware of your surroundings and what you’re up against. For example, if you’re in a wide-open battlefield, a Sniper and BR combo could be ideal. In tight corridors or indoor maps, a Shotgun or Mauler paired with an AR might be the best choice.
Ammo Management
No matter how powerful your weapon, it’s useless without ammo. Always keep an eye on how much you have left and switch out if you’re running low. Covenant and Brute weapons are great for this, as they’re typically abundant on the battlefield.
By learning the strengths and weaknesses of each weapon and adapting to the battlefield, you’ll be well-equipped to handle any challenge that comes your way in Halo 3. Happy hunting, Spartan!
Using Weapons Effectively
Halo 3 is packed with a diverse arsenal of weapons, each designed for different combat situations. To maximize your effectiveness on the battlefield, it’s crucial to understand how and when to use each weapon. Let’s break down some key weapon strategies.
1. Assault Rifle (MA5C)
The Assault Rifle is your go-to weapon for close to mid-range combat. It has a high rate of fire but loses accuracy over distance, so aim for the chest and push forward. Burst firing in short, controlled bursts can help maintain accuracy when you’re trying to take down a foe from a slightly longer range.
- Pro Tip: Combine the Assault Rifle with a melee attack to quickly finish off enemies in close quarters.
2. Battle Rifle (BR55)
The Battle Rifle is perfect for mid-range encounters and excels in headshot damage. Its three-round burst can tear through enemy shields and finish the job with a well-placed headshot.
- Pro Tip: Aim for the head after the shield is down to capitalize on the BR’s precision.
3. Sniper Rifle (SRS99D)
This long-range weapon is all about precision. If you can master quick-scoping and lead your shots, the Sniper Rifle can decimate enemies from afar. Use high vantage points to spot and snipe unsuspecting foes.
- Pro Tip: Use the crouch button to steady your aim and reduce your profile.
4. Energy Sword
The Energy Sword is a one-hit kill in close-quarters combat. Once you lock onto an enemy, a quick lunge can take them out instantly. Beware, though, it leaves you vulnerable if you miss the lunge.
- Pro Tip: Wait for the right moment to strike in tight corridors or when sneaking up on enemies.
5. Rocket Launcher (M41 SSR)
The Rocket Launcher is an explosive weapon that’s perfect for taking out groups of enemies or vehicles. Its splash damage can be devastating, but it has limited ammo. Use it sparingly for maximum impact.
- Pro Tip: Aim at the ground near targets for a better chance of splash damage rather than aiming directly at them.
6. Needler
The Needler fires explosive crystal shards that home in on targets. Though it requires a few seconds to build up damage, a full magazine can cause a supercombine explosion, instantly killing most enemies.
- Pro Tip: Time your shots and combine them with dodges to avoid incoming fire while you wait for the explosion.
7. Spartan Laser (M6 Grindell/Galilean Nonlinear Rifle)
The Spartan Laser is a powerful, charged weapon that can destroy vehicles and heavily armored targets in one shot. The charge time means you need to anticipate enemy movements and plan your shots carefully.
- Pro Tip: Over by holding the charge. If you don’t fire, the weapon won’t need critical cooling.
Secondary Weapon Strategy
Having a great primary weapon is important, but don’t forget about secondary weapons! They can complement your main weapon’s flaws. For example:
- Pistol (M6G PDWS): Useful as a backup because of its decent accuracy and headshot capability.
- Plasma Pistol: Can overcharge to deal a powerful EMP burst, disabling vehicles and draining shields.
- SMG (M7/Caseless): Pairs well with the Battle Rifle for balance between close and mid-range combat.
Grenades and Equipment
Halo 3 isn’t just about guns; grenades and equipment play a crucial role too.
Grenades
- Frag Grenades: Good for bouncing around corners or into groups of enemies.
- Plasma Grenades: Stick to targets for a sure kill. Aim for the feet to increase your chance of a stick.
Equipment
- Bubble Shield: Deploy to create a temporary safe zone. Just remember, enemies can walk through it too.
- Active Camo: Use it to become nearly invisible. Great for sneaky approaches or escapes.
- Regenerator: Heals you and your team. Perfect for when you’re low on health but need to stay in the fight.
Final Tips
- Mix and Match: Experiment with different weapon combos to find what works best for you.
- Map Knowledge: Learn where weapons and equipment spawn to get the upper hand.
- Adapt Your Strategy: Each encounter is different. Be ready to switch weapons or tactics based on the situation.
By mastering these weapons and tactics, you’ll be an unstoppable force in Halo 3. Happy hunting, Spartan!
Managing Ammo and Reloading
When you’re caught in the heat of Halo 3’s intense firefights, managing your ammo and reloading effectively can make the difference between victory and respawn. Here’s how to keep your weapons primed and ready:
Knowing Your Weapons
First things first: understand your weapon’s ammo capacity and reload time. Each weapon in Halo 3 behaves differently. For instance:
- Battle Rifle (BR55): 36 rounds per magazine, good range. A favorite for many players due to its versatility.
- Assault Rifle (MA5C): 32 rounds per magazine, best for close to mid-range. High fire rate but burns through ammo quickly.
- Sniper Rifle (SRS99D): 4 rounds per magazine, long reload time. Best used from afar to pick off enemies quickly.
Knowing these basics means you’ll have a better idea of when to reload and when to swap out weapons.
Conserving Ammo
- Aim for the Head: Headshots deal more damage and use less ammo. Practice your aim to make every bullet count.
- Burst Fire: Instead of holding down the trigger, use controlled bursts. This is especially useful with weapons like the Assault Rifle or the BR.
- Switch Often: Seriously, don’t be shy about swapping weapons. If you run out of ammo, look around - even enemy weapons can be useful.
Reloading: The Basics
- Don’t Reload Too Early: If you have more than half a magazine left, hold off on the reload. You don’t want to get caught swapping mags in the middle of a firefight.
- Take Cover: Before reloading, make sure you’re behind cover. Reloading in the open leaves you vulnerable to attacks.
- Listen to the Audio Cues: Halo 3’s sound design is top-notch. The “click” sound when you’re out of ammo or the distinct reload sounds can alert you to reload.
Advanced Reloading Tips
- Weapon Juggling: When you’re in a tight spot, switch to your secondary weapon instead of reloading. Once you have some breathing room, go back and reload your primary weapon.
- Active Reload Zones: In Halo 3’s campaign, there are areas where combat lulls. Use these moments to fully reload all your weapons. It might sound obvious, but it’s easy to forget in the heat of battle.
- Reload Cancelling: You can cancel a reload animation by sprinting or meleeing. This can be useful if you need to start shooting immediately.
Managing Supplementary Ammo
- Ammo Crates: These are scattered throughout the campaign. Memorize their locations and plan your movements around them.
- Count Enemy Drops: Keep an eye on how much ammo enemies drop. If your current weapon is running low, it’s often more efficient to swap to a fresh enemy weapon with full ammo.
- Conserve Grenades: While not technically “ammo,” managing your grenades is crucial. Use them wisely to avoid wasting them on single targets when they can clear groups.
Battle Weapons
- Energy Weapons: These don’t have traditional “ammo” but instead are limited by an energy meter. Keep an eye on the meter - when it gets low, switch to something else.
- Power Weapons: Think Rocket Launcher or Spartan Laser. These have limited ammo and slow reloads. Save them for tough enemies or vehicles to maximize their impact.
Final Thoughts
Ammo management and efficient reloading are skills that come with practice. You’ll find that as you become more familiar with the rhythms of combat in Halo 3, these actions will become second nature. Keep fighting, Spartan, and stay sharp!
Using Grenades and Melee Attacks
One of the best things about Halo 3 is the sheer variety of ways to take down your enemies. Two of the most satisfying methods are using grenades and melee attacks. Whether you’re in a heated multiplayer match or the middle of a tough campaign mission, mastering these tactics can be the difference between victory and defeat. Let’s dive into how you can best use these tools to your advantage!
Grenade Basics
Grenades in Halo 3 are incredibly versatile and powerful. You get four types of grenades: Plasma, Fragmentation, Spike, and Firebomb. Each has its own benefits and downsides, so let’s break them down:
Fragmentation (Frag) Grenades
- Use: These are your standard military grenades. They explode after a short delay and are great for flushing out enemies hiding behind cover.
- Tips:
- Bounce them off walls to reach tricky spots.
- Throw them into groups of enemies for maximum damage.
Plasma Grenades
- Use: These stick to surfaces, including enemies! Perfect for a well-aimed hit that sticks to a foe or their vehicle.
- Tips:
- Try sticking them to fast-moving enemies like Brutes or vehicles for a sure hit.
- Get close before throwing to increase your chances of sticking it.
Spike Grenades
- Use: These stick to surfaces and shoot out spikes upon exploding, causing damage in a small radius.
- Tips:
- Stick them to walls where enemies are likely to walk by.
- Aim for the ground near where you expect your enemy to be.
Firebomb Grenades
- Use: These create a blazing fire upon impact, damaging anyone who walks through the flames.
- Tips:
- Use them to zone areas and control enemy movements.
- Throw them at choke points to limit where enemies can go.
Grenade Strategy
- Combo it Up: One powerful tactic is to combine grenades and gunfire. Throw a grenade at a group, then immediately start firing at them. The grenade will damage or disorient them, making it easier to finish them off with your weapon.
- Bounce and Bank: Grenades can be bounced off walls and floors, so practice ‘banking’ your throws to get them around corners or over obstacles.
- Save ‘Em for Bad Guys: Don’t just toss grenades randomly. They’re precious tools that can turn the tide of battle, so save them for when they’ll make the biggest impact.
Melee Attacks
In Halo 3, melee attacks can be devastating, especially in close quarters. Here’s how to make sure your punches pack the most punch:
Basics of Melee
- Close the Gap: You need to be up close and personal to use melee attacks effectively. This usually means sprinting towards your enemy or catching them by surprise.
- Strafe and Strike: When you get close, don’t just stand still. Keep moving to dodge their attacks and hit back. Strafing while meleeing can make you a harder target.
- Finish ‘Em Off: If you’ve weakened an enemy with gunfire, a quick melee strike can finish the job, especially if they’ve lost their shields.
Advanced Melee Techniques
- Back Smack: Hitting an enemy from behind with a melee attack usually results in an instant kill. Sneak up behind foes or flank them to pull this off.
- Grenade-Melee Combo: Throw a grenade and then charge in with a melee attack while the enemy is disoriented or trying to escape the blast.
- Weapon Bash: Different weapons have different melee ranges and damage. Note that heavier weapons, like the Gravity Hammer, can deliver more powerful melee attacks.
Putting it All Together
Using grenades and melee attacks effectively can really boost your gameplay in Halo 3. Always keep an eye on your surroundings, think ahead, and be ready to switch up your tactics. Try combining different types of grenades with melee strikes for a combo that keeps your enemies guessing.
Remember, practice makes perfect. So get out there, keep experimenting, and soon you’ll be a pro at using grenades and melee attacks, ready to take on anything Halo 3 throws at you. Happy gaming!
Tips for Effective Combat
Mastering combat in Halo 3 can be the difference between winning big and staring at a respawn timer. Here are some practical tips to make you a Spartan legend on the battlefield.
1. Know Your Weapons
Each weapon in Halo 3 has its own strengths and weaknesses, so understanding when to use each one is crucial.
- Battle Rifle (BR): Perfect for mid-range combat, the BR’s three-shot burst can take down shields quickly.
- Assault Rifle: Great for close encounters, its rapid fire can pressure opponents.
- Sniper Rifle: Ideal for long-range engagements, but make sure you have a clear shot before pulling the trigger.
- Energy Sword: Unmatched in close quarters. Use it for quick kills, but beware of your enemy’s distance.
2. Use Grenades Wisely
Grenades can turn the tide of battle when used correctly. Aim to bounce grenades off walls to surprise opponents. Use Plasma Grenades to stick enemies for instant kills, and Frag Grenades to clear out clusters of foes.
3. Manage Your Equipment
Equipment like Bubble Shields, Power Drains, and Regenerators can give you the upper hand. Use a Bubble Shield for temporary cover, especially in open areas. Drop a Regenerator when your shields are low, and deploy Power Drains to disable your enemy’s shields.
4. Stay on the Move
Standing still makes you an easy target. Strafe, crouch, and jump to make it harder for enemies to hit you. Learn to circle strafe around opponents to maintain fire while dodging attacks.
5. Control the Map
Know the key locations on each map, such as where powerful weapons and equipment spawn. Controlling these areas can give your team a significant advantage. Deny your enemy access by setting traps and holding these positions with teammates.
6. Watch Your Radar
Keep an eye on your motion tracker. It can reveal the position of nearby enemies, giving you a much-needed warning before you get ambushed. Remember that crouching makes you invisible on the radar—use this to your advantage when sneaking up on opponents.
7. Team Play
Work with your team, not against them. Share weapons, call out enemy movements, and support each other in firefights. Even a lone wolf benefits from having a coordinated team.
8. Pay Attention to Shields
Your shield is your lifeline. When it’s about to break, retreat to safety until it recharges. Pushing without shields usually results in a quick death. Conversely, jump on enemies when their shields are down for an easy kill.
9. Vehicle Strategy
Vehicles can dominate the battlefield when used correctly.
- Warthog: Great for fast assaults and transporting teammates.
- Ghost: Ideal for quick hit-and-run tactics.
- Scorpion Tank: Offers immense firepower but moves slowly. Use vehicles wisely and always be aware of potential anti-vehicle weapons your enemies might have.
10. Adapt and Overcome
Be ready to adjust your strategy based on the situation. If your current approach isn’t working, don’t be afraid to try something new. Switching tactics can often throw your enemies off guard.