
Welcome to our detailed guide for “GW2: The Ruined City of Arah Dungeon.” Dive deep into the heart of this legendary dungeon as we walk you through every pivotal encounter and strategy you need to conquer the fallen city. Whether you’re taking on Dwayna’s Champion, Grenth’s Champion, Melandru’s Champion, or Lyssa’s Champion, we’ve got you covered with tips, tricks, and essential tactics. And, of course, face the ultimate showdown with the dreaded Zhaitan. Get ready to challenge the gods and make history in Tyria!
Dwayna’s Champion
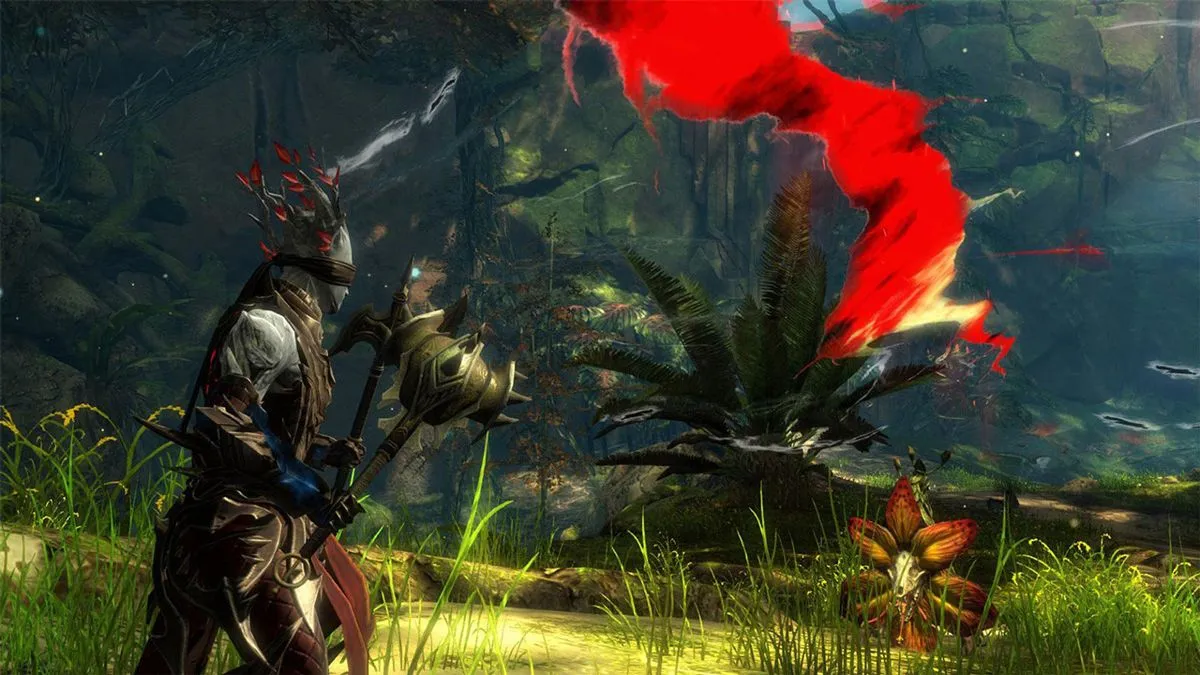
Welcome to the next part of our guide on Guild Wars 2’s dungeon, The Ruined City of Arah. This section will focus on tackling Dwayna’s Champion, one of the tougher bosses within the dungeon. Ready your armor and sharpen your weapons because this one’s going to be a challenge!
Who is Dwayna’s Champion?
Dwayna’s Champion is an imposing figure, representing the goddess Dwayna. This boss fight is critical as it stands between you and the progression of the dungeon. The mech plays a significant role here, demanding good gear, strategy, and coordination from your party.
Preparing for the Fight
Make sure your team is well-prepared before diving in. Here are quick tips for prepping:
- Gear Up: Ensure your gear is up to par. High-level armor and weapons are a must.
- Consumables: Stock up on healing potions, buffs, and utility items.
- Team Composition: A balanced team with tank, support, and DPS roles will give you the best edge.
Mechanics of the Fight
Understanding the mechanics of Dwayna’s Champion is crucial to success:
1. Divine Shields
Dwayna’s Champion uses divine shields throughout the fight. These shields make it immune to damage for limited periods. Focus on avoiding attacks and healing your team while the shield is up.
2. Healing Orbs
The Champion will summon healing orbs periodically. These orbs will restore the boss’s health if they aren’t destroyed quickly. Assign one or two DPS players to focus on destroying these orbs as soon as they appear.
3. Lightning Strikes
Be wary of random lightning strikes around the arena. These can deal significant damage to unprepared players. Spread out to reduce the chance of multiple members being hit at once.
4. AOE Attacks
Dwayna’s Champion has powerful area-of-effect attacks. When the boss starts charging these attacks, move out of the red circles on the ground to minimize damage.
Strategy
Following a clear strategy will help you take down Dwayna’s Champion effectively:
Phase 1: Managing Shields and Strikes
- In the initial phase, strike Dwayna’s Champion to whittle down its health.
- When the divine shield activates, avoid wasting attacks and focus on staying alive. Use this time to heal and prepare.
- Keep an eye on the sky for lightning strikes, and spread out to avoid splash damage.
Phase 2: Destroying Healing Orbs
- As soon as the healing orbs appear, assign your quickest DPS players to destroy them.
- Failure to eliminate these will result in the boss regaining health, prolonging the fight.
Phase 3: Dodging AOE Attacks
- When Dwayna’s Champion begins to charge an AOE attack, look for red markers on the ground.
- Move out of these areas to avoid taking massive damage.
Tips and Tricks
- Stay Mobile: The key to surviving this fight is to stay on the move. Don’t let the boss’s AOE or lightning strikes pin you down.
- Focus Fire: Keep your DPS focused on the boss or the healing orbs, depending on what phase you’re in.
- Communication: Use voice chat to coordinate your strategies and call out when shields are down or orbs appear.
Conclusion
Defeating Dwayna’s Champion can seem daunting, but with good preparation, strategy, and teamwork, you’ll bring this divine adversary down in no time. Keep these tips in mind, and soon you’ll be advancing deeper into The Ruined City of Arah, ready to face whatever other challenges come your way. Happy hunting, heroes!
Grenth’s Champion
Alright, adventurers! You’ve made it to the final encounter in the Ruined City of Arah dungeon. Get ready because Grenth’s Champion is not your average baddie. This fight requires coordination, strategy, and a little bit of luck. Let’s break it down so you can walk away victorious.
Understanding the Fight
Grenth’s Champion is a massive, spooky foe with a couple of nasty tricks up his sleeve. His room is filled with lethal hazards and adds that can quickly overwhelm an unprepared party.
- Health: High
- Special Abilities: Area of Effect (AoE) attacks, summoning adds, high damage attacks.
Team Composition
For this fight, balance is key. You’ll want a well-rounded party with each player taking on a specific role:
- Tank: To draw aggro and keep the boss’s attention.
- Healer: To keep everyone alive through the continuous damage.
- DPS (Damage Per Second): Ideally two DPS players focusing on both the boss and the adds.
Phase Breakdown
Phase 1: Initial Engagement
- Positioning: Spread out to avoid overlapping AoE damage. Tank should engage first to establish threat.
- Attacks: The Champion will unleash large AoE attacks. Watch for ground indicators and move out quickly.
- Adds: Adds will spawn periodically. DPS should switch to adds to clear them ASAP. Healer keeps an eye on the tank’s health.
Phase 2: Mid-Battle Mayhem
- Ghostly Minions: At around 50% health, the Champion will summon stronger ghostly minions. These guys hit hard and need to be dealt with quickly.
- Movement: The boss will start using knockback abilities. Don’t position yourself near hazards or edge of the platform.
- Bubble Shield: Occasionally, the Champion will generate a protective bubble, reducing incoming damage. Focus on adds during this time.
Phase 3: Final Showdown
- Enrage Timer: As health dwindles, the Champion enrages, dealing heavy damage.
- Focused Fire: Keep the DPS on the boss while support handles any straggling adds.
- Team Coordination: Now is the time to use your strongest abilities and consumables. Communication is crucial here to avoid mistiming.
Pro Tips
- Stay Mobile: Constant movement is vital to avoid AoE attacks.
- Crowd Control: Use stuns and interrupts to manage adds more effectively.
- Environment Awareness: Pay attention to environmental hazards around the platform. Falling or burning will lead to a quick death.
Loot and Rewards
Defeating Grenth’s Champion rewards players with high-tier loot, including potentially rare items, dungeon tokens for gear, and the personal satisfaction of conquering one of Arah’s toughest bosses. Don’t forget to check for any bonus chests hidden in the room!
Recap
Grenth’s Champion is no easy foe, but with the right strategy and teamwork, he’s definitely beatable. Keep cool, follow the phases, and don’t panic. This spooky giant can be taken down with a well-prepared and coordinated team. Good luck, adventurers, and may Grenth’s blessing (or curses) pave your way to glory!
Melandru’s Champion
One of the most challenging encounters in Guild Wars 2’s classic dungeon, The Ruined City of Arah, is the fight against Melandru’s Champion. This colossal tree-like monster is both visually impressive and a serious test of your group’s coordination and skills. Let’s break down the fight to help you defeat this mighty foe.
Preparing for the Battle
Before you even engage Melandru’s Champion, it’s crucial to make sure you and your party are ready:
- Group Composition: Ideally, you’ll want a balanced team with a mix of DPS (damage per second), support, and a tank. A healer is invaluable in this fight.
- Gear Check: Ensure everyone has up-to-date gear. High toughness and vitality stats help your tank survive the boss’ powerful attacks.
Phase 1: Handling Adds
When the fight begins, Melandru’s Champion will summon a group of adds (additional enemies). Here’s how to handle them:
- Focus Fire: Have the DPS focus on the adds first. Clearing them quickly reduces the overall damage your group takes.
- Tank Positioning: Your tank should position themselves to draw the boss’s attention away from the group while the DPS deals with the adds.
- Avoid AoE Attacks: Melandru’s Champion uses a variety of area-of-effect (AoE) attacks. Keep moving to avoid unnecessary damage.
Phase 2: The Champion’s Attacks
With the adds out of the way, the battle enters the next phase where you’ll face Melandru’s Champion directly.
- Root Slam: This is a high-damage frontal attack. Tanks need to keep the boss faced away from the group and be ready to dodge or block.
- Poison Spores: The boss will drop poison spores at random locations. Stay alert and move out of these areas quickly to avoid taking damage over time.
- Knockback: Occasionally, Melandru’s Champion will perform a knockback move. Position yourself to avoid being tossed into environmental hazards.
Phase 3: Healing and Sustainability
As the fight progresses, your team needs to stay alive and manage resources effectively.
- Healer’s Role: The healer should stay mobile and keep the team topped up with health to mitigate ongoing damage.
- Condition Removal: Poison and other conditions can quickly wear down your health. Use skills and abilities that cleanse conditions.
- Rest Areas: Take advantage of brief lulls in the fight (usually after add waves) to heal up and reorganize.
Final Phase: Berserk Mode
Near the end of the battle, Melandru’s Champion will enter a berserk mode, increasing its attack speed and damage output. This is the final push, and coordination is crucial.
- Cooldown Management: Use powerful skills and cooldowns wisely to maximize damage and keep the party healed.
- Dodge Timing: The increased attack speed means you’ll need to be extra vigilant with dodging and blocking.
- Focus Fire: Ignore any new adds and focus all attacks on the boss to bring it down quickly.
Loot and Rewards
Defeating Melandru’s Champion yields some high-quality loot, including rare gear and valuable crafting materials. The victory also brings you one step closer to completing The Ruined City of Arah and all its legendary treasures.
Quick Tips Summary
- Prepare with the right team composition and gear.
- Prioritize killing adds first in the initial phase.
- Dodge and block powerful attacks like Root Slam and Poison Spores.
- Manage healing and condition removal effectively.
- Focus all attacks on the boss during berserk mode.
By following these steps and keeping your cool, your party will stand tall against Melandru’s Champion and emerge victorious. Happy adventuring!
Lyssa’s Champion
When you venture into the Ruined City of Arah dungeon in Guild Wars 2, you’ll face a series of challenging encounters. One of the most thrilling and tricky battles you’ll come across is Lyssa’s Champion. Let’s break down everything you need to know to take down this formidable foe.
Finding Lyssa’s Champion
First things first, you’ll need to navigate your way through the dungeon to reach Lyssa’s Champion. The dungeon is sprawling and filled with enemies that will test your skills, so make sure your party is prepared. Stick together, communicate, and be ready for anything.
To find Lyssa’s Champion, you’ll make your way through the City of Arah, battling various minions. Keep an eye out for visual clues and map markers that lead you toward the boss.
Understanding the Fight
Lyssa’s Champion isn’t your ordinary boss; she comes packed with multi-phase mechanics that can catch you off guard if you’re not careful. Her abilities are inspired by the goddess Lyssa, focusing heavily on illusions and deception.
Phase 1: Initial Assault
- Illusory Clones: Lyssa’s Champion will spawn illusions of herself that attack your group. These clones don’t deal much damage but can overwhelm if ignored. Focus on taking them down quickly with AoE attacks.
- Mirror Images: She will create mirror images that explode after a short time. Dodge or move away from these to avoid heavy damage.
Phase 2: Deception and Chaos
- Mesmerizing Dance: When Lyssa’s Champion casts this, she confuses and disorients party members, making direction and targeting difficult. Assign roles beforehand to ensure that there’s always someone who can call out instructions during this phase.
- Spectral Barrage: She fires off a series of projectiles that target random players. These can be avoided with dodges or by using skills that block projectiles.
Phase 3: Final Stand
- Champion’s Gambit: In the last phase, Lyssa’s Champion will summon a massive illusion that mimics all her previous attacks but stronger. Focus down this illusion as soon as it appears while keeping pressure on Lyssa’s Champion herself.
- Blinding Light: She releases a blinding light that can stun and damage anyone caught in its radius. Use stability or stun breaks to counter this ability.
Key Strategies for Victory
- Crowd Control: Bring skills that can immobilize, stun, or knock down illusions and mirror images. Skills that cleanse conditions, especially confusion, are vital too.
- Communication: Stay vocal about what’s happening. Calling out attacks, illusions, and strategies can be the difference between success and failure.
- Positioning: Spread out but stay within range of heals and buffs. This minimizes the damage from AoE attacks and makes it easier to avoid projectiles and exploding mirrors.
Loot and Rewards
After you’ve successfully defeated Lyssa’s Champion, you’ll be rewarded with high-level gear and unique items. Be sure to check for valuable drops and split the loot with your group. Also, remember that defeating her contributes to achievements in the dungeon, so you’re ticking off some checkboxes while you’re at it!
By following these strategies and understanding her mechanics, you’ll be well on your way to vanquishing one of the toughest bosses in the Ruined City of Arah. So gear up, gather your party, and may Lyssa’s illusions be your stepping stone to victory.
Zhaitan: The Final Boss of The Ruined City of Arah Dungeon
Welcome to the epic conclusion of Guild Wars 2’s personal story! If you’ve made it this far, you’re about to face Zhaitan, the Elder Dragon of Orr. Ready to bring him down? Here’s everything you need to know.
The Setup
Before diving into the battle, you’ll journey through The Ruined City of Arah dungeon, taking on hordes of undead minions and mini-bosses to reach Zhaitan. Team coordination is key here, so stick together and strategize.
Preparing for Zhaitan
- Team Composition: Aim for a balanced team of DPS, tank, and healing. Guardians and Warriors make great tanks, while Elementalists and Mesmers can dish out heavy damage. Rangers or Druids are good for healing and support.
- Gear and Consumables: Equip your best gear with the highest stats you have. Don’t be shy about using consumables like food and potions to boost your attributes. Get those buffs rolling!
- Communication: Use voice chat if possible. Clear and quick communication can make a big difference, especially during critical moments in the fight.
The Battle Phases
Phase 1: The Approach
- Location: On a giant airship facing the massive undead dragon.
- Strategy: Keep an eye out for Zhaitan’s undead minions. Focus them down quickly to avoid getting overwhelmed. Spread out to minimize damage from Zhaitan’s large area-of-effect (AoE) attacks.
- Key Tips: As Zhaitan periodically flies around, adjust your positioning to target his weak spots. Watch out for any environmental hazards.
Phase 2: The Claws
- Location: Moving to another airship.
- Strategy: Here, you’ll focus on destroying Zhaitan’s claws. These giant appendages deal significant damage if left unchecked.
- Key Tips: Prioritize the claws while fending off smaller enemies. Group AoE attacks from Mesmers or Necromancers can be highly effective. Stay mobile to avoid heavy damage.
Phase 3: The Heart
- Location: Back on your primary airship.
- Strategy: Zhaitan’s heart becomes vulnerable. As it does, he’ll throw everything he’s got at you. Split your team to handle both the heart and the waves of minions.
- Key Tips: This phase requires excellent timing and coordination. Prepare to revive fallen team members quickly to maintain DPS. Focus fire on the heart while parrying enemy attacks.
Phase 4: The Final Stand
- Location: On a nearby platform.
- Strategy: Zhaitan makes his last desperate stand. Bring all your power to bear and finish him off.
- Key Tips: The key here is to avoid his devastating attacks. Use mobility skills to dodge and keep away from the front, as his breath weapon covers a wide arc. Rally together and pour on the damage.
Victory and Rewards
Defeating Zhaitan is no small feat and marks a major milestone in your Guild Wars 2 journey. You’ll earn tons of loot, including rare items and valuable crafting materials. Plus, the personal satisfaction of having taken down an Elder Dragon!
- Loot: Look out for unique gear and materials exclusive to this dungeon.
- Achievements: Completing this dungeon will unlock achievements and titles.
Congrats, Commander! You’ve slain Zhaitan and saved Tyria from one of its gravest threats. Stand tall, adventurer – you’ve earned it.
Final Tips
- Stay Positive: This fight is tough, but don’t get discouraged. Learn from each attempt and talk through what went wrong with your team.
- Keep Moving: Mobility and positioning are as important as damage output. Stay light on your feet.
Good luck out there! Oh, and keep an eye out for updates and events – ArenaNet loves to surprise players with new content.
There you have it! A comprehensive guide to taking down Zhaitan in The Ruined City of Arah dungeon. Remember, teamwork makes the dream work! Now, get out there and show that Elder Dragon who’s boss. 😎