
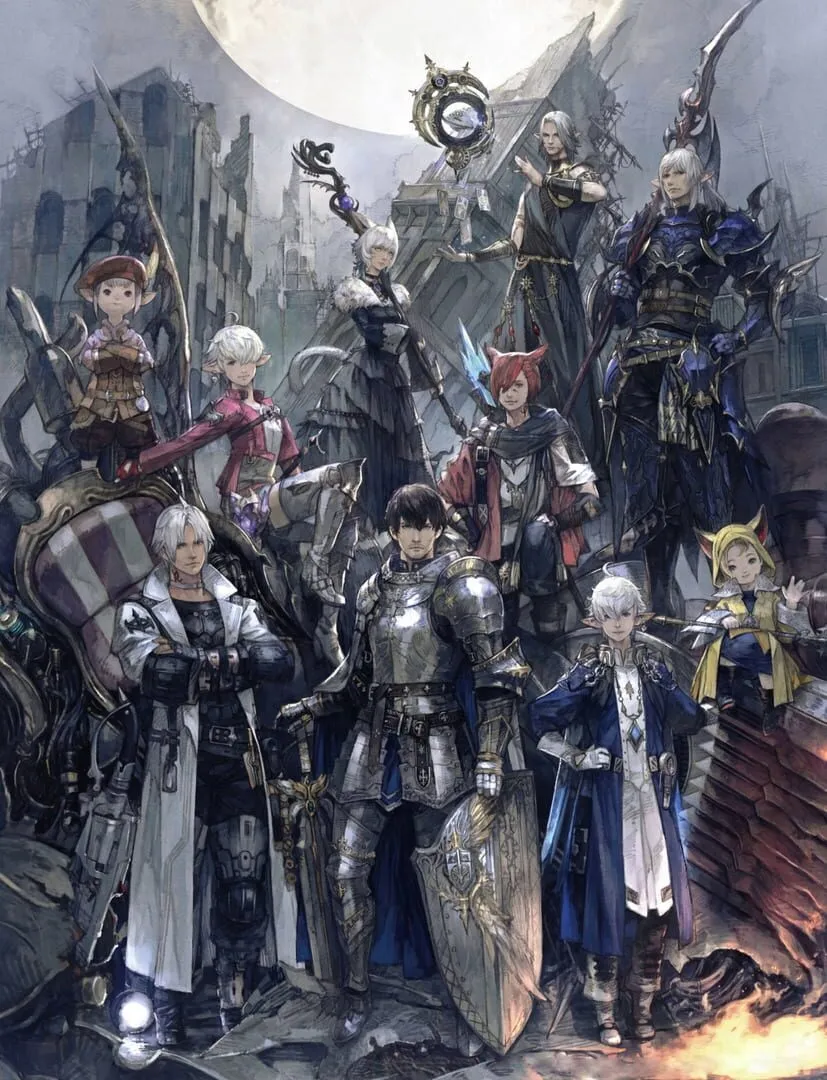
Welcome to your ultimate guide for conquering the depths of The Sunken Temple of Qarn in FFXIV! Dive into the labyrinthine corridors and sunken treasures of this epic dungeon as we break down everything you need to know. From battling the menacing Teratotaur and formidable Temple Guardian to managing Adjuncts and snagging coveted Drops, we’ve got you covered. Plus, discover the Best Party Setup to ensure your success. Ready to emerge victorious? Read on to master The Sunken Temple of Qarn!
Teratotaur: The Sunken Temple of Qarn’s Big Bad Beast
Ah, Teratotaur. This hulking beast serves as the first boss in the Sunken Temple of Qarn, and it’s definitely not to be taken lightly. Unlike many other bosses, Teratotaur has some pretty unique mechanics that can wipe your party if you’re not careful. Let’s dive in and dissect this monstrous encounter!
Overview
When you first step into Teratotaur’s room, you’ll notice the arena is pretty spacious. That’s for a good reason – you’re gonna need the space to handle its mechanics effectively. Teratotaur doesn’t rely on just brute strength; it has a couple of nasty tricks up its sleeve.
Key Mechanics
Doom (The Real Nightmare)
The real challenge with Teratotaur is dealing with Doom. When the boss casts Doom on a player, a countdown timer starts ticking above their head. If this reaches zero, it’s an instant knockout. Eeek! Thankfully, there’s a way to cleanse it.
- Stone Pedestals: The arena is dotted with glowing blue pedestals. To cleanse Doom, stand on one of these. Standing on a pedestal will cleanse the Doom debuff, but it can only be used once. Coordinate with your team to ensure each person with Doom has access to a pedestal.
Adds (They’re Not Just Annoying)
Periodically, Teratotaur will summon adds (additional enemies) that can overwhelm your party if left unchecked.
- Kill Priority: Typically, DPS should focus on taking down the adds quickly before returning to Teratotaur. Healers and tanks should stay on their toes, managing health bars and aggro.
Frightful Roar
Another ability to watch out for is Frightful Roar. This is an AoE (area of effect) ability that increases the damage your party takes. It’s not something you can dodge, so healers should prepare to top everyone off as soon as it happens.
Strategy
- Positioning: Spread out around the room, but close enough to help each other if adds become overwhelming.
- Communication: Make sure everyone knows where the nearest stone pedestal is. You don’t want four players scrambling for the same pedestal when Doom gets cast.
- Focus Adds Quickly: Adds should be dealt with immediately to prevent the situation from getting out of control.
- Healing: Healers need to be ready to cleanse Doom and patch everyone up after Frightful Roar. Efficient healing here is crucial.
Additional Tips
- Limit Breaks: Save your limit break for a critical moment. It’s generally more useful as a party-wide save rather than burning it early.
- DPS Coordination: While it’s important for DPS to keep their output high, they should also be prepared to switch targets to adds when necessary.
- Tank Positioning: Tanks should keep Teratotaur positioned in the center while allowing the DPS and healers to move freely around them. This makes dodging and pedestals easier to manage.
Conclusion
Teratotaur is all about managing debuffs, adds, and positioning. As long as your party keeps calm and communicates well, you’ll have no problem tearing down this terrifying beast. Enjoy your victory and the treasure that follows!
By mastering these mechanics, you’ll be well on your way to conquering the Sunken Temple of Qarn. Good luck, and happy adventuring!
Hopefully, this chunk of the guide helps you and your friends avoid turning Teratotaur into a tombstone test. Remember: teamwork and communication are your best friends in this fight!
Temple Guardian
Alright, adventurers, once you’re through the initial swarms of enemies in the Sunken Temple of Qarn, you’ll face your first big test: the Temple Guardian. This sentinel isn’t the toughest boss, but it can trip you up if you’re not careful. Let’s break down everything you need to know about tackling this ancient automaton.
Boss Overview
The Temple Guardian is a large, mechanical golem that guards the inner chambers of Qarn. It’s got a few tricks up its sleeves, but with the right strategy, you can make short work of it.
Recommended Party Setup
- Tank: 1 Tank to hold aggro
- Healer: 1 Healer to keep everyone alive
- DPS: 2 DPS to maximize damage output
This standard party composition should serve you well for this encounter.
Key Mechanics
Stone Skull (Titanic Swing)
- The Guardian will wind up and slam the ground, dealing heavy damage to everyone in front of it. Tanks should face the boss away from the party while others should stay behind to avoid the hit.
Spawning Adds
- Throughout the fight, the Temple Guardian will summon smaller mobs called Stone Servants. These need to be dealt with quickly.
- DPS should prioritize taking these out to ease the healer’s burden.
Weight of the World
- The Guardian applies a debuff to random party members. This debuff gradually deals damage over time.
- Healers, keep an eye out and use your cleansing abilities to remove these debuffs as soon as possible.
Obelisks
- In the room, you’ll notice some obelisks. Use these to your advantage. When they glow, interact with them to trigger a protective barrier.
- These barriers will shield you from the Temple Guardian’s Deadly Smash, a room-wide AoE attack that deals significant damage.
Battle Strategy
Positioning:
- The tank should grab the Guardian’s attention and keep it faced away from the party. Try to pull it to a corner to minimize the area affected by Titanic Swing.
- The rest of the party should spread out behind the Guardian but close enough to quickly switch to new adds when they spawn.
Managing Adds:
- When Stone Servants appear, DPS should take them down ASAP. If left unchecked, they can overwhelm the healer and tank, potentially leading to a party wipe.
Handling Mechanics:
- Healers need to swiftly remove the Weight of the World debuff and toss in some AoE heals whenever Deadly Smash occurs.
- Keep an eye on the obelisks. When they glow, make sure someone interacts with them to provide the party with the shield needed to survive Deadly Smash.
Cooldowns:
- Tanks should use defensive cooldowns to mitigate the damage from Titanic Swing and other heavy hits.
- DPS should use their damage bursts during the phases when no adds are present, to bring the Guardian down as quickly as possible.
Quick Tips
- Always stay behind the Guardian unless you’re tanking.
- Make use of the glowing obelisks to protect against Deadly Smash.
- Prioritize adds to keep the battlefield manageable.
- Communicate with your party to handle debuffs and adds efficiently.
Conclusion
With good positioning, attention to adds, and effective use of obelisks, the Temple Guardian isn’t so daunting. Follow these strategies, keep your cool, and this ancient automaton will be ancient history. Onward to more adventures in the Sunken Temple of Qarn!
Good luck, Warriors of Light! May your journey through Qarn be filled with treasure and triumph.
Adjuncts in The Sunken Temple of Qarn
So, you’ve found yourself navigating the ancient corridors of The Sunken Temple of Qarn in Final Fantasy XIV. This dungeon, rich in Allagan ruin vibes, is tricky with its puzzles and mobs. And then there are the Adjuncts. Let’s break down what these mystical entities are and how you can best tackle them.
What Are Adjuncts?
Adjuncts are specific types of enemies in The Sunken Temple of Qarn. You’ll notice them because they have the term “Adjunct” in their names, like “Stone Gold Adjunct.” These baddies are unique because they play a crucial role in the mechanics of the dungeon’s puzzles and boss fights.
How to Deal with Adjuncts
Recognize and Prioritize
Adjuncts show up alongside other enemies, often making things more complicated. These enemies are essential to eliminating quickly because they can interfere with the mechanics you need to solve to move forward. When you see an Adjunct:
- Focus Fire: The party should target the Adjunct first. These enemies can disrupt your progress if left unchecked.
- Stay Calm: Panic is your enemy. Maintain your cool to ensure efficient teamwork and execution of strategies.
Interacting with Mechanisms
Occasionally, you’ll find Adjuncts near ancient mechanisms or puzzles. Sometimes defeating an Adjunct is a prerequisite to activate or solve a part of the dungeon. They might guard levers or buttons critical to progressing.
Boss Fights and Adjuncts
Temple Guardian
In the fight against the Temple Guardian, Adjuncts will spawn periodically. Here’s your game plan:
- Assign Roles: Have one DPS or the off-tank focus on eliminating the Adjuncts while others manage the main boss.
- AOE Attacks: When Adjuncts spawn in groups, use Area of Effect (AOE) attacks to quickly thin their numbers. This helps keep the battlefield manageable.
Adjudicator
Later, when you face the Adjudicator, Adjuncts contribute to the chaos:
- Top Priority: Adjuncts must be your immediate priority. Their spawn events are often tied to boss actions, making things overwhelming if not managed.
- Keep an Eye Out: These Appendages can sometimes be tricky to spot in the heat of battle. Always keep an eye on the battlefield to notice new spawns quickly.
Tips and Tricks
- Communication is Key: Always communicate with your team about Adjunct spawns. A quick “Adjunct up!” in chat can be the difference between success and chaos.
- Skill Rotation: Use your most efficient skills to quickly take Adjuncts down. You want to minimize the distraction time spent away from the boss.
- Positioning: Keep an eye on where these enemies spawn and adapt your positioning quickly to deal with them. Staying mobile is crucial.
- Healing and Support: Healers should keep a watchful eye on health bars as focusing on Adjuncts might cause momentary lapses in health management.
Wrapping Up
Dealing with Adjuncts in The Sunken Temple of Qarn requires sharp attention and swift action. By recognizing their importance and promptly neutralizing them, you ensure smoother dungeon runs and prevent any unwelcome surprises from these pesky enemies. Dive in, stay focused, and keep your path clear of Adjunct troublemakers. Happy adventuring!
Navigating the Sunken Temple of Qarn can be daunting, but with this guide, you’re better prepared to face the Adjunct threats head-on. Keep at it, adventurer!
Drops
So, you’ve made it to the Sunken Temple of Qarn in Final Fantasy XIV, and you’re probably wondering: What awesome loot can you get here? Don’t worry; we’ve got you covered. Here’s the lowdown on the treasure you’ll be hunting for in this ancient, trap-filled dungeon.
Gear Drops
First, let’s talk about gear. The Sunken Temple of Qarn is packed with chests and enemies dropping gear suited for various jobs. Here’s a quick rundown of what you can expect:
- Sunken Temple Attire: These pieces are designed to help boost your stats and make fighting those pesky dungeon bosses a bit less painful.
- Sunken Temple Helm
- Sunken Temple Sabatons
- Sunken Temple Breeches
- … and other set pieces.
- Accessories: Like rings, bracelets, and necklaces. These add small stat boosts but can make a difference in tougher battles.
Boss-Specific Drops
Each boss you defeat in the Sunken Temple of Qarn has a chance to drop some unique and pretty cool items. Let’s break it down by each boss:
- Teratotaur: This big, scary monster isn’t just here to intimidate you. Beat him, and you might get:
- Orchestrion Roll: Plays cool music when used in your home.
- Teratotaur’s Fang: A crafting material for specific recipes.
- Temple Guardian: Defeat this stone behemoth for a chance to snag:
- Guardian’s Pauldron: Adds a solid boost to your defense stats.
- Ancient Coins: Collect enough, and you can trade them for nice rewards.
- Adjudicator: The final boss isn’t going down without a fight, but the loot is worth it:
- Adjudicator’s Robe: A stylish robe that boosts your magical capabilities.
- Mystic Scrolls: These give you lore and other interesting tidbits about Eorzea’s past.
Rare and Special Drops
Persist through the dungeon often enough, and you might come across some rare items. These aren’t guaranteed drops, but they are worth mentioning:
- Pets/Minions: Like the “Qarn Kis-Na” which is a tiny, adorable helper that’ll follow you around.
- Mounts: Extremely rare, but some dungeon drops include mounts that you can ride.
- Crafting Materials: Sometimes you’ll find rare ores or materials that can help in crafting high-level gear or collectibles.
Tips for Farming Drops
If there’s something specific you’re looking for, here are some tips to maximize your chances:
- Clear Speed: Try to run through the dungeon as quickly and efficiently as possible. The faster you clear, the more you can repeat.
- Groups: Join a group specifically looking to farm the dungeon. More runs mean more chances for those rare drops.
- Daily Roulettes: Use the Duty Finder’s daily roulettes for extra rewards and quicker queue times. This can help keep your motivation high, as you’ll get bonus loot for doing these runs.
So, there you have it, adventurers! Equip yourself wisely, and may you find the treasure you seek in the Sunken Temple of Qarn. Happy hunting!
Best Party Setup
When diving into The Sunken Temple of Qarn in Final Fantasy XIV, having the right party setup can make all the difference. This dungeon isn’t overly difficult, but a well-balanced team ensures a smooth run with minimal frustration. Let’s break down the ideal setup.
Tank: The Team’s Shield
Your tank is the cornerstone of the party, taking the brunt of the damage and keeping enemies focused away from the more vulnerable members. In The Sunken Temple of Qarn, any of the four tank jobs will suffice:
- Paladin: Excellent for beginners, with strong defensive skills and healing abilities.
- Warrior: High HP and self-healing capabilities make them very durable.
- Dark Knight: Great for soaking up damage, with a mix of offensive and defensive skills.
- Gunbreaker: High damage output and defensive cooldowns make them versatile.
The tank’s job is to gather up enemies and bosses, hold their attention, and minimize damage to the rest of the party.
Healer: The Lifeline
A good healer keeps everyone alive through the dungeon’s twists and turns. There are three main healer jobs, each bringing something unique to the table:
- White Mage: Powerful heals and simple mechanics, great for beginners.
- Scholar: Uses a pet to assist in healing, adding a layer of complexity but offering strong sustained healing.
- Astrologian: Versatile healer with cards that can buff the party and adapt to different situations.
Healers should focus on keeping the tank’s health topped up while throwing out AoE heals during group-wide damage.
DPS: Bringing the Pain
The damage dealers (or DPS) are responsible for taking down enemies and bosses quickly. A balanced team ideally includes one melee and one ranged/magic DPS to take advantage of various buffs and debuffs. Here’s what you could include:
- Melee DPS:
- Dragoon: High burst damage and simple rotations.
- Samurai: Pure melee damage with high output.
- Ninja: Offers utility with debuffs and high mobility.
- Ranged/Magic DPS:
- Bard: Supportive with party buffs and decent damage.
- Machinist: High single-target damage and gadgets for utility.
- Black Mage: Devastating spell casts, though requires positional awareness.
- Summoner: Versatile with pets and strong AoE damage.
- Red Mage: Balanced damage with the ability to heal and resurrect.
Mixing melee and ranged DPS also helps handle different mechanics effectively.
Ideal Composition
While any reasonably balanced party can complete The Sunken Temple of Qarn, here’s a tried-and-true setup:
Tank: Warrior
- Durable, with good self-sustain.
Healer: White Mage
- Simple, straightforward, and efficient healing.
DPS: Dragoon and Black Mage
- Covers melee and magic damage, offering flexibility and high output.
Team Strategy
To make the most of your party setup, communication and teamwork are key. Here are some tips:
- Pulling and Positioning: Tanks should pull enemies strategically to avoid overwhelming the healer. Aim to face enemies away from the party to reduce cleave damage.
- Cooldowns and Buffs: Coordinate DPS cooldowns and healer buffs to maximize damage during boss fights.
- Mechanics Mastery: Ensure everyone understands boss mechanics. For example, during the switches-and-beams sections, position yourself accordingly to avoid taking unnecessary damage.
Flexibility Counts
While the above setup is a solid choice, flexibility is essential in FFXIV. Sometimes you may need to adapt depending on the available party members. Understanding each role’s strengths and how they can compensate for each other will always give you an edge.
By having a well-rounded party and effective communication, The Sunken Temple of Qarn becomes less of a challenge and more of an enjoyable adventure. Happy dungeoning!