
Unlock the mysteries of the ancient Dwemer ruin in our comprehensive ESO: Volenfell Dungeon Guide! Journey through the sand-swept halls of Volenfell, battling fierce enemies and uncovering lost treasures. This guide will arm you with essential strategies to conquer each boss and navigate treacherous encounters. Dive into detailed tactics for defeating Quintus Verres, taming the formidable Tremorscale, and mastering the formidable trials of the Guardian’s Spark, Guardian’s Strength, and Guardian’s Soul. Whether you’re a seasoned adventurer or a newcomer, our guide ensures you’re prepared for every challenge. Get ready to conquer Volenfell and claim your rewards in The Elder Scrolls Online!
Quintus Verres
Quintus Verres can be one tough customer in The Elder Scrolls Online, especially if you’re venturing into the Volenfell dungeon for the first time. Don’t fret, though—this guide will help you through it all!
Who is Quintus Verres?
Quintus Verres is one of the bosses you’ll encounter in the Volenfell dungeon. He’s a powerful Imperial who delves deep into ancient ruins, seeking lost treasures and knowledge. As an enemy, he’s pretty formidable and has some tricky abilities that can trip up unprepared players.
Where to Find Quintus Verres
You’ll bump into Quintus Verres in the latter part of the Volenfell dungeon. The ruins are infested with Dwemer constructs and other nasty critters, so be ready for a challenging trek. Keep pushing forward, and you’ll eventually come face-to-face with Verres.
Abilities and Mechanics
Quintus Verres has a few key abilities you’ll need to watch out for:
- Fiery Blast: Verres unleashes a powerful fire-based attack. When you see him winding up, it’s a good idea to dodge or block.
- Summon Constructs: If the fight drags on too long, Verres will call in Dwemer constructs to help him. These constructs can get annoying if you don’t take them out quickly.
- Healing Aura: This sneaky move allows Verres to recover some of his health. Interrupt him asap when you see him use this ability.
Strategy for Taking Him Down
Here’s a tried-and-true strategy to take down Quintus Verres:
- Tank Up Front: Your tank should keep Verres occupied, maintaining aggro and soaking up his heavy hits.
- DPS on the Move: Damage dealers (DPS) should focus on hitting him hard and fast, but stay mobile to avoid his Fiery Blast.
- Healer on Standby: Healers need to stay alert, ready to patch up allies who get caught in the fire or by the constructs.
- Interrupt Often: When Verres starts using Healing Aura, interrupt him quickly. This will stop him from regaining health and make the fight shorter.
- Manage Adds: When Verres summons constructs, designate one DPS to handle them. Take them down swiftly to keep the focus on Verres.
Rewards
After all that hard work, defeating Quintus Verres can net you some sweet loot. Players typically receive unique set items such as the Treasure Hunter’s Set, which can be a big boost for your character. Plus, you’ll get the satisfaction of having taken down a tough opponent and progressed further through Volenfell.
Tips
- Stay Nimble: Always be ready to dodge or block Verres’ special attacks.
- Communication is Key: Keep your team informed, especially when handling adds or needing interrupts.
- Practice Makes Perfect: If you don’t get it on the first try, don’t get discouraged. Learn from each attempt.
Taking down Quintus Verres requires teamwork, strategy, and a bit of quick thinking. Stick to the plan, and you’ll have this boss down in no time. Good luck, adventurers!
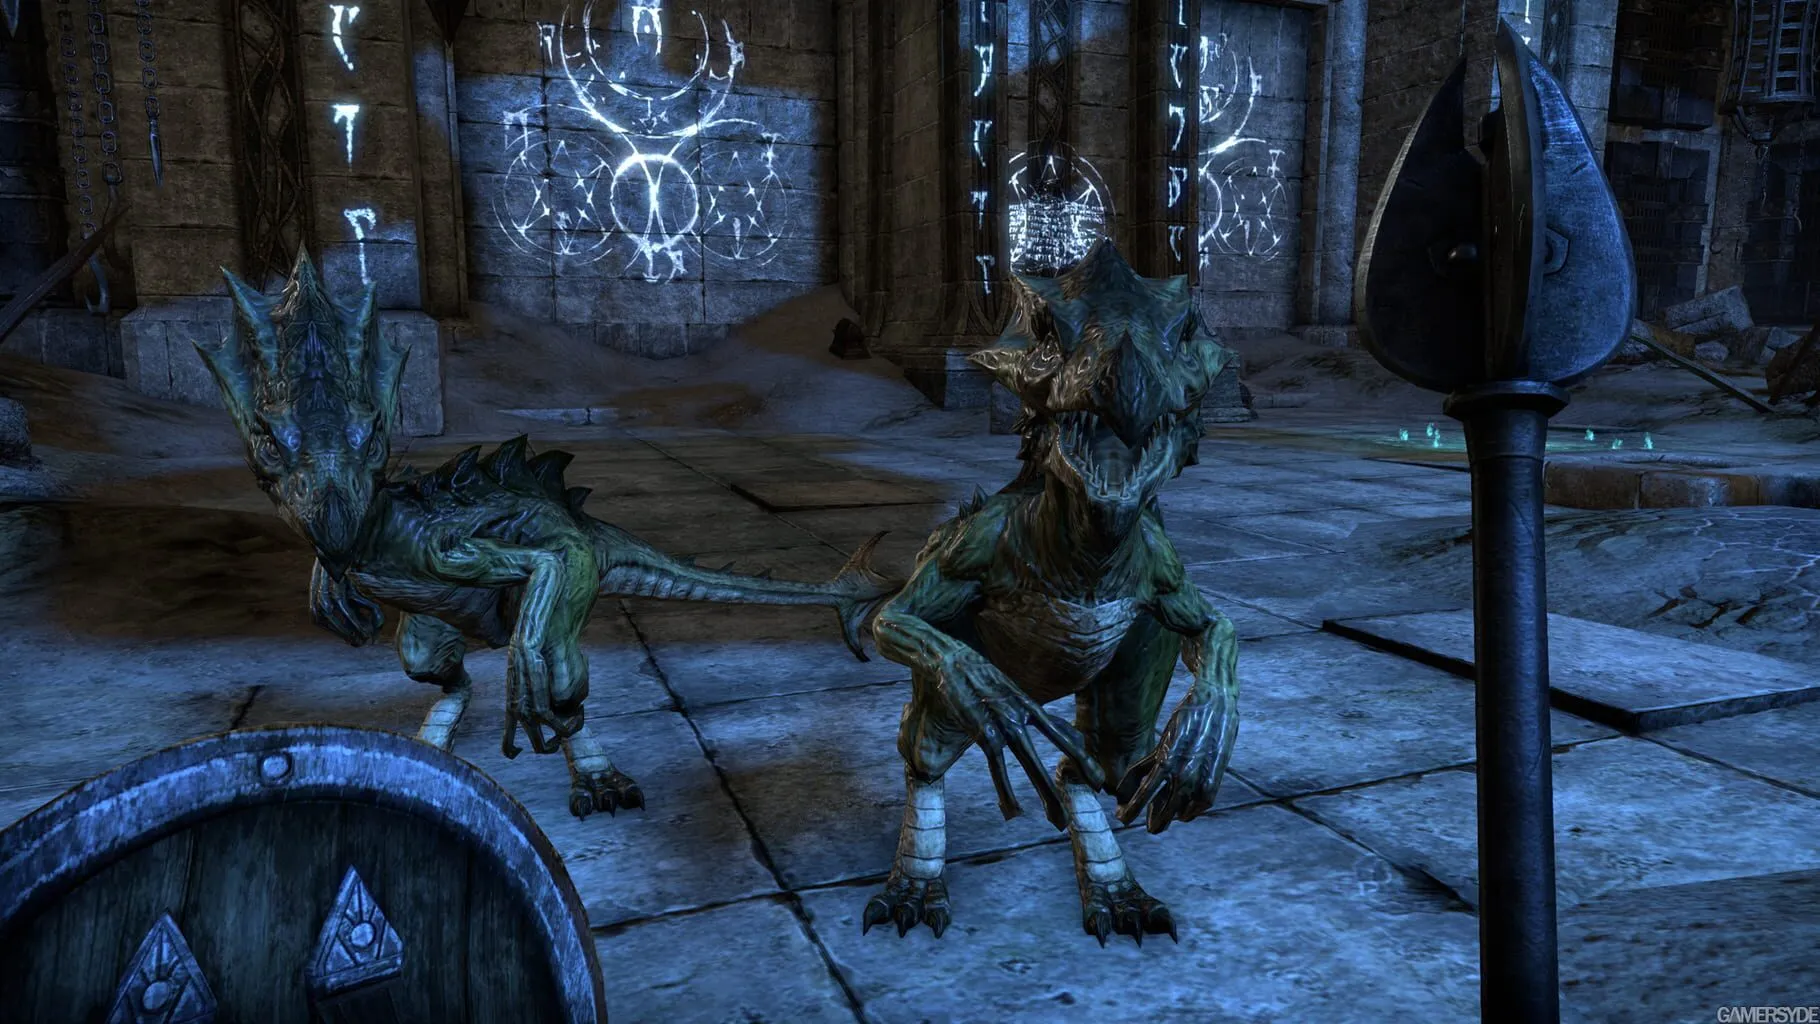
Tremorscale: Your Guide to Defeating the Monstrous Durzog in Volenfell
Who is Tremorscale?
Tremorscale is one mean durzog—the big guy lurking in the shadows of the Volenfell dungeon in Elder Scrolls Online. He’s a nimble adversary and packs a punch, so don’t underestimate him. If you’re not familiar, a durzog is a reptilian creature often seen as the muscle for nasty Dwemer constructs. Tremorscale rules this roost and you’ll need your A-game to take him down.
Preparing for the Battle
Before you face Tremorscale, make sure your group’s ready. Here’s what you need:
- Tank: Someone to hold Tremorscale’s attention.
- Healer: Keeping the team alive through all the chaos.
- DPS (Damage Per Second): The ones dishing out the pain and taking Tremorscale down.
Equip your best gear, stock up on potions, and check your abilities. Communication is key, so hop on voice chat or use text to strategize.
The Arena
Picture this: you’re in a circular pit with Tremorscale at the center. The arena has some pillars around, giving you spots to dodge and hide from attacks. Use these to your advantage!
Tremorscale’s Abilities
Here’s what to watch out for when fighting Tremorscale:
Burrow Ability: Tremorscale loves to dig underground and emerge to surprise you. When he starts burrowing, watch the ground for clues on where he’ll pop up next. If you see a rumbling patch of ground, steer clear!
Stomp Attack: This AoE (Area of Effect) attack is a big problem. Tremorscale lifts his mighty legs and stomps down hard. You’ll see him raise his foot—when he does, move away fast!
Bite: His bite is as bad as his bite. It’s a single-target attack aimed at whoever has his aggro (mostly the tank). Tanks should be ready with a block or a dodge roll.
Strategy to Win
Positioning is Everything: Tanks, keep Tremorscale’s attention but move him around the pillars to help dodge his burrow attacks. Other players should keep an eye on the ground and avoid those rumbling signs.
Kite and Fight: When Tremorscale starts burrowing, it’s time for everyone to scatter and keep moving. Standing still = bad news.
Stagger Healing and Shielding: Healers should top up health bars constantly and drop shields to help with the fight’s constant damage spikes. DPS players should make sure to have self-healing abilities ready.
Burst Damage Windows: After stomping, Tremorscale is a bit slow to recover. Hit him hard during these moments.
Focus on Communication: Call out when you see Tremorscale about to burrow or stomp. Let your team know what you’re doing to synchronize your movements and reactions.
Epic Loot
Defeating Tremorscale isn’t just for glory. He drops some really cool gear. You might get the Tremorscale Monster Set, which has some awesome bonuses for tanks and DPS:
- Helm: Drops directly from Tremorscale.
- Shoulders: Can be bought in Undaunted chests.
Set Bonuses:
- One Item: Adds Stamina.
- Two Items: When you taunt an enemy, you can release a lava fissure that deals damage and reduces enemy Movement Speed.
Conclusion
Facing Tremorscale in Volenfell is a test of your team’s coordination and skill. By staying alert and strategizing, you can make this fight a ton of fun instead of a massive headache. Get your team together, gear up, and go show that big, bad durzog who’s boss. Happy hunting!
ESO: Volenfell Dungeon Guide
Guardian’s Spark
In the Elder Scrolls Online, Volenfell is one of the classic dungeons you can dive into. One of the bosses you’ll face here is called the Guardian’s Spark. Knowing how to handle this encounter can make a big difference between wiping and winning. Here’s what you need to know to tackle this electrifying boss.
Who is the Guardian’s Spark?
The Guardian’s Spark is a massive, lightning-infused construct that packs a punch. Found in the depths of Volenfell, it menaces players with a mix of electric attacks and area-of-effect (AoE) skills. If you and your team aren’t prepared, it can quickly turn the fight into a chaotic scramble.
What to Expect
When you first engage the Guardian’s Spark, you’ll notice it has two main phases:
High Voltage Attacks: The Guardian will launch powerful electric attacks aimed at single players. These hits can deal massive damage, so tanks need to keep aggro and block these strikes when possible.
AoE Shockwaves: Periodically, the Guardian will generate large AoE shockwaves. These can hurt — a lot. They’re indicated by a glowing circle that appears on the ground. If you see this, move away fast to avoid major damage.
Effective Strategies
Here are some key strategies to get the upper hand:
- Spread Out: Make sure your team isn’t clumped together. This minimizes the risk of everyone being hit by AoE attacks. Spread out to give each player room to dodge.
- Block and Interrupt: Tanks should focus on blocking the Guardian’s direct attacks to absorb damage. DPS players should look for opportunities to interrupt its casted abilities. This can reduce the number of spells the Guardian can get off.
- Stay Mobile: The Guardian likes to use stuns and snares, so keep moving. Don’t stand in one place for too long unless you’re sure you’re safe.
Team Roles
A balanced team can handle Guardian’s Spark more effectively:
- Tanks: Keep the boss’s attention. Use your taunts and shields to absorb those dangerous strikes.
- DPS: Your job is to dish out damage while avoiding the Guardian’s AoE. Interruption skills can be handy to stop big attacks.
- Healers: Keep everyone’s health topped up, especially when AoE attacks land. If possible, try to place healing zones close to where players might dodge to.
Recommended Gear and Skills
Before fighting Guardian’s Spark, make sure your team’s gear and skills are up to the task:
- Lightning Resistance: Equip gear that reduces lightning damage. It can provide an edge in surviving the Guardian’s electric onslaught.
- AoE Heals: Healers should prepare spells that heal multiple targets. With the spread-out strategy, keeping everyone healed can be trickier.
- Stamina and Magicka Management: Watch your resources! This fight can be long and draining, so bring potions to help manage stamina and magicka.
Final Tips
- Learn Patterns: The Guardian’s attacks follow predictable patterns. With enough practice, you’ll learn when to dodge, block, and interrupt.
- Communicate: Call out when you see AoE indicators or when you need help. Team coordination is vital.
- Stay Positive: This boss can be tough, but don’t get discouraged. Learn from each attempt and you’ll eventually emerge victorious.
Taking down Guardian’s Spark is a real thrill, and with this guide, you’re better prepared to face this electrifying challenge. Grab your gear, get your team together, and light up that dungeon!
Guardian’s Strength: Your Guide to Surviving Volenfell
So you’ve decided to brave the dusty ruins of Volenfell in Elder Scrolls Online. Good choice! This dungeon is packed with both treasure and danger, but fear not – with the right strategy, you and your buddies can come out victorious. One of the biggest headaches you’ll face in Volenfell is the Guardian’s Strength fight. Let’s break it down.
The Guardian’s Strength: Who Are You Fighting?
The Guardian’s Strength is a massive stone golem, essentially a walking statue of pure power. This boss doesn’t mess around, and it’s got a few tricks up its stone sleeves that can wipe your team if you’re not prepared.
Getting Ready
Before you jump in, make sure you:
- Gear Up: Equip your best gear. Sharp weapons and strong armor will make all the difference.
- Stock Up on Potions: Health and stamina potions are a must.
- Plan Your Roles: Have your tank, healer, and DPS roles clearly defined.
Breaking Down the Fight
The Guardian’s Strength has a few key abilities you need to watch out for. Here’s what to expect and how to handle each one:
Ground Slam:
- What It Does: The Guardian will rear up and then slam the ground, causing a shockwave that hits everyone in range.
- How to Deal: The tank should keep the boss’s attention and try to move to the side to avoid the direct impact. DPS and healers should stay at range to minimize damage taken.
Boulder Toss:
- What It Does: Pretty much what it sounds like – the Guardian lobs a huge rock at a player.
- How to Deal: When you see the Guardian winding up for a throw, move! Keep an eye out for an incoming boulder, and dodge to the side to avoid it. Healers should be ready to top off anyone who gets hit.
Stomp:
- What It Does: The Guardian stomps the ground, causing tremors that deal damage over time.
- How to Deal: Avoid grouping up. Spread out to minimize the collective damage from the tremors. If you’re a healer, prioritize healing over time spells to counteract the continuous damage.
Team Strategy
To take this boss down efficiently, follow these general tips:
- Tank’s Job: Keep the Guardian’s attention focused on you. Shield yourself when you see the Ground Slam or Stomp coming.
- Healer’s Role: Position yourself where you can easily reach all teammates. Use area-of-effect heals to keep up with the persistent damage from the Stomp.
- DPS Tactics: Focus fire on the Guardian and use any debuffs or damage amplifiers you have on hand. Always be ready to dodge the Boulder Toss.
When Things Go Sideways
If you find yourselves getting overwhelmed, don’t be afraid to reset. Sometimes taking a breather and giving your team a moment to regroup can turn the tide of the fight. Remember, communication is key – call out abilities when you see them being prepped to give everyone the best chance to dodge and stay alive.
The Loot
The best part of any boss fight – the loot! Defeating the Guardian’s Strength can score you some sweet gear drops that are perfect for advancing in the game. Keep an eye out for unique set items that boost your stats.
Wrapping Up
With these tips in your back pocket, you’re all set to take on the Guardian’s Strength in Volenfell. Remember to gear up, stay alert, and communicate with your team. Good luck out there, adventurer, and may your loot be ever epic!
ESO: Volenfell Dungeon Guide
Guardian’s Soul
Ah, Volenfell! The home of ancient Dwemer ruins, deadly traps, and tricky bosses. One of the key encounters in this dungeon is the Guardian’s Soul. This mystical entity can be a real pain if you don’t know what you’re doing. But don’t worry, we’ve got you covered. Here’s everything you need to know to take down the Guardian’s Soul and survive to tell the tale.
The Setup
Before we dive into the fight itself, let’s talk setup. Make sure your group is balanced with a solid tank, a couple of dps (damage per second) characters, and a healer. Everyone should have their gear and abilities optimized for their roles. A well-prepared group is key to beating Guardian’s Soul efficiently.
Know Your Enemy
The Guardian’s Soul has a few nasty tricks up its sleeve. Understanding its abilities is crucial to staying alive and coming out on top. Here’s a breakdown:
1. Soul Drain: This ability will target a random player, dealing continuous damage over several seconds. Healers need to be quick to keep the player’s health up.
2. Summon Constructs: The Guardian’s Soul will periodically summon Dwemer constructs to assist in the fight. Focus on these ads quickly, as they can overwhelm your group if ignored.
3. Soul Barrage: The boss will unleash a torrent of magic projectiles at the group. These are avoidable if you stay mobile and keep an eye on where they’re coming from.
4. Phase Shift: At certain health thresholds, the Guardian’s Soul will briefly phase out, making it immune to damage. Use this time to regroup and heal up.
Strategy
Positioning: Keep the Guardian’s Soul in the center of the room, with the tank holding aggro. DPS and healers should spread out to minimize damage from Soul Barrage. This setup helps avoid group-wide damage.
Dealing with Soul Drain: Healers should prioritize the affected player, but DPS can also use damage reduction abilities or shields to help mitigate the damage.
Managing Constructs: Designate one DPS to focus on ads as soon as they spawn. This player’s job is to keep the constructs under control, allowing the rest of the group to focus more on the boss.
Handling Phase Shift: When the boss becomes immune, it’s a good time for DPS to switch to any remaining constructs. Healers should top off everyone’s health, and the tank can reposition if needed.
Pro Tips
- Communication is key: Update your team when constructs appear, or when someone is hit by Soul Drain.
- Stay mobile: Constant movement will keep you safer from Soul Barrage.
- Prioritize: Always clear ads quickly to avoid getting overwhelmed.
- Cooldown Management: Save your big cooldowns for when the Guardian’s Soul comes out of a Phase Shift. This will help push through the tougher parts of the fight more smoothly.
Final Thoughts
The Guardian’s Soul is a challenging part of Volenfell, but with the right strategy and preparation, it’s totally manageable. Remember to keep communicating with your team, stay on top of ad management, and be ready to adapt to the boss’s mechanics. With these tips in mind, you’ll have the Guardian’s Soul down in no time, ready to move on to the next challenge in this ancient Dwemer fortress.
Good luck, adventurer, and may your loot be plentiful! 🗡️✨