
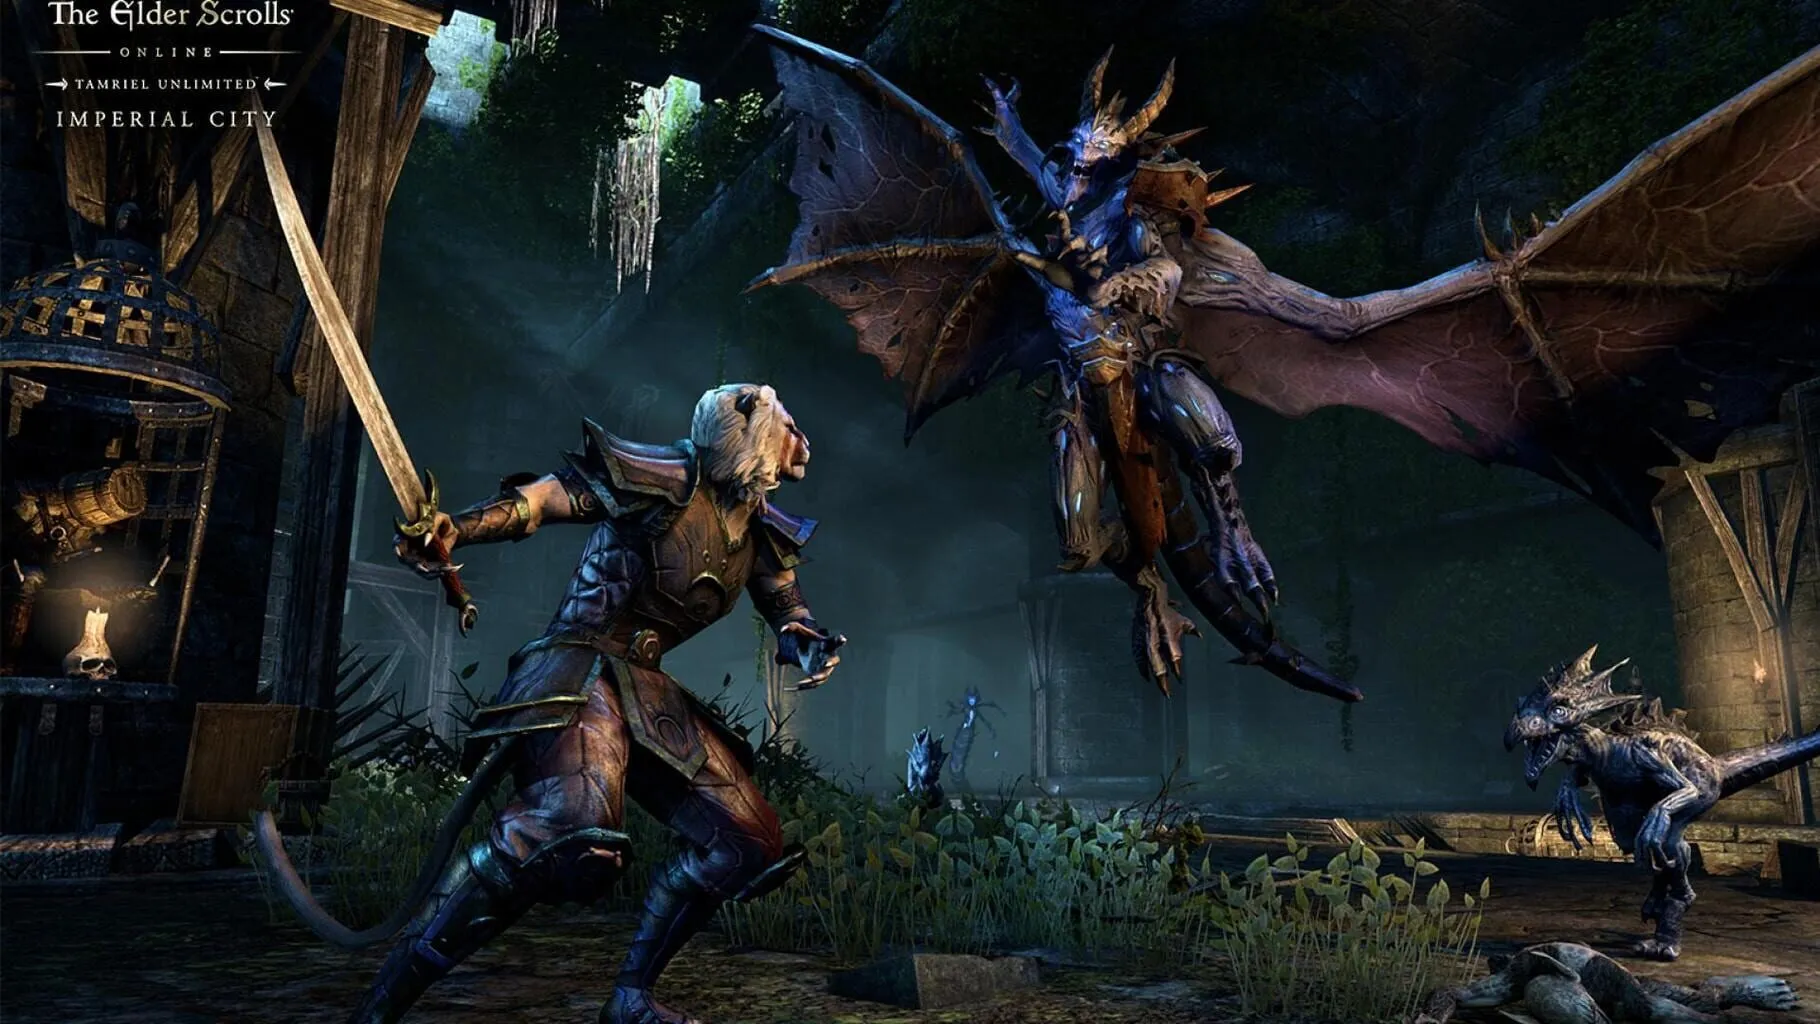
Step into the thrilling depths of The Elder Scrolls Online with our comprehensive Spindleclutch I Dungeon Guide! Whether you’re a seasoned adventurer or a newcomer to Tamriel, this guide will equip you with all the knowledge needed to conquer one of ESO’s most notorious dungeons. Discover strategies and tips for overcoming the menacing Spindlekin, mastering the tactics to defeat The Swarm Mother, tackling the formidable Big Rabbu, outsmarting Cerise the Widowmaker, and finally, bringing down the fearsome Bloodspawn. Dive in, and get ready for an exhilarating journey filled with epic battles and legendary rewards!
Spindlekin
Spindlekin is one of the trickier bosses you’ll face in Spindleclutch I. Known for her creepy spider-wrangling abilities and nasty poison attacks, she can be a real challenge if you don’t know what you’re doing. But, fear not, we’ve broken it down for you!
1. Location and Readiness
Spindlekin is the third boss you’ll encounter in Spindleclutch I. Make sure your team is well-prepared before facing her. Stock up on potions and ensure your gear durability is maxed out. Also, it’s helpful to have some poison resistance if possible.
2. Group Composition
A classic setup works well here: one tank, one healer, and two damage dealers (DPS). Here’s why:
- Tank: Keep Spindlekin’s attention and soak up the damage.
- Healer: Keep your team’s health topped up and cleanse poison effects when needed.
- DPS: Focus on Spindlekin and the spider adds, eliminating them quickly to reduce the chaos.
3. Attack Patterns and Abilities
Understanding Spindlekin’s moves will help you dodge and counter them effectively.
- Poison Spray: Spindlekin sprays poison across the room in narrow lines. It’s crucial to avoid these lines, so keep moving and be aware of her positioning.
- Spider Summons: She will periodically summon small spiders. If left unchecked, they will overwhelm your group. DPS should switch to take these out fast.
- Web Trap: Occasionally, she’ll ensnare a random player in a web. This player will be immobilized and take damage over time. Another player must help free them by damaging the web.
4. Tactics and Positioning
Positioning makes or breaks this fight:
- Tanks: Hold Spindlekin in the center of the room but be ready to move her if the area fills up with too many poison lines.
- Healer: Stay at the edges, where you can watch everyone and step out of harm’s way.
- DPS: Rotate around Spindlekin, always looking out for poison spray and spiders. Work together quickly to clean up any adds.
5. Tips and Tricks
- Stay Mobile: Keep moving to avoid poison blasts and web traps.
- Communication: Keep talking to your group; call out when someone is webbed or poison spray is about to hit.
- Cleanse Poison: The healer should be quick to cleanse any poison effects. It can make the difference between life and death.
- Focus Adds: Don’t ignore the smaller spiders. They can be deadly if they gang up on you.
6. Loot and Rewards
Defeating Spindlekin can net you some decent gear, typically targeted towards medium armor users and stamina-based builds.
- Set Bonuses: Look out for pieces from sets like Spinner’s Garments or Silks of the Sun.
- Unique Drops: Spindlekin might drop unique items like Spindlekin’s Web-Cloaked Gloves, which offer additional poison resistance.
7. Wrapping Up
Once you’ve taken Spindlekin down, take a moment to celebrate—this is no easy feat. Spindlekin is not just about dealing damage but also managing mechanics and working seamlessly with your team. Now you’re one step closer to mastering Spindleclutch I and ready to tackle the final bosses, the Swarm Mother and Big Rabbu.
Remember, practice makes perfect. If you wipe, analyze what went wrong, adjust your strategy, and try again. Happy dungeon diving!
The Swarm Mother
Alright, adventurers, let’s dive into one of the creepier bosses you’ll face in Elder Scrolls Online’s Spindleclutch I: The Swarm Mother. Seriously, if you’ve got a fear of spiders, brace yourself — it’s about to get webby!
Overview
The Swarm Mother is the second boss inside the Spindleclutch I dungeon, and she brings a swarm of spiders with her. Expect to be webbed, bitten, and swarmed. Let’s break down her abilities and how to handle them so you can squash this eight-legged foe and her creepy-crawly minions.
Abilities
Web Spray: The Swarm Mother loves to spit webs at players, entangling them. It’s a pesky immobilization effect, so make sure to break free as soon as possible.
Summon Minions: Throughout the fight, she will constantly summon smaller spiders to aid her. These minions can overwhelm your group if left unchecked.
Titanic Smash: This ability deals heavy damage in a cone in front of her. Tanks, keep her facing away from the group to avoid unintentional spider squashing.
Strategy
For Tanks
- Positioning: Keep the Swarm Mother faced away from the rest of the party. This will prevent Titanic Smash from hitting everyone. Move her occasionally to avoid standing in web pools.
- Adds Management: When the smaller spiders are summoned, try to pull them towards you and keep them off your DPS and healer. If possible, use your area-of-effect (AoE) taunts to grab their attention quickly.
For DPS
- Focus Fire: Your main target is the Swarm Mother, but don’t ignore the minions. Assign one DPS to help the tank clear the adds efficiently.
- Stay Mobile: Avoid getting hit by Web Spray by keeping your distance and moving unpredictably. If you do get webbed, break free ASAP.
- Interrupts: If you see her winding up for a big attack, use any interrupts you have to stop her from performing it.
For Healers
- Keep Moving: Web pools can cause a lot of trouble if you’re caught in them, so stay on your toes.
- Cleanse and Heal: Your party will likely take damage from minions and Titanic Smash. Prioritize cleansing immobilizations and keep everyone’s health topped up, especially the tank.
- Help with Adds: When possible, throw in some light attacks or AoE spells to help whittle down the minion numbers.
Tips and Tricks
- Communication: Make sure your team knows who is dealing with adds and who is focusing the boss. Quick and clear communication makes the fight smoother.
- Potion Usage: Don’t hesitate to use your potions if you’re low on health, magicka, or stamina. Better to chug a potion than wipe!
- Use Synergies: Watch for synergistic effects from your teammates’ abilities. Utilize them, especially Blessing of Protection or Combustion, to turn the tide in your favor.
Loot
Defeating this creepy-crawly menace can net you some sweet loot. Look out for these goodies:
- Swarm Mother’s Entanglement: A set piece that enhances your stamina and weapon damage.
- Venin Skoria: A chance for a powerful helm piece that fits older Monster sets.
- Generic Dungeon Loot: Gold, soul gems, and crafting materials are a given. Hopefully, you’ll get lucky with some high-quality gear!
Conclusion
Facing the Swarm Mother can be a grimy affair, but with the right strategy, it can also be quite satisfying. Focus on positioning, communication, and handling the minions effectively. Take down the Swarm Mother and you’ll be one step closer to conquering Spindleclutch I. Happy hunting, and watch out for those webs!
If you’ve got any cool stories or extra tips about taking down the Swarm Mother, drop them in the comments below! Adventurers unite!
Big Rabbu: The Hilarious Hunched Menace
Alright, adventurers, time to get down to brass tacks. Spindleclutch I is one of those fan-favorite dungeons in The Elder Scrolls Online that offers not just challenge but also some good laughs. One major source of both is Big Rabbu, a boss you’ll encounter along the way. This guide will give you the lowdown on taking down this entertainingly tough baddie.
Meet Big Rabbu
Big Rabbu is a giant spider in the Spindleclutch I dungeon. This hunched-over monstrosity is no joke despite having a name that might make you smirk. Don’t let your guard down just because he sounds a bit silly!
Where to Find Him
Big Rabbu is not hiding, considering his size. He can be found after defeating the pesky spiderlings and dark magic creatures that infest Spindleclutch I. He’s one of the last obstacles you’ll face before confronting the final boss, the Swarm Mother.
Battle Mechanics
Web Spray: Big Rabbu loves to use his Web Spray ability. He’ll pin one of your teammates to the floor. If you’re the chosen one, start breaking free quickly, or you’ll take major damage. If you see this happening to a friend, make sure to help them out immediately!
Spiderlings: Not only does Big Rabbu fight, but he also calls for back-up in the form of smaller spiders known as spiderlings. These can be a nuisance if you ignore them. Make sure your DPS characters clean them up quickly so they don’t overwhelm your healer and tank.
Venomous Bite: Every so often, Big Rabbu will go for a deadly bite that packs a punch. Tanks, this is where you shine. Make sure to keep his attention on you and use your defensive skills to reduce incoming damage.
Pound Attack: Big Rabbu occasionally lifts his front legs and slams them down, causing an area-of-effect (AOE) attack. It’s slow but damaging, so if you see him winding up for this attack, get out of the way fast!
Strategy for Success
Here are some tips to send Big Rabbu back to whatever creepy corner he crawled from:
Dodge, Dodge, Dodge: Web Spray and Pound Attack are both avoidable if you’re swift about it. Always be moving to avoid getting caught.
Focus Fire: When spiderlings show up, designate a DPS to take them out quickly. The rest should keep pressure on Big Rabbu.
Tanking: Tanks should stay focused on keeping Big Rabbu’s attention. Use taunts and area-control abilities to keep him from targeting your squishier teammates.
Healing: Healers, keep an eye on anyone caught in Web Spray. They’re going to need series heals to survive the pinning damage.
Loot and Rewards
Defeating Big Rabbu isn’t just about bragging rights. He drops some decent loot that can be quite useful for your adventure:
- Jewelry and Armor: Big Rabbu often drops rare jewelry or parts of the Spinner’s Garments set, which can be a nice addition to your collection.
- Experience Points: Boss fights in ESO always give you a sweet chunk of experience points, helping you level up faster.
Final Thoughts
Big Rabbu may not be the final boss of Spindleclutch I, but he still demands respect. By sticking to these strategies, you’ll make short work of him. Good luck, and may your weapons strike true!
That’s it for Big Rabbu! Now go in there, kick some spider butt, and enjoy the spoils of victory. And hey, if you can, try to laugh a little at the absurdity of it all. You’re fighting a giant spider named Big Rabbu. How could you not?
ESO: Spindleclutch I Dungeon Guide
Cerise the Widowmaker
Navigating through the dark and creepy corridors of Spindleclutch I can be daunting, but knowing your enemies gives you a solid edge. One of the trickiest bosses in this dungeon is Cerise the Widowmaker. Let’s break down everything you need to know about tackling this formidable foe.
Who is Cerise the Widowmaker?
Cerise the Widowmaker is one of the notable bosses in the Spindleclutch I dungeon, lurking in the shadows with a gang of nasty adds (additional enemies). She’s not just a regular spider; she controls other spiders in an effort to overwhelm and destroy unsuspecting adventurers.
Preparing for the Fight
Before you rush in, make sure your group is ready. A balanced team composition usually works best: ideally, a tank, a healer, and at least two damage dealers (DPS).
- Tank: Needs high health and good damage mitigation to withstand Cerise’s attacks.
- Healer: Must keep the tank’s health high while also being ready to heal any damage dealers hit by stray attacks.
- DPS: Should focus on taking out the adds quickly before turning their attention to Cerise.
The Fight
The battle against Cerise the Widowmaker is as much about strategy as raw power. Here’s what to keep in mind:
Adds First:
- Cerise has a bunch of spider minions. They’ll join the fight as soon as it begins. Taking them out quickly should be the priority. If left unchecked, they can overwhelm your healer or interrupt your DPS.
Positioning:
- Make sure the tank has Cerise’s attention and positions her away from the rest of the team. This minimizes damage from her attacks on multiple players.
Avoid the Poison:
- Cerise’s most dangerous move is her poison spit, which targets a random player. If hit, you’ll take continuous damage over time. Keep a close eye on your health bar and have the healer ready to dispel this.
Movement:
- Cerise will often move around the room. The tank should be ready to reposition Cerise to ensure that the DPS can maintain a steady flow of damage, and that the healer isn’t cut off from the tank or DPS.
Interrupts and Stuns:
- Some of Cerise’s abilities can be interrupted. Pay close attention to her casting bar (it usually appears above her health). If you see her channeling a powerful attack, interrupt it to prevent devastating effects on your team.
Pro Tips
- Communication: Keep an open line of communication within your group. Call out when you’re being targeted by poison so the healer knows to focus on you.
- Stamina Management: DPS characters, manage your stamina wisely so you can dodge out of the way of poison pools and other hazardous attacks.
- Ultimate Abilities: Coordinate the use of your ultimate abilities for a concentrated burst of damage when Cerise reaches 50% health to finish her off quickly.
Wrap-Up
Defeating Cerise the Widowmaker rewards you with loot, experience, and the satisfaction of overcoming one of Spindleclutch I’s trickiest bosses. Remember, coordination and knowledge are your biggest allies in this fight.
Spindleclutch I is just one of the many dungeons in ESO that offers thrilling challenges. Stay prepared, keep your strategies tight, and Cerise the Widowmaker will be just another victory on your journey through Tamriel. Have fun and good luck in your adventures!
That’s all you need to know about tackling Cerise the Widowmaker in Spindleclutch I. Check out our other Elder Scrolls Online guides for more tips and strategies. Happy questing!
Bloodspawn
If you’re diving into Spindleclutch I, one of the dungeons in Elder Scrolls Online (ESO), you’re likely preparing to face several fearsome enemies. One of the major bosses you’ll encounter here is Bloodspawn. Getting the hang of this fight is crucial if you want to get through the dungeon in one piece. Here’s a breakdown to help you and your team conquer this beast.
Who is Bloodspawn?
Bloodspawn is a massive, grotesque Troll boss lurking in Spindleclutch I. He’s known for his brute strength and regeneration abilities, making him a tough opponent even for seasoned adventurers.
Key Abilities
To defeat Bloodspawn, you will need to understand and anticipate his key abilities:
Ground Smash: Bloodspawn smashes the ground, dealing high damage in a frontal cone. Don’t stand in front of him to avoid getting hit, simple as that.
Charge: He will sometimes charge at a distant player. This attack deals heavy damage and knocks the target back. The charged player should block if possible or, better yet, try to dodge to the side to avoid it completely.
Leap: Bloodspawn will leap into the air and come crashing down, dealing area-of-effect (AoE) damage. This attack is telegraphed by a red circle on the ground, so be quick to move out of its range.
Self-Heal: This troll loves to regenerate. When he starts healing, he gains a green aura and health bar ticks up. Interrupt this healing ability quickly using your class’s interrupt skills or bash him to stop it.
Strategy
Tanking: The tank should keep Bloodspawn facing away from the rest of the group to minimize the risk from Ground Smash. Stay alert for his Charge and be ready to chase him down and pull him back if he moves away from your spot.
DPS: Damage dealers should spread out but stay within the healer’s range. Focus on avoiding the Leap AoE by keeping an eye out for the red circle and dodge rolling out of it. When Bloodspawn starts his Self-Heal, use interrupts immediately to keep his health from recovering.
Healer: As a healer, your main job is to keep everyone topped up, especially the team members hit by unexpected attacks like the Charge. Position yourself at a moderate distance from the melee fray to manage incoming damage and react to AoE heals.
Tips
- Stick Together: Don’t stray too far from the pack. It’s easier to manage heals and share information about incoming attacks if you’re close to each other.
- Save Your Ultimate Abilities: Timing your ultimate abilities for when Bloodspawn starts healing can make a big difference. High burst damage during this time can outpace his regeneration.
- Communicate: Make sure your team is talking to each other. Call out when you see bloodspawn start leaping or charging so everyone can react appropriately.
Summary
Bloodspawn is a test of coordination and timing. By understanding his abilities and working as a cohesive unit, you and your team can bring this monstrous troll down. Stay alert, communicate, and keep those interrupts ready and you’ll make it through Spindleclutch I just fine.
Good luck, adventurer! Now get out there and show Bloodspawn who’s boss.