
Welcome to our ultimate Counter-Strike 2 map guide for Overpass! Whether you’re a seasoned pro or a newcomer looking to up your game, this guide is your go-to resource for mastering one of the most tactical maps in the series. Dive into the Overview of Overpass to understand its unique layout and challenges. Learn the critical Key Locations and Callouts to improve team communication and coordination. Discover the Best Strategies for both Terrorists (T) and Counter-Terrorists (CT) to gain a strategic edge. Master the art of Navigating the Map Efficiently, ensuring you’re always in the right place at the right time. Finally, arm yourself with our top Tips for Winning on Overpass and dominate the competition. Read on to elevate your gameplay and become an Overpass champion!
Overview of Overpass
Overpass, one of the most iconic maps in Counter-Strike 2, offers a unique blend of long sightlines, tight corridors, and verticality that challenges both new and veteran players alike. Set in a lush park above the river Spree in Berlin, it’s a mix of urban and natural environments, with a lot of areas where tactical gameplay can truly shine.
General Layout
Overpass is a fairly large map with two bomb sites—A and B. Each has its own distinct features and strategic points.
Bombsite A: Located at the end of a long pathway, this site is known for its elevated position and open spaces. Defenders have the advantage of high ground, while attackers need to navigate through narrow pathways or come up the stairs from the underground waterway.
Bombsite B: Situated near the canals, B site is often considered the more daunting of the two. It has more cover but also more ways for attackers to breach it, creating tense and dynamic battles.
Key Areas
T Spawn and CT Spawn: Like any map, you start at your respective spawn points. Terrorists (Ts) have their spawn on the lower left of the map, while Counter-Terrorists (CTs) start on the upper right. From here, you’ll be navigating through various choke points and pathways to reach your objectives.
Playground: Located towards Bombsite A, breaking through here can give you a good start. It’s an open area but often a hot spot for early skirmishes.
Fountain: Another route to A site, going through Fountain can be risky due to its open nature but offers a faster approach.
Connector: This central area links the underground passageways, allowing for quick rotations between sites. It’s tight and can be a chokepoint, making grenades essential here.
Bathroom: Adjacent to Bombsite A, it’s another key area that can be used for sneak attacks onto the site.
Monster: A large tunnel leading to B, this is often one of the primary routes for Ts. CTs need to hold this area strongly to prevent an easy breach.
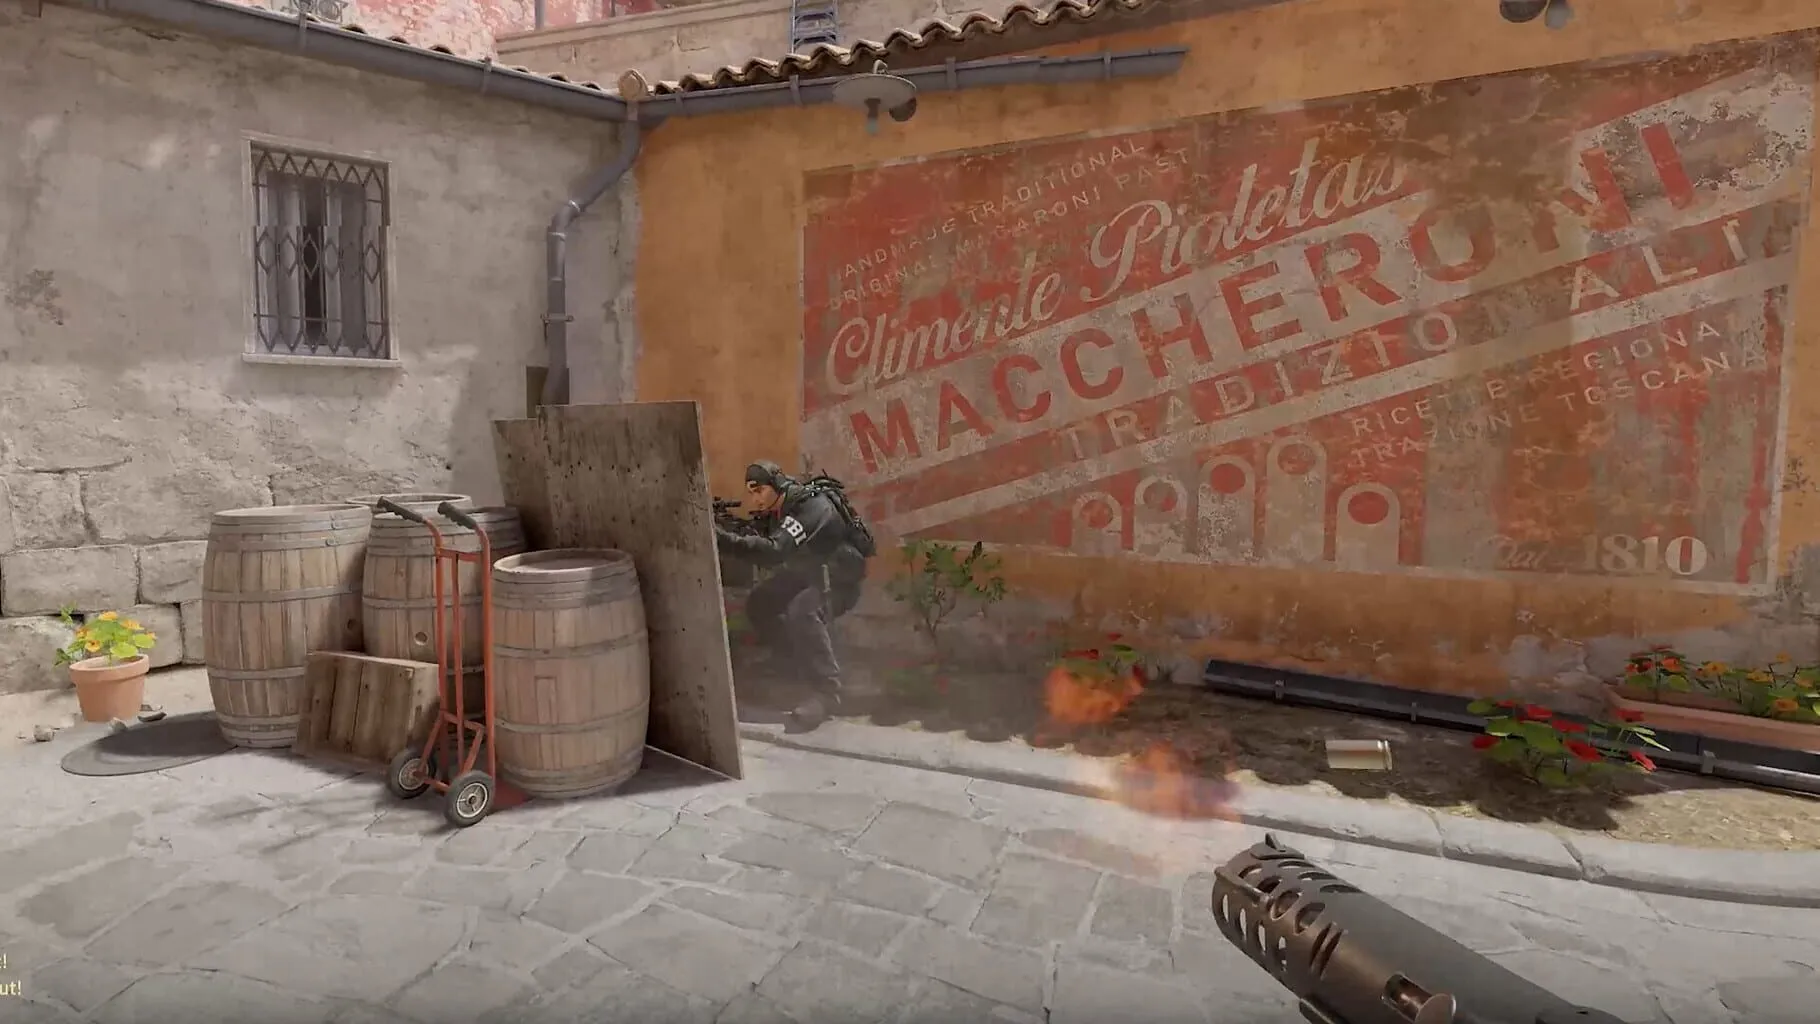
Barrels: On Bombsite B, allows good cover for both attackers planting the bomb and defenders trying to hold the site.
Team Strategies
Terrorists (Ts):
- For a rush strategy, preferring Monster for B or Fountain for A can lead to quick site control.
- Slow plays involve splitting the team to cover Connector and multiple entrances, using grenades to flush out defenders.
Counter-Terrorists (CTs):
- Early control of Connector can severely limit T movements.
- B site defenders often benefit from holding Monster and Short B Tunnels to delay or kill incoming Ts.
Utility Usage
- Smoke grenades are essential for cutting off sightlines, especially at entrances to both bombsites.
- Flashbangs can be used effectively in Connector and tight corridors, blinding enemies to give you the upper hand.
- Molotovs and incendiaries are great for area denial, especially common hiding spots like Barrels at Bombsite B.
Tips and Tricks
- Use High Ground: Both bomb sites have elevated areas that give you a tactical advantage. Make sure to use them when defending or pushing.
- Rotate Smartly: Because of the map’s size and layout, knowing when and how to rotate between sites can make or break your game.
- Listen for Footsteps: With its narrow pathways and underground sections, sound cues are incredibly important.
Remember, Overpass is a map that rewards both strategic planning and quick reflexes. Use your surroundings, communicate with your team, and always be ready to adapt to the flow of the match. Happy gaming!
Counter-Strike 2 Map Guide - Overpass: Key Locations and Callouts
Welcome to Overpass, one of the most iconic maps in Counter-Strike 2. Knowing the key locations and mastering the callouts on this map can be the difference between winning and losing. Here’s everything you need to know to communicate effectively and outsmart your opponents.
A Site
A Site is one of the two bomb sites and is tucked away behind tight chokepoints making it a challenging location to both attack and defend.
- Long A: This is the long pathway leading from T spawn to A site. Perfect for snipers to take long-range shots.
- Bathrooms (Toilets): A small area next to Long A with lots of cover. Ideal for surprise engagements.
- A Site: The bomb plant area, usually filled with cover zones like boxes and greenery.
- Truck: Located at the back of A site, it’s a popular cover spot for defenders.
- Bank: The upper floor area behind A site, providing a high vantage point for defenders.
- Dumpster: Close to the A site, often used for quick cover or jumping into position.
B Site
B Site is the other bomb site on Overpass. It’s more compact than A Site but can be accessed via multiple lanes.
- B Site (Pit): The main area where the bomb is planted. Surrounded by walls and covers.
- Water (Canal): The canal that runs under the map. Often used for sneaky rotations.
- Short B: A pathway leading from water up to B Site. Also called “Short.”
- Monster: The tunnel entrance to B Site. Often the route chosen by attackers.
- Heaven: The high ground overlooking B Site, providing a clear view of the entire bomb plant area.
- Graffiti: A wall with graffiti near the B Site. Used for cover and callouts.
Connector and Middle Areas
Connecting sites and controlling crucial points in Overpass is essential. Here’s where most action happens:
- T Spawn: The starting point for Terrorists. Pathways diverge from here to A or B Sites.
- CT Spawn: The starting point for Counter-Terrorists. Close to B Site, but leads to A quickly.
- Connector: The underground tunnels mixing A and B sites. A high-traffic area for rotations.
- Tunnels (Pipe): These connect from bomb sites to underground passages.
- Park: The open area near A Site, providing various cover and connections.
Playground to Fountain
This area is closer to the Terrorist spawn and is generally a low-risk zone but offers key routes.
- Playground: The very first area that Ts pass through. Mostly safe but very open.
- Fountain: The next section leading towards the bathrooms. It offers less cover, making early-game engagements possible.
Positional Advantage
Taking control of certain positions on Overpass is vital for successful strategies. Here are some tips on holding and pushing:
- Holding Long A: Snipers with long-range weapons have a significant advantage. Use smokes to disrupt enemy vision.
- Controlling Connector: Being able to rotate between sites swiftly could turn the tide. Always check corners and use grenades to clear it.
- Securing Heaven: Dominating this high-ground position makes defending B site much easier. Make sure to communicate if you’ve got it.
Conclusion
Mastering these key locations and callouts on Overpass is essential for a well-coordinated team play. Remember, communication is key. Be specific with callouts and always back up your teammates. Get out there, practice these, and you’ll be winning rounds in no time!
Happy fragging, and see you on the map!
Best Strategies for T/CT on Overpass
Terrorist (T) Side Strategies
1. Split A Attack
Description: A classic strategy where your team splits up to attack the A site from multiple angles, often resulting in a chaotic but effective push.
Execution
- Players Required: 5
- Setup: Split your team into two groups. One group goes toward A Long, while the other goes through Connector to Bathrooms.
- Steps:
- A Long Group: Move towards A Long and take control. Watch out for any CTs hiding in corners or sniper spots.
- Connector Group: Push through Connector and take control of Bathrooms, clearing any CTs along the way.
- Timing: Synchronize the push so both groups hit the A site at the same time. Use flashbangs and smokes to blind and block the CTs’ vision.
- Bomb Planting: Once on site, plant the bomb in an open position that can be easily defended from multiple angles.
2. Fast B Rush
Description: A high-risk, high-reward strategy that involves rushing the B site with little delay, aiming to overwhelm the defenders before they can react.
Execution
- Players Required: 5
- Setup: All players should buy SMGs or rifles and armor. Utility (like flashbangs and smokes) is crucial too.
- Steps:
- Initial Push: Immediately push down Monster Tunnel or Short B, throwing a smoke grenade to block off Heaven.
- Flash and Clear: Use flashbangs to temporarily blind any CTs as you enter the B site. Check common hiding spots like Barrels, Pit, and Water.
- Control and Plant: Once the area is clear, plant the bomb behind New Box. Position yourselves to cover from Short and Monster.
3. Fake A, Hit B
Description: A deceptive strategy where your team fakes an attack on one site, then quickly pivots to hit the other.
Execution
- Players Required: 5
- Setup: Have three players fake a push towards A, while the other two hold near B.
- Steps:
- A Fake: The three players at A throw smokes, flashbangs, and molotovs to create the illusion of a heavy A push.
- B Execute: As CTs rotate to A, the two players near B push onto the B site, with the remaining three following quickly behind.
- Communication: Effective timing and communication are crucial. Ensure the fake is convincing enough to draw CTs away from B.
- Plant and Defend: Once on B, plant the bomb and set up crossfire positions to hold off the rotating CTs.
Counter-Terrorist (CT) Side Strategies
1. Aggressive Mid Control
Description: Taking early control of Mid can provide valuable map information and disrupt T side strategies, making it harder for them to push.
Execution
- Players Required: 5
- Setup: Allocate two players to play aggressively in Mid/Connector, one player each for B and A site, and one to float based on information.
- Steps:
- Push Up: Early in the round, the two players in Mid use grenades to take control of Connector/Bathrooms.
- Hold and Fall Back: Hold aggressive positions until you gain valuable info (how many Ts, their intentions), then fall back to safer angles.
- Rotate: The floating player helps reinforce either site depending on T movements.
- Adjust and Inform: Constantly inform your team of T positions and adjust accordingly.
2. B Site Stack
Description: Stacking B can be an effective counter to frequent B rushes or executes, catching the Ts by surprise.
Execution
- Players Required: 5
- Setup: Allocate three players to B site, one watching Mid/Connector from Short, and one to hold A or rotate as needed.
- Steps:
- B Site Setup: Station three players in hidden or mix of exposed positions (Barrels, Pit, Heaven).
- Short Coverage: The player at Short can provide early info and fall back to B, if needed.
- Quick Rotate: The A player can quickly rotate depending on the information provided by the rest of the team.
- Execute Defense: Use smokes and flashbangs to disrupt any T rushes, focus on trading kills efficiently.
3. Retake A Setup
Description: Letting Ts take the A site and playing for the retake can tilt the round in your favor, especially if your team is adept at coordinated retakes.
Execution
- Players Required: 5
- Setup: Place one player on A to provide early info, two holding Mid/Connector, and two on B.
- Steps:
- Initial Hold: The single A player should play for info, trying to delay or get an early pick.
- Gather Info: As soon as Ts are spotted heading to A, call for a retake setup.
- Positioning: Players from Mid/Connector and B rotate and set up for the retake, using grenades to clear common T hold spots.
- Retake: Coordinate flashbangs and push together to overwhelm the Ts, defusing the bomb in the process.
Mastering these strategies on Overpass can turn the tide of the match. Whether you’re pushing hard as a T or setting up a solid defense as a CT, plan ahead, communicate with your team, and always adapt to the unfolding game. Good luck!
Counter-Strike 2: Map Guide - Overpass
Getting the Lay of the Land
Overpass is one of those maps that can feel like a maze at first, but once you get the hang of it, you’ll be zipping around like a pro. The map has two bomb sites: A and B. A is located above ground while B is underground, requiring careful navigation through various tunnels and chokepoints.
Key Areas You Need to Know
T Spawn: This is where the terrorists start. It’s located at the bottom left of the map. From here, you can go towards either A Site through areas like Playground and Fountain or toward B Site by navigating the Tunnels.
CT Spawn: This is the counter-terrorist starting point, positioned at the top middle of the map. CTs have quick access to both bomb sites, with A being to their right and B being down towards their left through Construction.
Playground and Fountain: These are common travel routes towards A Site from T Spawn. They offer various points of engagement and can be great places to throw off your opponents with unexpected strategies.
Bathrooms: Near A Site, this area offers tight corridors perfect for ambushes. Control over Bathrooms gives easy access to A Site and a higher chance for a successful plant or defuse.
Short Water and Tunnels: Primarily used to reach B Site. Tunnels can be a sneaky way to surprise CTs who may be set up defensively. However, be wary of CTs waiting with flashbangs and smokes.
Connector: This central route connects the two bomb sites and allows for quick rotations. Knowing when and how to use Connector is crucial for both terrorists and counter-terrorists.
Tips for Efficient Map Navigation
Use Grenades Wisely
- Flashes and Smokes: Always carry these, especially if you’re traversing through narrow areas like Bathrooms or Tunnels. A well-placed smoke can block sightlines and create opportunities for surprise attacks or retreats.
- Molotovs and HE Grenades: Great for flushing out enemies hiding in key spots or slowing down rushes. Molotovs can control areas like Bathrooms or force opponents out of cover in short water.
Communication is Key
- Callouts: Use specific callouts like ‘Playground,’ ‘Connector,’ or ‘Heaven’ (the elevated position overlooking B Site) to keep your team informed. Communication can make or break a round. Knowing where your teammates and enemies are can help plan better strategies.
Master the Angles
Peeking and Holding: Take your time when entering common fight areas. Use peeks to gather info without exposing yourself too much, and always be ready to adjust your aim based on common enemy positions.
Teamwork: Move together and cover each other’s angles. This prevents getting picked off one by one and maintains map control.
Rotating Smartly
Rotation is a big part of navigating Overpass efficiently. Knowing when and how to rotate can save the game. For CTs, quick rotations can be the difference between defusing a bomb or losing a round. Use the Connector and Tunnels to your advantage, and always be one step ahead of the enemy.
Listening: Pay attention to sound cues—footsteps, gunfire, and bomb plants. These can give you critical information on enemy positions and intentions, guiding your rotation decisions.
Timing: Don’t rotate too early or too late. Wait for solid intel before making your move, and always watch for lurkers trying to catch you off guard.
Closing Thoughts
Navigating Overpass efficiently boils down to knowledge, communication, and smart use of utilities. Practice makes perfect, so dive into some matches and start experimenting with different routes and strategies. Before you know it, you’ll be guiding your team to victory with ease. Remember, every game is a chance to learn, so keep your eyes and ears open!
Keep these tips in mind, and you’ll soon be navigating Overpass like a seasoned pro in Counter-Strike 2. Happy fragging!
Tips for Winning on Overpass
Winning on Overpass in Counter-Strike 2 is all about mastering the map’s unique layout, smart strategizing, and knowing the best spots to defend and attack. Overpass is split into two bomb-sites (A and B), each offering different challenges and opportunities. Here’s what you need to get the upper hand:
Know the Map Layout
One of the first things you should do is familiarize yourself with Overpass’s layout. Here are some key areas to keep in mind:
- Bombsite A: Situated near the CT spawn, this site has multiple entry points, including long A, short A, and the bathrooms.
- Bombsite B: Located near T spawn, guarded by water and construction zones. It’s a favorite for teams because it offers heavy cover.
- Connector: This area links the sewer with A site and offers critical rotation opportunities.
- Tunnels: These include long tunnels leading to B site and are essential for surprise attacks.
Tips for Attackers (T Side)
- Use Smokes and Flashes: When attacking, controlling vision and movement is vital. Smoke off key areas like sniper spots and main chokepoints to reduce the defender’s line of sight. Flashbangs help to disorient and rush the enemy.
- Work as a Team: Solo rushing will rarely end well. Plan coordinated attacks with your teammates. Going through connector means you can quickly change direction from A to B or vice versa.
- B is Your Friend: Bombsite B offers many entry points and tight corners, making it easier to take control if you move methodically. Use molotovs to clear hiding spots.
- Check Your Corners: Overpass is full of tight spaces that enemies love to camp. Always check corners before moving to the crucial areas.
Tips for Defenders (CT Side)
- Early Info Gathering: Send a teammate to push and get early info on which site the enemy is targeting. Sometimes just spotting them can slow them down.
- Utilize Heavy Cover: Use the map’s many barricades and walls for cover, especially near Bombsite B where enemies have limited visibility.
- Rotate Smartly: Don’t be afraid to quickly rotate between sites, especially if your teammate calls out an attack at A or B. The connector area often serves as the fastest path between the two.
- Save Utility: Keep a few smoke grenades and molotovs for the later stages of the round. Smoking off main entry points can dramatically delay an advance and give your teammates more time to rotate and set up.
General Strategies
- Communication is Key: Always keep your teammates in the loop. Tell them where the enemy is and what you plan to do.
- Economy Management: Buy wisely. Save if you need to and don’t force buy every round. Having the right gear can make a massive difference.
- Map Control: Regularly control important territories like connector and tunnels. This denies information to your opponents and gives your team strategic advantage.
- Mind the Clock: Be aware of the time left in the round. For attackers, don’t leave it too late to plant the bomb. For defenders, don’t rush a defuse unless absolutely necessary; sometimes, waiting and baiting enemies to make mistakes works better.
Trick Spots and Callouts
- Boost Spots: Utilize the classic boosts on short B and over walls near A long for surprising angles against attackers.
- Heaven: This is a high-traffic spot for defenders near Bombsite B. It offers a great vantage point overlooking the whole site.
- Fountain: An excellent place for catching early kills as attackers move from T spawn to A site. A clean kill here can often change the round’s entire dynamic.
Mastering Overpass in CS2 takes time. Use these tips to put yourself ahead, adapt to the flow of the game, and communicate with your team. With practice and smart play, you’ll find yourself winning more often. Good luck out there! 🚀